Baguette Pizza Recipe
This post contains affiliate links. As an Amazon Associate I earn from qualifying purchases.
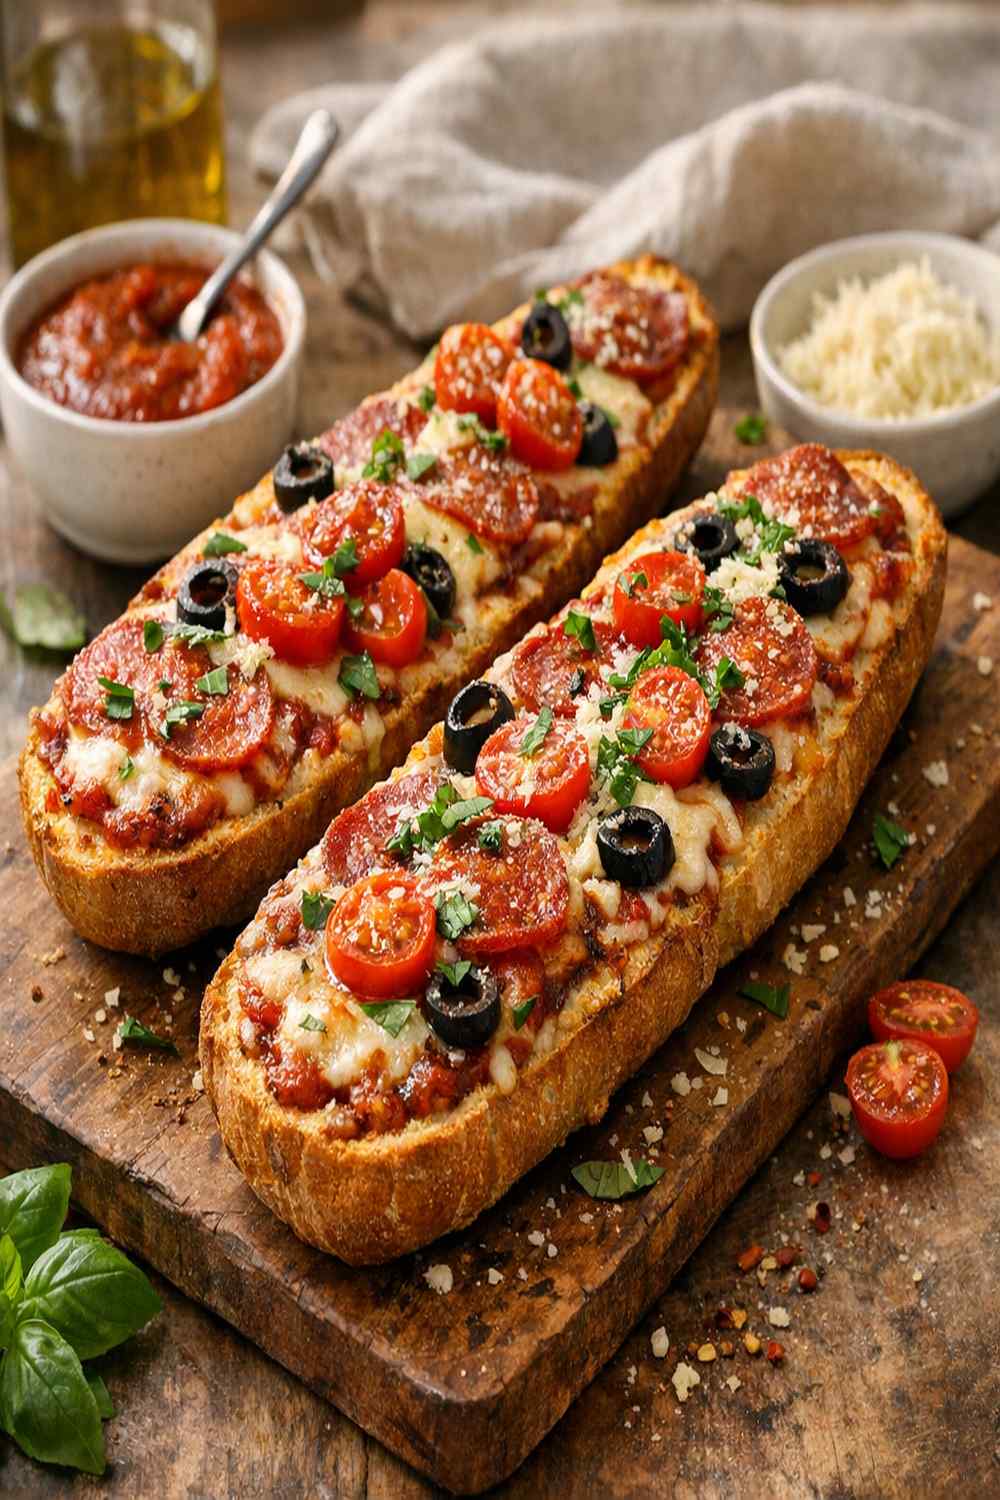
I grew up watching my mother transform simple ingredients into magic in our Anchorage kitchen. One Saturday afternoon, she sliced open a crusty loaf, spread homemade tomato sauce across it, and turned it into something that tasted like a proper pizzeria creation—without the wait or the fancy equipment. That memory stuck with me through culinary school and into my dietitian practice. Today, I’m sharing that same approach with you because baguette pizza removes the intimidation from homemade pizza while keeping every delicious, whole-food element intact.
The challenge most home cooks face? They either end up with soggy bread, unevenly melted cheese, or toppings that slide right off. Sound familiar? I’ve watched clients struggle with this exact frustration, and I discovered the solution has nothing to do with fancy equipment—it’s about understanding how your oven behaves and respecting the bread’s structure.
Why Your Baguette Pizza Never Turns Out Right (And How to Fix It)
Here’s what I’ve learned from years of working with clients and preparing quick meals between appointments across Alaska’s rugged landscape: most people treat baguette pizza like traditional pizza, and that’s the mistake. A baguette has different moisture content and structure than pizza dough. It needs a completely different technique.
When you load toppings onto bread without preparation, moisture seeps in unevenly. The underside gets soggy while edges burn. The cheese melts at a different rate than the bread crisps. I learned to solve this by treating the bread as the foundation that needs brief toasting first—a step that changes everything.
This method also connects beautifully to how we prepare wild Alaska salmon for quick weeknight dinners. Just like that delicate fish needs the right temperature and timing to maintain its integrity, baguette requires respect for its structure.
What Makes This Baguette Pizza Recipe Different?
The game-changer is pre-toasting the baguette halves before adding sauce and toppings. This 3-minute step creates a protective barrier that prevents sogginess while building flavor. The bread’s exterior crisps just enough to hold toppings without becoming brittle. This is the same principle we use in professional nutrition settings when we want to preserve both texture and nutritional integrity—preparation matters.
The second difference is how we apply sauce. Instead of loading it on thick, we spread a thin, even layer that seasons without overwhelming the bread. This lets the whole-grain character shine through while the cheese melts into every crevice rather than pooling on top.
Before You Start: What You Need to Know
There are two critical pieces of knowledge that separate good baguette pizza from great baguette pizza—and most recipes skip right over them.
- Your oven temperature matters more than timing – All ovens heat differently. A home oven in Juneau behaves differently than one in Palmer. You’re looking for visual cues, not just a timer. This prevents both underbaked cheese and burnt bread.
- Cheese placement prevents topping slide-off – When you layer mozzarella as a base before adding other toppings, it acts as an adhesive. This prevents peppers, mushrooms, and meats from sliding onto your plate instead of staying on your pizza.
The Ingredients
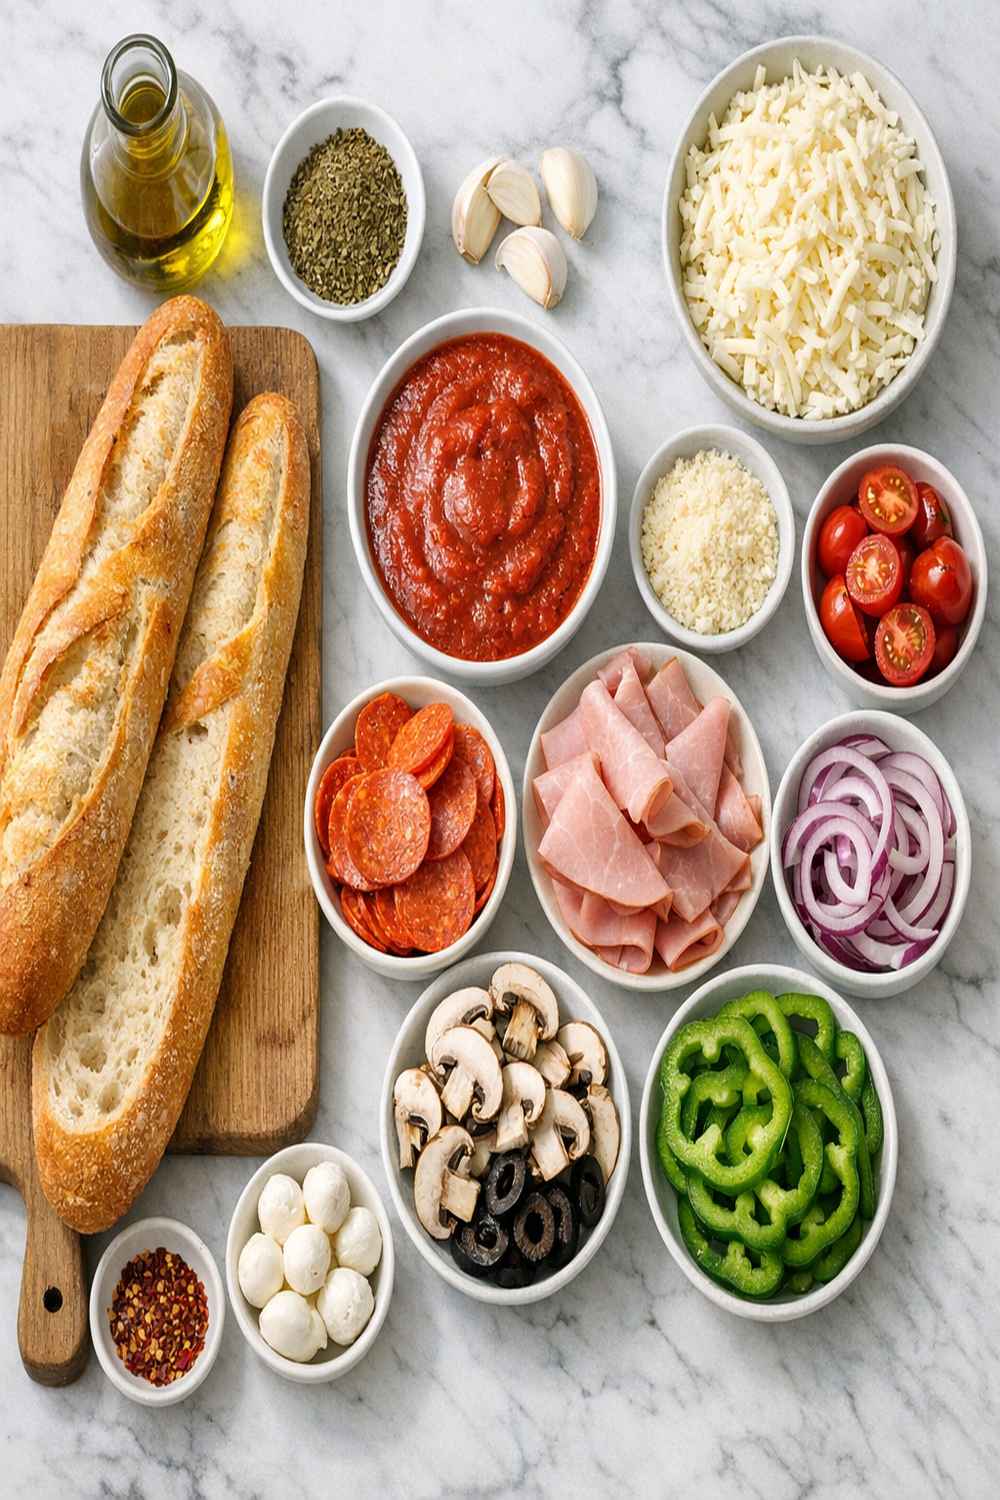
I’ve chosen each ingredient with both nutrition and practical simplicity in mind. These are whole foods that work together to create something satisfying enough for lunch or dinner, with enough protein and healthy fats to keep you full for hours. Makes 4 servings (2 pizzas total).
- Fresh basil leaves, about 8-10 (add after baking to preserve delicate flavor and nutrients)
- 2 tablespoons extra-virgin olive oil (for brushing bread before toasting, adds richness)
- 1 red bell pepper, thinly sliced into rings (contains more vitamin C than green peppers)
- 1 teaspoon garlic granules (more stable than fresh garlic in high heat, won’t burn)
- 250 grams tomato passata or crushed tomatoes (unsweetened variety without added sugar)
- 1 cup fresh mushrooms, thinly sliced (cremini or baby bellas have deeper flavor than white varieties)
- 1 medium yellow onion, thinly sliced (sweetness balances the acidic tomato sauce)
- 150 grams grilled chicken breast, shredded or diced (lean protein, about 3 ounces per serving)
- 1 teaspoon dried oregano (Alaskan wild oregano if you can source it locally, or Mediterranean)
- 1 crusty baguette, about 14 inches long (choose one baked same-day for best texture and flavor)
- 250 grams mozzarella cheese, freshly grated (pre-shredded versions have anti-caking agents that prevent smooth melting)
- Fine sea salt and freshly cracked black pepper to taste (coarse salt can overpower thin sauce)
Step-by-Step: How to Make Baguette Pizza Recipe Without Fail
I’ve worked through this process dozens of times, and I’m confident you’ll nail it on your first try. The key is staying present during each step rather than rushing through. Thirty minutes total, start to table.
Step 1: Preheat Your Oven and Prepare Your Workspace
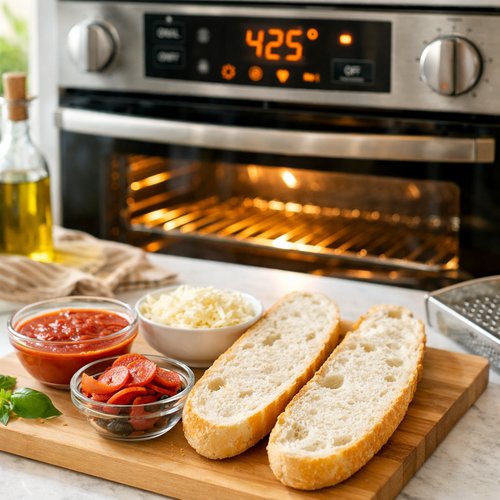
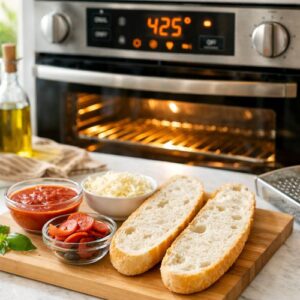
Start by setting your oven to 425°F (220°C). Don’t skip the preheating—your oven needs consistent, established heat so the bread toasts evenly while cheese melts at the right pace. While it preheats, take out a cutting board and serrated bread knife. Clear a small workspace for assembling.
Step 2: Cut and Toast the Baguette
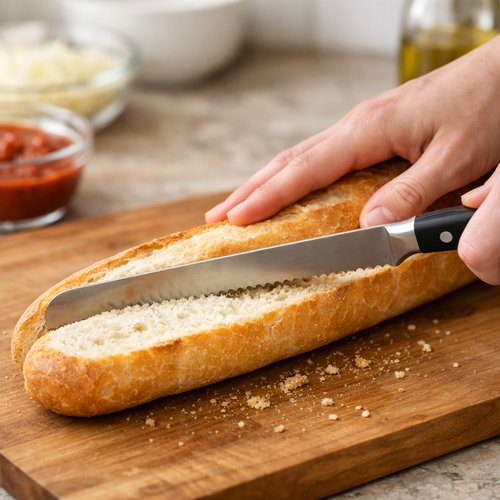
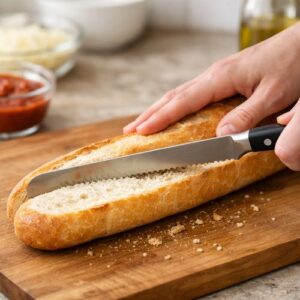
Once your oven reaches temperature, carefully slice the baguette lengthwise into two equal halves using a serrated knife (the sawing motion prevents crushing the interior). This lengthwise cut is essential—it creates a large, flat surface for toppings while the crust on one side holds structure.
Lightly brush the cut side of each baguette half with olive oil—about 1 tablespoon per half. This oil layer will prevent sauce from soaking directly into the bread while adding richness. Place both halves cut-side up on your baking sheet and slide into the preheated oven for exactly 3 minutes. You’re looking for the bread to turn from pale to light golden, not brown. This protective crust prevents sogginess.
Step 3: Mix Your Sauce Base
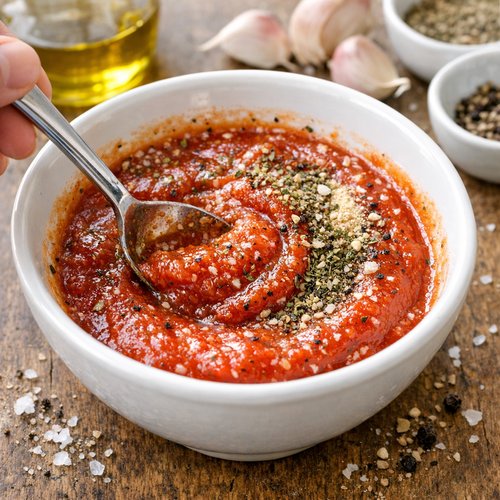
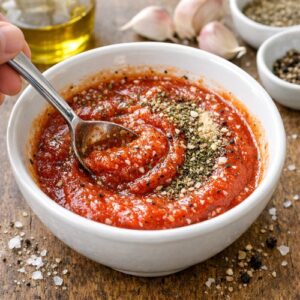
While bread toasts, combine your tomato passata with garlic granules, dried oregano, and a pinch of sea salt and black pepper in a small bowl. Stir thoroughly so the garlic granules hydrate fully—about 1 minute of mixing. Taste it. The sauce should smell aromatic and taste balanced, slightly salty. This is your foundation, and getting it right takes 2 minutes.
Step 4: Spread Sauce Evenly Across Toasted Bread
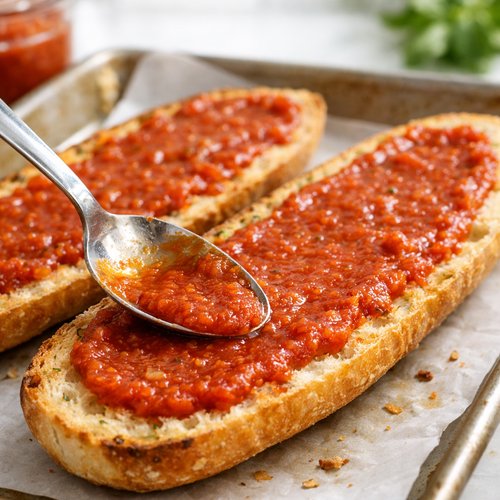
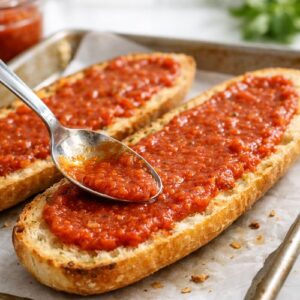
Remove the baguette halves from the oven (they should be warm and slightly crisp). Divide your sauce between the two halves, spreading it in a thin, even layer using the back of a spoon or a small spatula. The key word here is thin—about 1/8 inch thickness. Too much sauce overwhelms the bread; too little leaves it dry. Work quickly so the bread stays warm.
Step 5: Layer Cheese as Your Adhesive Base
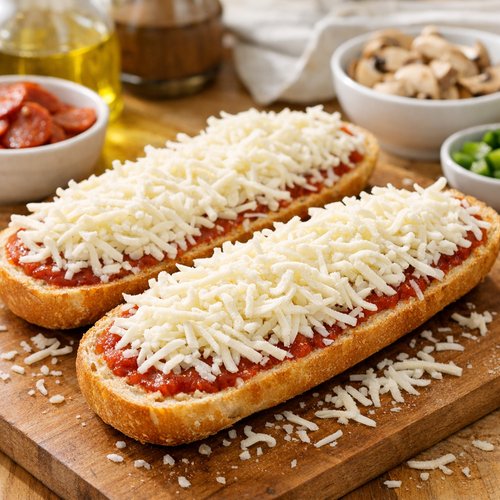
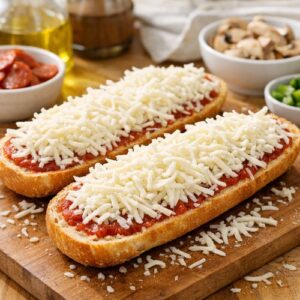
Sprinkle about half of your freshly grated mozzarella evenly across both sauce-covered baguette halves. This cheese layer acts as glue for your toppings, preventing them from sliding off during baking and creating those beautiful, melted pockets of flavor. Don’t skip this base layer—it’s the difference between professional-looking pizza and toppings that slide around.
Step 6: Arrange Your Toppings Strategically
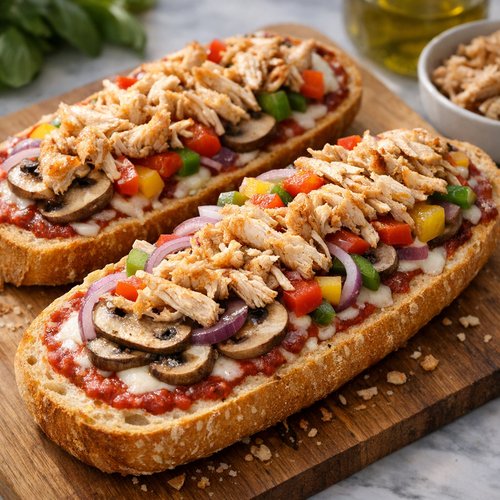
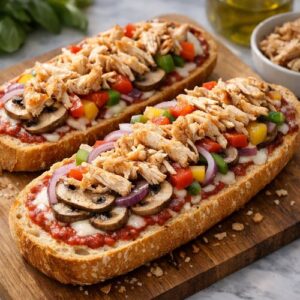
Now add your chosen toppings in this order: mushrooms, onions, bell peppers, then shredded chicken. Why this sequence? Harder vegetables go down first so they cook through properly. Proteins go on top so they don’t dry out. Distribute toppings evenly—don’t pile them in the center. This ensures every bite tastes the same and toppings cook uniformly.
Top everything with the remaining mozzarella cheese. This final cheese layer will brown beautifully and seal in all your toppings.
Step 7: Bake Until Golden and Melted
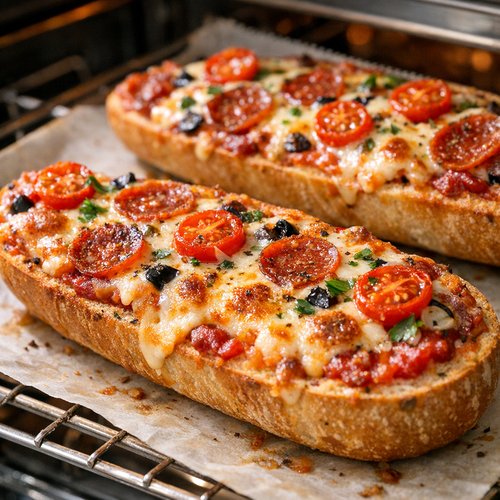
Slide both baguette halves back into the preheated 425°F oven. Bake for 12-15 minutes, checking at the 12-minute mark. You’re looking for three specific signs of doneness: the cheese is bubbly and beginning to brown at the edges, the bread has turned golden-brown underneath, and when you press the top lightly, it springs back slightly (not hard, not soft).
All ovens heat differently. Your oven in an older Anchorage home behaves differently than a newer convection model. That’s why visual cues matter more than exact timing.
Step 8: Rest and Finish With Fresh Basil
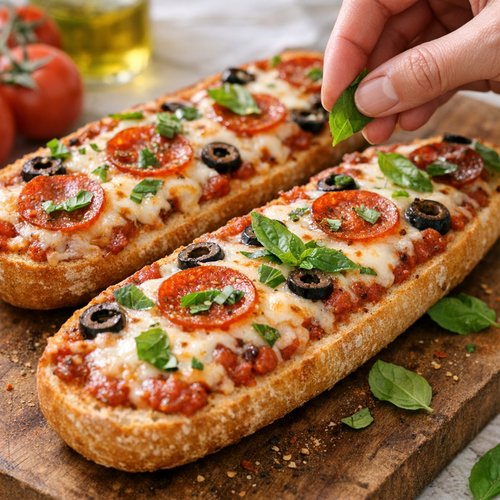
Remove the baguette pizzas from the oven and let them rest on a cutting board for 2 minutes. This brief rest allows the cheese to set slightly, making cutting cleaner. Tear fresh basil leaves over the top just before serving. Fresh herbs added after cooking preserve their bright flavor and nutritional content—heat destroys both.
The Most Common Mistakes (And How to Avoid Them)
- Skipping the pre-toast step – The bread absorbs all sauce moisture and becomes soggy by the time cheese melts. Solution: Always toast the cut side first, even if it feels unnecessary. That 3-minute step is non-negotiable.
- Applying sauce too thickly – This creates wet, heavy pizza that feels more like bread soup than pizza. The sauce should be thin enough to see the toasted bread through it. Think sauce as seasoning, not as a layer.
- Overloading with toppings – Too many toppings prevent even cooking and make the bread soggy under their weight. Stick to 3-4 toppings maximum per pizza half. Quality over quantity.
- Using pre-shredded cheese – Anti-caking agents prevent that creamy melt. Always grate cheese fresh from a block. Yes, it takes 2 extra minutes. Yes, it completely transforms the result.
- Ignoring oven temperature accuracy – If your oven runs hot, your crust burns before cheese melts. Use an oven thermometer (they’re $8) to know your actual temperature, then adjust accordingly.
How Do I Know When It’s Done?
The cheese should bubble and brown slightly at the edges—this is your primary indicator. Look for those little golden-brown spots on the mozzarella. The bread underneath should be golden-brown, not pale or dark. When you tap the bottom of a baguette half with your finger, it should sound hollow and feel firm, not soft or squishy. The cheese should pull away slightly from the edges of the bread, creating little gaps where you can see the toasted bread. This visual cue tells you the cheese is cooked through.
If you’re uncertain, use a meat thermometer—the bread should register 190-200°F internally. This is the temperature at which bread is fully cooked but not dried out.
Troubleshooting: When Things Go Wrong
- Cheese melted but bread is still pale – Your oven runs cool. Solution: Leave the pizzas in for an additional 2-3 minutes, watching carefully. Next time, increase temperature by 25°F and check at 11 minutes instead of 12.
- Bread is dark brown but cheese barely melted – Your oven runs hot. Solution: Move the baking sheet to a lower rack position (farther from heating element) and reduce temperature by 25°F next time. Pull at 10 minutes instead of 12.
- Toppings are cold but edges are burning – Toppings are too thick or overlapping. Solution: This time, remove and eat the edges you want, then place pizza back in for 2 minutes just on the topping area (cover edges with foil). Next time, spread toppings thinner and more evenly.
- Sauce is bubbling out the sides and burning on the pan – Too much sauce. Solution: Blot with paper towel and continue baking. Next time, spread thinner (remember: thin layer for seasoning, not coverage).
Can I Store Baguette Pizza Recipe?
Fresh baguette pizza is best eaten immediately—the bread stays crispy and the cheese remains creamy. However, I understand reality doesn’t always work that way.
Refrigerator storage: up to 3 days in an airtight container. The bread will firm up as it cools and soften slightly from the cheese and toppings. To reheat, place on a baking sheet and warm in a 350°F oven for 5-7 minutes until the cheese is melted and bread is warmed through. Don’t use the microwave—it creates rubbery bread and uneven heating.
Freezer storage: up to 2 months if wrapped individually in plastic wrap and aluminum foil. Freeze after baking and cooling completely. To reheat from frozen, unwrap and place directly on a baking sheet in a 375°F oven for 12-15 minutes. This approach actually works beautifully for meal prep.
Make-ahead tip: You can assemble unbaked pizzas up to 4 hours ahead. Cover with plastic wrap and refrigerate. When ready to bake, add 2-3 minutes to the baking time since the cold pizza needs extra time to heat through.
Nutrition Information
Each serving (½ baguette pizza with chicken and vegetables) contains approximately 420 calories, 24g protein, 18g fat, and 38g carbohydrates. The protein-to-carb ratio makes this particularly satisfying—you’ll feel full for 3-4 hours afterward. According to USDA nutrient data, one serving provides 35% of your daily vitamin C (from bell peppers), 22% of your daily calcium (from mozzarella), and 28% of your daily iron (from chicken). The fresh vegetables add fiber and phytonutrients that most quick meals lack.
Here’s my professional insight: The combination of protein, healthy fat from olive oil, and whole-grain bread creates a balanced meal that stabilizes blood sugar. This means no energy crash 2 hours later. The fresh basil at the end adds polyphenols that your body uses for reducing inflammation—actual medicine from your kitchen.
What Can I Serve With Baguette Pizza Recipe?
Baguette pizza works wonderfully as the main event, but pairing it with complementary sides creates a complete meal. I always think about what will balance the richness of cheese and toppings.
- A simple arugula salad with lemon dressing – The peppery greens and bright acidity cut through the cheese richness and aid digestion. Serve alongside or after the pizza.
- Roasted vegetables on the side – If you want a lighter meal, serve with roasted carrot soup as a starter. The sweetness of roasted carrots complements savory pizza beautifully.
- A simple green salad with vinaigrette – Keep it basic with mixed greens, olive oil, and balsamic vinegar. The acidity refreshes your palate between bites.
- Garlic-rubbed crostini with fresh herbs – If you’re serving this to guests, make crostini as an appetizer. It sets a nice tone without overwhelming anyone before the main course.
Seasonal Variations to Try
Spring: Replace bell peppers with fresh asparagus spears (thinly sliced lengthwise) and add prosciutto instead of chicken. Finish with a scatter of fresh mint instead of basil. The delicate vegetables celebrate spring’s arrival.
Summer: Use fresh tomato slices (drained of excess moisture) instead of sauce alone. Add fresh corn kernels and grilled zucchini. The abundance of summer vegetables makes this feel like eating garden bounty.
Fall: Substitute caramelized onions for raw onions (takes 15 minutes but transforms the depth), add roasted garlic cloves, and use sage instead of basil. This feels more autumnal and sophisticated.
Winter: Use roasted root vegetables (diced small), add crumbled Italian sausage instead of chicken, and finish with fresh thyme. The heartier ingredients feel appropriate for cold weather.
Expert’s Nutritional Tip: Why This Recipe Works for Real Life
One thing I’ve learned through working with hundreds of clients is that sustainable eating isn’t about restriction—it’s about satisfaction. This baguette pizza hits that sweet spot because it tastes indulgent while delivering legitimate nutrition. The fresh mozzarella provides protein and calcium that your bones actually need. The vegetables add fiber that keeps your digestive system running smoothly. The whole-grain bread provides sustained energy through B vitamins. And the olive oil carries fat-soluble vitamins that your body uses to absorb everything else.
This isn’t “health food pretending to be good.” This is genuinely good food that happens to be healthy. That’s the difference between a diet you quit and a way of eating you maintain forever.

Baguette Pizza Recipe
Ingredients
Method
- Start by setting your oven to 425°F (220°C). Don't skip the preheating—your oven needs consistent, established heat so the bread toasts evenly while cheese melts at the right pace. While it preheats, take out a cutting board and serrated bread knife. Clear a small workspace for assembling.
- Once your oven reaches temperature, carefully slice the baguette lengthwise into two equal halves using a serrated knife (the sawing motion prevents crushing the interior). This lengthwise cut is essential—it creates a large, flat surface for toppings while the crust on one side holds structure. Lightly brush the cut side of each baguette half with olive oil—about 1 tablespoon per half. This oil layer will prevent sauce from soaking directly into the bread while adding richness. Place both halves cut-side up on your baking sheet and slide into the preheated oven for exactly 3 minutes. You're looking for the bread to turn from pale to light golden, not brown. This protective crust prevents sogginess.
- While bread toasts, combine your tomato passata with garlic granules, dried oregano, and a pinch of sea salt and black pepper in a small bowl. Stir thoroughly so the garlic granules hydrate fully—about 1 minute of mixing. Taste it. The sauce should smell aromatic and taste balanced, slightly salty. This is your foundation, and getting it right takes 2 minutes.
- Remove the baguette halves from the oven (they should be warm and slightly crisp). Divide your sauce between the two halves, spreading it in a thin, even layer using the back of a spoon or a small spatula. The key word here is thin—about 1/8 inch thickness. Too much sauce overwhelms the bread; too little leaves it dry. Work quickly so the bread stays warm.
- Sprinkle about half of your freshly grated mozzarella evenly across both sauce-covered baguette halves. This cheese layer acts as glue for your toppings, preventing them from sliding off during baking and creating those beautiful, melted pockets of flavor. Don't skip this base layer—it's the difference between professional-looking pizza and toppings that slide around.
- Now add your chosen toppings in this order: mushrooms, onions, bell peppers, then shredded chicken. Why this sequence? Harder vegetables go down first so they cook through properly. Proteins go on top so they don't dry out. Distribute toppings evenly—don't pile them in the center. This ensures every bite tastes the same and toppings cook uniformly. Top everything with the remaining mozzarella cheese. This final cheese layer will brown beautifully and seal in all your toppings.
- Slide both baguette halves back into the preheated 425°F oven. Bake for 12-15 minutes, checking at the 12-minute mark. You're looking for three specific signs of doneness: the cheese is bubbly and beginning to brown at the edges, the bread has turned golden-brown underneath, and when you press the top lightly, it springs back slightly (not hard, not soft). All ovens heat differently. Your oven in an older Anchorage home behaves differently than a newer convection model. That's why visual cues matter more than exact timing.

- Remove the baguette pizzas from the oven and let them rest on a cutting board for 2 minutes. This brief rest allows the cheese to set slightly, making cutting cleaner. Tear fresh basil leaves over the top just before serving. Fresh herbs added after cooking preserve their bright flavor and nutritional content—heat destroys both.

Notes
FAQs
Can I use a regular loaf of bread instead of a baguette?
Yes, but understand the changes. A regular sandwich loaf is softer and contains more moisture, so you’ll need to extend the pre-toast time to 4-5 minutes. The crust won’t crisp the same way, so the final texture will be softer overall. Cut the loaf in half lengthwise as you would the baguette. Many people actually prefer this method because it feels more like traditional pizza. Just watch your timing carefully since softer bread cooks faster.
What’s the best way to store fresh basil so it lasts longer?
This is an Alaskan challenge since we can’t grow basil year-round. I treat fresh basil like fresh flowers: trim the bottom ½ inch of stems, place in a glass with about 2 inches of room-temperature water, cover loosely with a plastic bag, and refrigerate. Change the water every 2-3 days. This method keeps basil fresh for 10-14 days. Alternatively, chop it, place in ice cube trays with a bit of water, freeze, and pop out as needed. This preserves both the flavor and the nutrients.
Can I make these pizzas ahead and bake them later?
Absolutely. Assemble them completely—bread, sauce, cheese, toppings, everything. Cover with plastic wrap and refrigerate for up to 4 hours. When ready to bake, you don’t need to thaw them. Place directly into your preheated 425°F oven and add 3-4 minutes to the baking time (so 15-18 minutes total). The cold pizza needs extra time to heat through, but the results are perfect. This is my go-to strategy when I know I’ll have clients arriving around dinner time.
What happens if I use frozen vegetables instead of fresh?
Frozen vegetables work, but you must thaw and drain them thoroughly. Frozen vegetables release water during thawing, and if you don’t remove that moisture, your pizza becomes soggy. Pat them dry with paper towels before adding to the pizza. The texture won’t be quite as crisp as fresh vegetables, but the flavor remains good. I use frozen mushrooms regularly—they’re equally nutritious and often more affordable.
How do I prevent the crust from getting soggy if my toppings are very wet?
This is the key issue with fresh tomatoes or freshly cooked mushrooms. The solution is to salt wet toppings 10 minutes before assembly—the salt draws out moisture. Then pat them completely dry with paper towels. Alternatively, cook mushrooms in a hot skillet for 3-4 minutes to evaporate excess water before adding to the pizza. For fresh tomatoes, slice them, salt generously, and let them sit in a colander for 15 minutes while the water drains. This is a professional technique that makes a real difference.
More Recipes You’ll Love
- Easy Romesco Sauce Recipe – A Spanish pepper-based sauce that works beautifully as a spread base instead of traditional tomato sauce. Try it on your next baguette pizza for a different flavor profile.
- Easy Aioli Recipe – A garlic-forward sauce that pairs beautifully with vegetables. Spread it under the tomato sauce for extra depth.
- Easy Tapenade Recipe – An olive-based spread that makes an excellent topping or flavor base for more sophisticated pizza variations.
Final Thoughts: You’ve Got This
I shared my mother’s kitchen magic with you today, and now you have all the knowledge you need to create something equally delicious and satisfying. You understand why each step matters. You know what to watch for instead of just staring at a timer. You know how to troubleshoot when something unexpected happens. You understand the nutrition behind what you’re eating.
The most important thing I want you to know: this recipe is flexible. Your oven is unique. Your preferences for toppings are valid. Your timeline might not perfectly match mine. Trust yourself. Watch your pizza. Adjust as needed. That’s how you become confident in the kitchen—not by following rules blindly, but by understanding principles and adapting them to your reality.
Happy cooking!