Ingredients
Method
Step 1: Start Your Broth Base
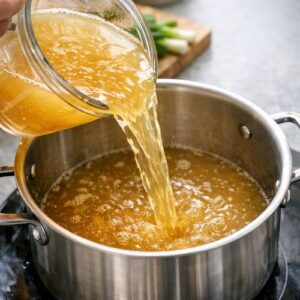
- Pour your 4 cups of chicken stock directly into a large saucepan or small pot. If using homemade stock, no need to strain it further—those gelatin-rich bits are liquid gold for nutrition. If using store-bought, check the sodium content; if it's already salty, you may need less soy sauce later. Place the pot over medium-high heat and watch for the first bubbles to break the surface, which should happen in about 4-5 minutes depending on your stove. While the stock heats, prepare your ingredients. This is my version of mise en place—having everything ready means you're not scrambling mid-cook, and it helps you control the final flavor. Slice your bok choy into ½-inch pieces (keeping stems separate from leaves), slice your green onions into thin rings, and if using ginger, mince it finely.
Step 2: Build the Flavor Foundation
- Once your stock is actively simmering (you'll see consistent bubbles breaking across the surface), add your oyster sauce, the first tablespoon of low-sodium soy sauce, and your minced ginger if using it. Stir well and let it incorporate for about 30 seconds. You're looking for that distinct savory aroma to lift from the pot—that's when you know the flavors are activating properly. Taste a small spoonful of broth now. It should taste rich and slightly salty, with depth underneath. If it tastes thin or flat, the aromatics haven't had time to develop. This is totally normal; they will deepen as the broth simmers. This step typically takes about 1-2 minutes total.
Step 3: Add Your Noodles
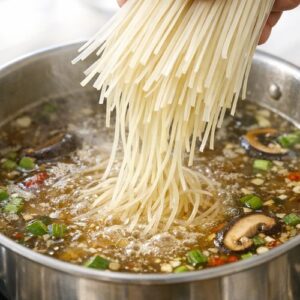
- Pour your dried noodles directly into the simmering broth. The broth will immediately cool slightly as the noodles absorb liquid—this is exactly what should happen. Stir gently to separate any noodles that are clumping together. Now check your noodle package for cooking time (usually 6-8 minutes for dried Asian noodles, but this varies significantly by type and brand). Set a timer for the amount specified on your package, minus about 1 minute. You want the noodles to be just barely tender, not soft or mushy. This is one place where most home cooks make mistakes—they cook noodles all the way to "done" and end up with a mushy bowl. We're aiming for that slight resistance when you bite through, which means the noodles will continue softening slightly after you pull the pot from heat.
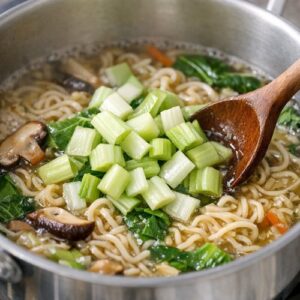
Step 4: Add Your Greens
- About 1 minute before your noodles finish cooking, add your sliced bok choy stems first (they take longer to soften). Give everything a gentle stir, then let it cook for 45 seconds. Add the leafy parts of your bok choy, stir again, and let everything cook for the final 15 seconds. The residual heat will wilt the leaves perfectly while keeping them bright and nutritious. This timing is crucial because overcooked bok choy becomes sulfurous and unpleasant. You want it tender but still vibrant in color—that visual cue tells you the nutrients are still intact, and that's what my clinical training tells me matters most for your body's ability to absorb the vitamins and minerals.
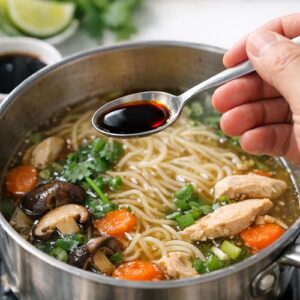
Step 5: Season and Finish
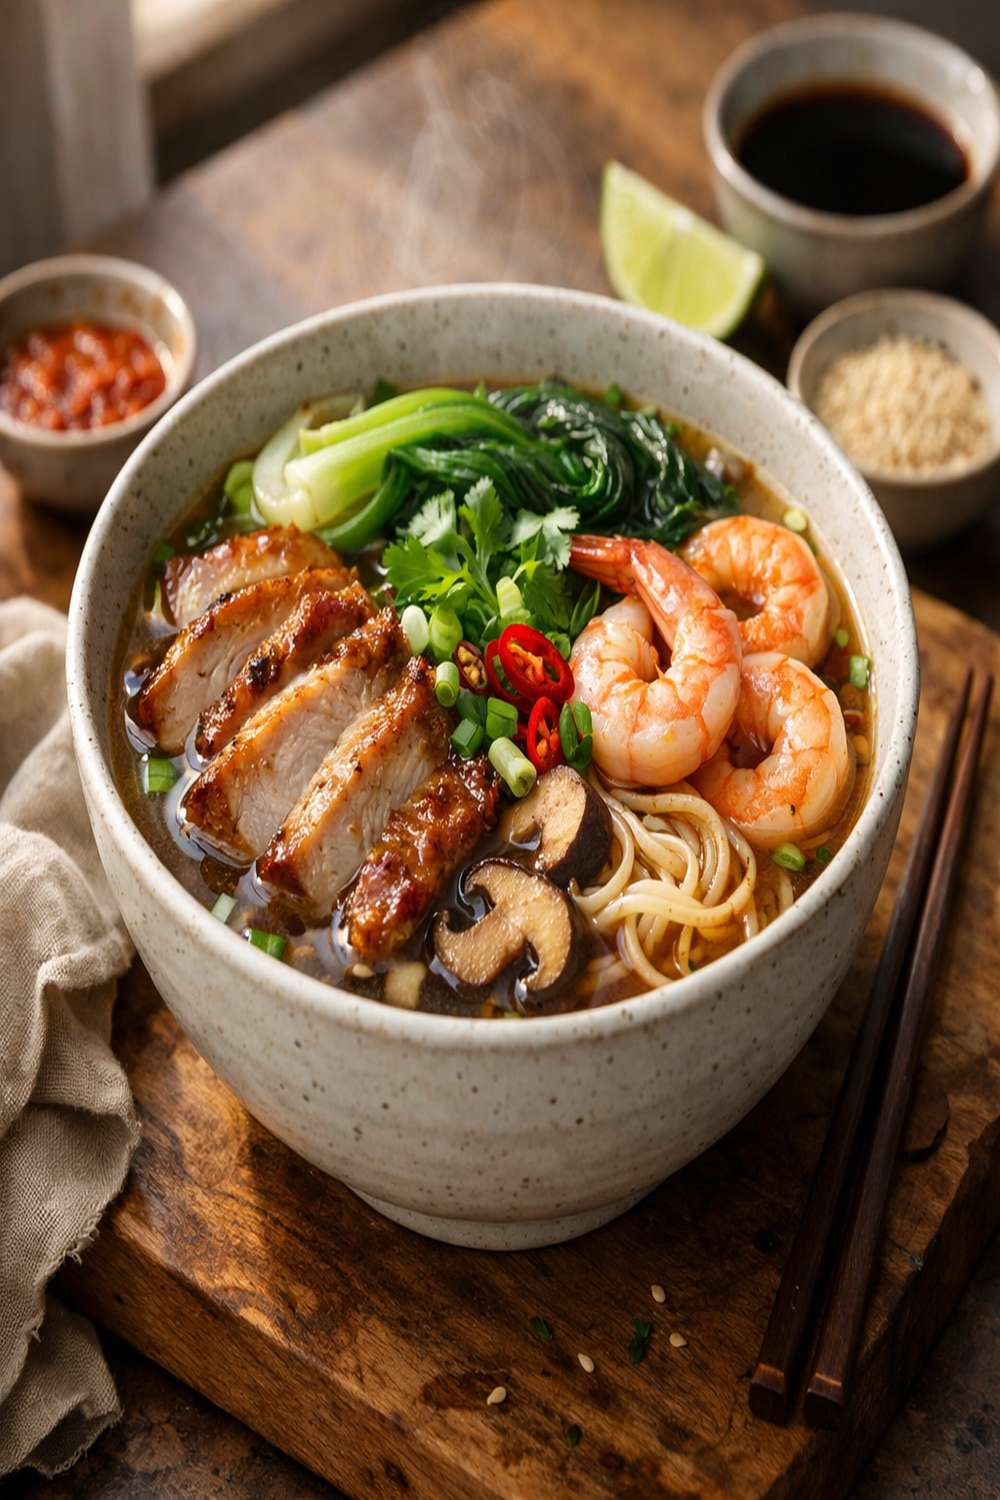
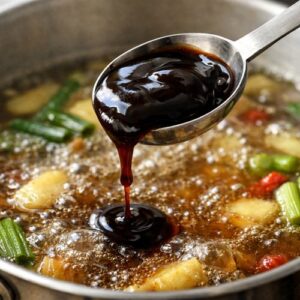
- Turn off the heat. Take a small spoonful of broth and taste it. At this point, you'll decide about the additional dark soy sauce. This ingredient adds complexity and deeper umami, but it can also make the broth taste one-dimensional if you add too much. I typically add about half of that tablespoon, stir it in, taste again, and then decide if I need the rest. Once you're satisfied with the salt level and depth, divide the soup between two bowls (this recipe serves 2 generously, with noodles and broth in perfect proportion). Drizzle ¼ teaspoon of sesame oil over each bowl—this final touch adds richness and an almost nutty aroma that feels luxurious without being heavy. Top with your sliced green onion rings, including some of those dark green tops you reserved. Serve immediately while everything is piping hot.
Notes
- Stock quality changes everything - If you have access to homemade stock (especially bone broth), use it. The gelatin and collagen add nutritional depth that drives flavor naturally, meaning you need less salt to taste satisfied. My Alaska-based clients often make stock in bulk during salmon season and freeze it in ice cube trays for exactly this purpose
- The green onion hack - Slice your green onions, then store the white and light green parts in an airtight container and the dark green tops in a separate freezer bag. The white parts keep fresh for about 10 days and work beautifully in soups like this one. The dark green tops freeze indefinitely and add color and mild flavor to finished dishes without the "cooked onion" taste that happens when dark greens simmer too long
- Bok choy storage matters - Store bok choy in a perforated plastic container in your refrigerator's vegetable drawer, not in a sealed bag (which creates moisture and rot). Stored correctly, quality bok choy stays crisp and ready for 5-7 days. I learned this from working with families managing multiple servings throughout the week
- Taste progressively, not at the end - In my clinical nutrition work, I teach clients to taste at each stage rather than trying to correct flavor at the end. Once everything is cooked together, it's harder to adjust. This soup teaches that skill beautifully because soy sauce layers in over time
- Sesame oil is not optional - I know it's not in the original recipe, but after years of making this for clients and my own family, I can tell you that ¼ teaspoon per serving is the difference between "pretty good" and "why does restaurant soup taste better?" It adds mouthfeel and aroma without adding fat calories in any meaningful way
- Fresh ginger transforms it - A tiny piece of fresh ginger (about the size of your thumbnail, minced) adds warming properties and anti-inflammatory compounds that feel especially good during Alaska's cold months. This is medicine and flavor working together, which is how I approach all cooking