Baked Oat Bites Recipe
This post contains affiliate links. As an Amazon Associate I earn from qualifying purchases.
I still remember the first time I made these baked oat bites on a crisp September morning in my Anchorage kitchen. My teenage nephew was visiting from the Lower 48, and he’d mentioned feeling sluggish from all the processed grab-and-go breakfasts he’d been eating at college. I pulled out my pantry staples—oats from our local co-op, fresh eggs, real maple syrup—and whipped up a batch while telling him about the Alaskan fishermen who fuel their early mornings with whole grains and protein. When he bit into one warm from the oven, something shifted. He finally understood that “healthy” didn’t mean sacrificing flavor or satisfaction. These bites became his dorm-room staple for months after. That’s the magic of this recipe: it bridges the gap between nourishing your body and actually enjoying what you eat. Whether you’re planning a family gathering, stocking your freezer for hectic weekdays, or looking for your new favorite breakfast, these oat bites deliver wholesome nutrition without the fuss. I’ve tested countless variations at different elevations across Alaska, and this formula works beautifully every single time.
Baked Oat Bites Recipe: The Ultimate Make-Ahead Breakfast That Tastes Like Comfort
This recipe emerged from years of working with busy families who kept asking me the same question: “How do I make something healthy that doesn’t take all morning?” I grew up watching my grandmother pull fresh salmon from Alaska’s waters and transform it into dinner in minutes. That same philosophy of efficiency without compromise shapes how I approach breakfast. These baked oat bites are my answer to that challenge—they’re the kind of food that feels indulgent but actually supports your body’s needs with real, whole ingredients.
I think of these bites as edible insurance against poor breakfast choices. You know those mornings when you’re rushing out the door and grab whatever’s convenient? These sit waiting in your fridge, ready to go. One bite delivers oats for sustained energy, eggs for protein and choline (critical for brain health), and natural sweetness from maple syrup. They taste like you spent an hour in the kitchen when you’ve really invested just thirty minutes.
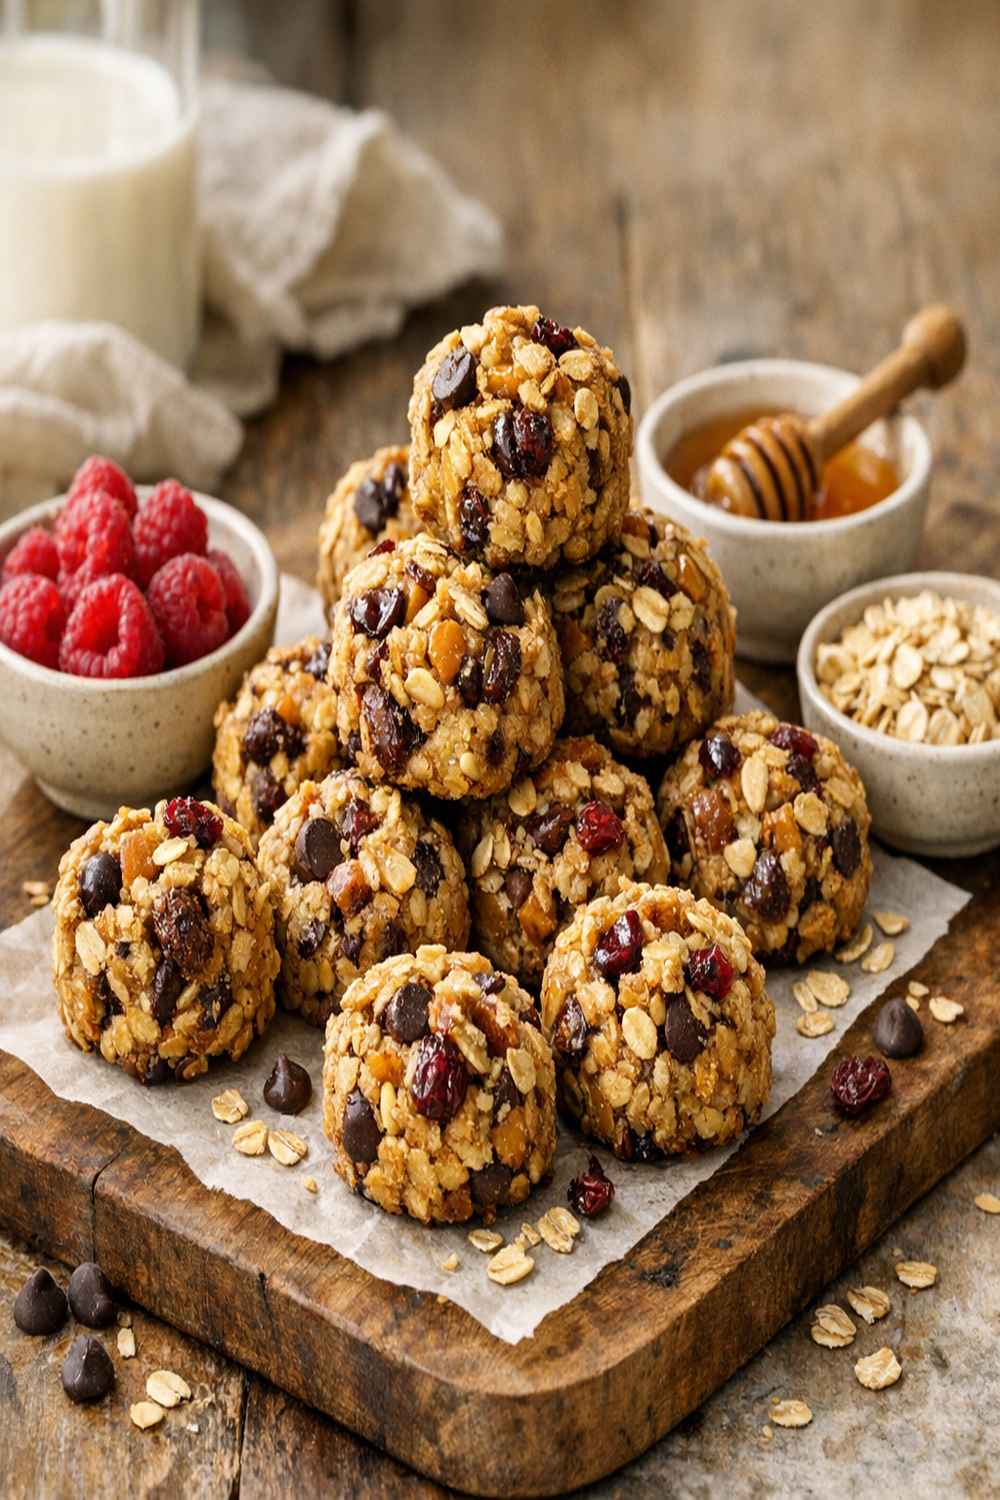
When to Make Baked Oat Bites Recipe
The beauty of this recipe lies in its versatility. I’m sharing the specific moments when these bites shine brightest in your kitchen and your life.
- Sunday meal prep sessions – Bake a double batch while you’re organizing the week ahead. You’ll have grab-and-go breakfasts for six days straight, which means you’re supporting your metabolism and energy levels before 7 AM even happens.
- Back-to-school season – August and September in Alaska bring that frantic energy of new schedules. Pack these in lunch boxes alongside a piece of fruit, and you’ve created a complete, balanced breakfast without the morning scramble.
- Travel days – Whether you’re heading to the Lower 48 or driving through the Alaska interior, these bites pack beautifully and don’t require refrigeration for several hours. Airport security doesn’t question them, and they’re infinitely better than vending machine options.
- Postpartum meal prep – I’ve worked with countless families navigating the newborn chaos. These freeze exceptionally well and warm up in seconds. New parents need calories and nutrients they can eat one-handed while holding a baby.
- Holiday entertaining – Serve these on a beautiful platter for brunch gatherings. Guests are always surprised by how wholesome they taste, and you’ve managed the breakfast portion of your event the day before.
What Makes This Baked Oat Bites Recipe Special
Working as a registered dietitian means I spend my days helping people align their food choices with their actual lives. This recipe does that beautifully. It’s not restrictive—you’re not measuring out portions or tracking anything obsessively. It’s not complicated—you literally mix everything in one bowl. And it’s not boring—the customization possibilities mean you could make a different variation every week for months.
What elevates this beyond typical oat recipes is the texture. Because we’re baking rather than boiling, these bites develop subtle edges and a pleasant density. The egg acts as a binder and enriches the entire batch without making them heavy. The milk creates moisture that keeps them tender through several days of storage. And the maple syrup brings authentic sweetness without the chemical aftertaste of processed products.
From a nutritional standpoint, these bites offer what I call “balanced convenience.” One bite contains roughly 3-4 grams of protein, 5-6 grams of fiber, and carbohydrates that digest slowly enough to prevent the mid-morning energy crash. That’s the difference between a breakfast that fuels your body and a breakfast that just occupies your stomach until lunch.
Scaling for Your Crowd
I designed this recipe for a standard 12-cup muffin tin because that’s what most home kitchens have on hand. But meals happen at different scales, and I want you to feel confident adjusting this recipe whether you’re cooking for yourself or a gathering of twenty.
- For 2 people (makes 6 bites) – Use half the quantities listed below. Bake in a 6-cup muffin tin or small ramekins for 20-22 minutes. These will keep in your fridge for four days, providing two quick breakfasts plus a snack buffer.
- For 4-6 people (makes 12 bites) – This is your standard recipe as written. Perfect for a family or a small gathering. Bake for 25 minutes and you’re done.
- For 12+ people (makes 24-36 bites) – Double or triple the recipe and use multiple muffin tins. Stagger them in the oven if needed—they don’t interfere with each other. Two batches baking simultaneously take about 50 minutes total when you account for preheating once. The extra time is minimal, and you’ll have bites for a full two weeks.
The Ingredients
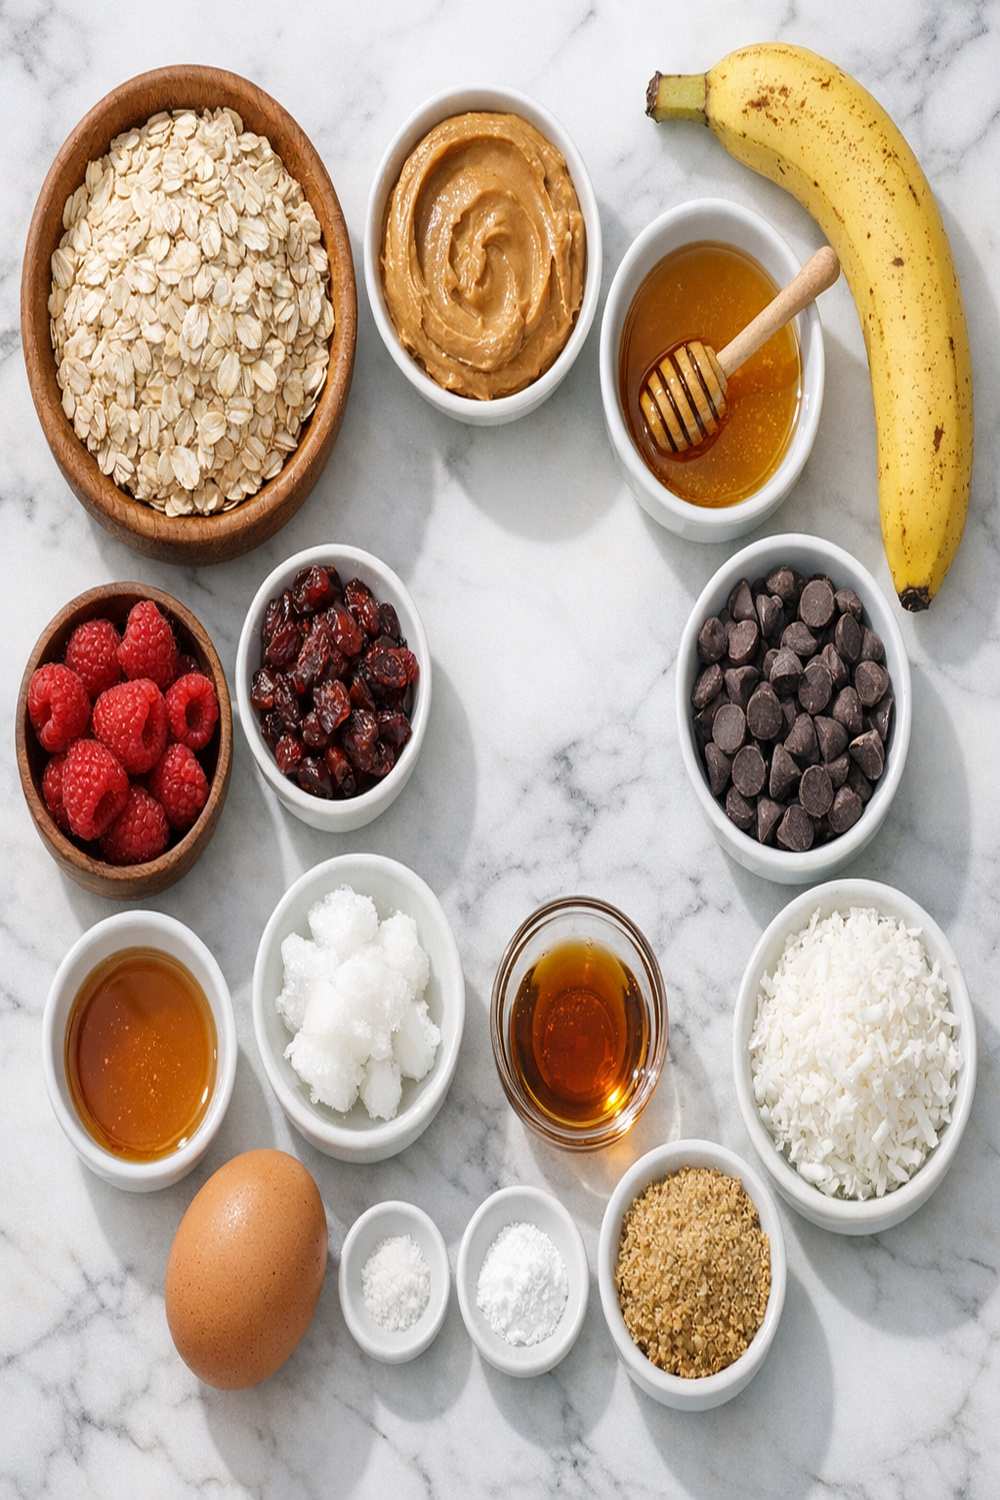
Here’s everything you need for wholesome, customizable bites that taste far more indulgent than their ingredient list suggests. I’m including storage notes for each item because how you keep your ingredients directly impacts how long they maintain their nutritional value and flavor.
- 1/2 cup chopped raw almonds or walnuts (adds nutritional density and pleasant texture contrast)
- 1 teaspoon ground cinnamon (optional but highly recommended; store in a sealed jar away from heat to preserve the volatile oils that give it flavor)
- 2-3 tablespoons unsalted butter (for greasing your pan; helps bites release cleanly without sticking)
- 1 large egg (room temperature if possible, as it blends more evenly throughout the batter)
- 1 cup fresh or frozen berries (raspberries, blueberries, or blackberries; frozen work just as well and sometimes better for texture)
- 1/4 cup pure maple syrup (the real thing, not pancake syrup; store in a cool cupboard and it keeps indefinitely)
- 1 1/2 cups milk of your choice (dairy, almond, oat, or coconut all work beautifully; use full-fat versions for best moisture and mouthfeel)
- 1/2 teaspoon sea salt (balances sweetness and enhances all other flavors; use fine grain rather than flaky)
- 1/2 cup chopped fresh apple or banana, divided among your flavor combinations (adds natural moisture and fiber)
- 1/4 cup mini dark chocolate chips (optional but worth it; choose versions with minimal added sugar)
- 2 1/2 cups rolled oats (choose certified gluten-free if needed; store in an airtight container away from sunlight to preserve the delicate fats)
- 2-3 tablespoons natural peanut butter (optional mix-in; adds protein and richness that transforms the entire bite)
How to Make Baked Oat Bites Recipe for Your Occasion
This recipe exists in that beautiful sweet spot where it’s simple enough for a weeknight and impressive enough for entertaining. I’m walking you through each step with the specific insights I’ve gathered from testing these at various Alaskan elevations and temperatures. Follow this method and you’ll have perfect bites every time.
Step 1: Prepare Your Muffin Pan and Heat Your Oven
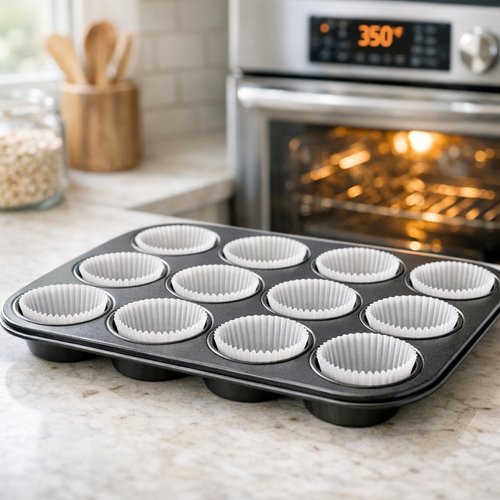
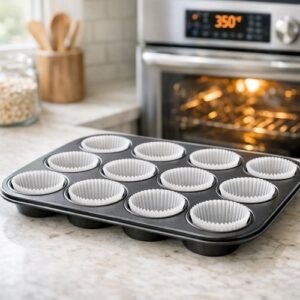
Start by preheating your oven to 350 degrees Fahrenheit. This moderate temperature allows the bites to cook through gently without the exterior browning too quickly. If you have a convection oven—common in many Alaskan homes where we’re managing wood stoves alongside conventional appliances—use 325 degrees instead and reduce baking time by 2-3 minutes.
While the oven warms, lightly grease your 12-cup muffin pan with unsalted butter or cooking spray. The butter works better because it provides a subtle flavor that complements the finished bites. If you’re making a double batch, have your second pan ready. Silicone muffin cups work beautifully here—they release these bites with zero struggle, which matters when you’re trying to maintain that tender crumb structure.
Step 2: Combine Your Base Ingredients
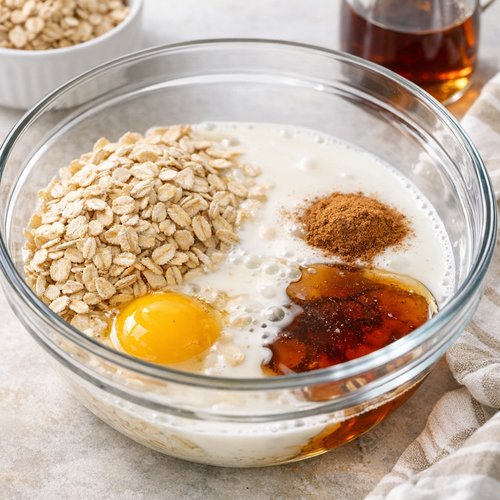
In a medium mixing bowl, combine 2 1/2 cups of rolled oats, 1 large egg, 1 1/2 cups of milk, and 1/4 cup of pure maple syrup. Add 1 teaspoon of ground cinnamon and 1/2 teaspoon of sea salt. Stir everything together until fully combined—you’re looking for a texture that’s thick but still pourable, similar to pancake batter but slightly thicker.
This is the critical moment where consistency matters. If your batter seems too dry, add milk one tablespoon at a time. Too wet? Add oats in small increments. At Alaskan elevations and humidity levels, your batter might behave differently than at sea level. Trust what you see in front of you more than the recipe numbers.
The mixture will seem a bit loose—that’s exactly right. The oats will continue absorbing liquid even as you fill the cups, and that continued hydration creates the tender texture we’re after.
Step 3: Customize Your Flavor Combinations
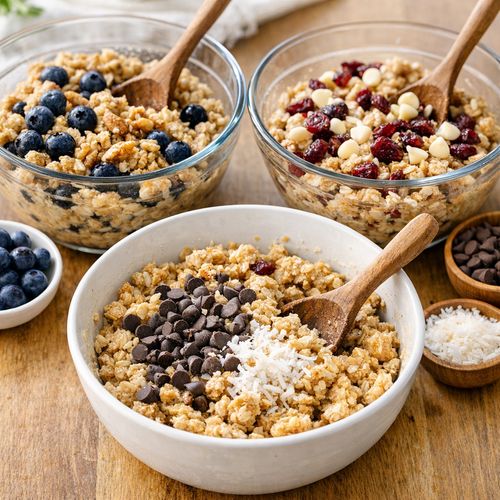
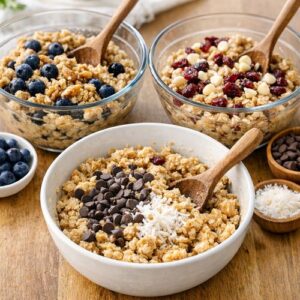
Now comes my favorite part—creating the flavor profiles you actually want to eat. Divide your mix-ins into groups and fold them into specific portions of the batter. This approach means you can make four or five different varieties in a single batch without any additional effort.
My most requested combinations: apple with cinnamon, banana with natural peanut butter, fresh raspberries with mini dark chocolate chips, and blueberries with chopped almonds. But you’re the expert on your own preferences—these are simply starting points. Dried cranberries with orange zest, chopped dates with walnuts, fresh peaches with candied ginger—all of these work beautifully.
Keep portions consistent. If you’re adding fruit, aim for about 2 tablespoons per bite. Nuts should be roughly 1 tablespoon per bite. This balance prevents any single flavor from overwhelming the others and ensures even distribution across your batch.
Step 4: Fill Your Muffin Cups with Even Distribution
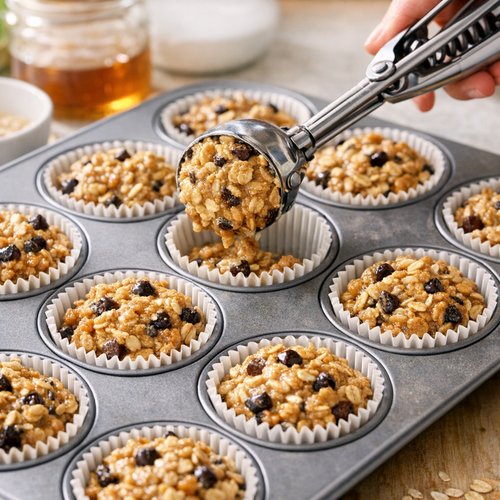
Using a small ice cream scoop or a 1/4-cup measure, divide the batter evenly among your 12 muffin cups. This is where precision matters—if some cups get significantly more batter than others, they’ll bake at different rates. You want all twelve bites finishing at exactly the same moment with the same level of doneness.
Fill each cup so the batter comes about three-quarters of the way up the side. This leaves room for slight expansion without overflow. If you’re using silicone cups, place them on a baking sheet for stability and easier handling.
Take a moment to ensure you’ve distributed the mix-ins somewhat evenly. Each cup should contain a balanced portion of your chosen add-ins so nobody gets a bite that’s all nuts or all fruit.
Step 5: Bake Until Golden and Set
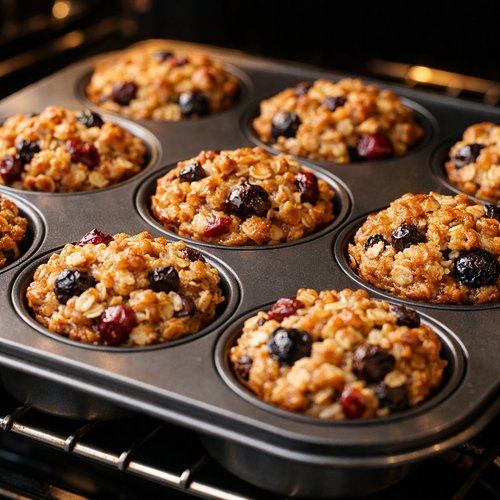
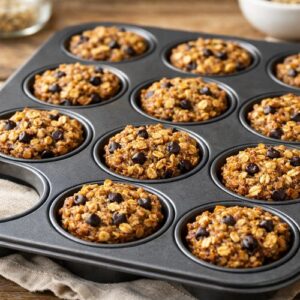
Place your muffin pan in the preheated 350-degree oven. Bake for approximately 25 minutes. You’re looking for two specific signs of doneness: the tops should be light golden brown, and a toothpick inserted into the center of one bite should come out clean or with just a few moist crumbs clinging to it.
Baking time can vary by 2-3 minutes depending on your oven’s personality and your elevation. Alaska’s elevation changes from sea level in Juneau to over 3,000 feet in some interior regions, which affects baking time. Start checking at 22 minutes and proceed from there.
Do not overbake. These bites continue cooking slightly from residual heat even after you remove them from the oven. Slightly underbaked is far better than dry.
Step 6: Cool Before Removing From the Pan
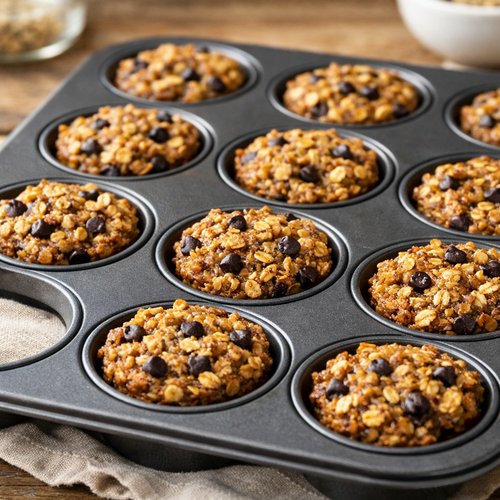
Remove your pan from the oven and let the bites cool for 10-20 minutes while still in the muffin cups. This resting period allows them to firm up just enough to release cleanly without falling apart. During this time, they’re still warm and pleasant to eat, but they’ve set enough to handle movement.
After 15 minutes of cooling, run a thin knife around the edges of each cup to loosen them gently. This prevents any sticking and makes removal effortless. If you’re using silicone cups, they release with almost no effort.
Once loosened, carefully turn each bite out onto a wire cooling rack. Let them cool completely before storing. This final cooling step prevents condensation from building up during storage, which would make them soggy.
Make-Ahead Timeline
Meal planning is where registered dietitian expertise meets real life. Here’s how I approach making these bites fit seamlessly into your weekly routine, whether you’re planning for immediate eating or building a freezer stash.
- Up to 3 days before – Measure out your dry ingredients (oats, cinnamon, salt) and keep them in an airtight container. Chop any fresh fruit you’re using and store it in sealed containers. This advance prep means your actual baking day takes just 15 minutes of active hands-on time.
- The night before – Make the entire batch. The bites are equally delicious whether served at room temperature or gently warmed. If you’re serving them at a gathering the next morning, having them completely finished eliminates stress and frees you to focus on beverages, fruit platters, or other components of your meal.
- The morning of – If serving warm, place bites on a baking sheet and warm them in a 300-degree oven for about 5 minutes. They’ll taste freshly baked without requiring any actual baking. Arrange on a beautiful platter with fresh berries, yogurt, and honey for drizzling. Offer both warm and room-temperature options so guests can choose.
How to Present and Plate Baked Oat Bites Recipe
Presentation matters more than we often admit. Even the most nutritious, delicious food deserves to look intentional and beautiful on the plate. These bites have rustic charm built in, but a few thoughtful presentation choices transform them from breakfast to impressive.
- Arrange on a wooden board or ceramic platter – Place the bites slightly at angles rather than in perfect rows. This casual arrangement signals that these are homemade and real. If you’ve made several flavor variations, group them by type so guests understand the options available.
- Add complementary accompaniments – Serve alongside fresh yogurt (which adds creaminess and probiotics), a small dish of local honey for drizzling, and perhaps a small bowl of chopped fresh mint or toasted nuts for garnish. These additions create visual interest and give people choices for customizing their own bite.
- Include a small descriptive card – If you’ve made multiple varieties, label them. “Apple Cinnamon” and “Blueberry Almond” help guests navigate their choices and spark conversation about the flavors. It also opens the door for you to talk about the real ingredients involved.
- Serve on individual small plates – For a more formal presentation, place one or two bites on a salad plate with a dollop of yogurt and some fresh berries alongside. This plating style works beautifully for brunch gatherings or small celebrations where you’re serving a complete breakfast.
Seasonal Variations
Alaska’s dramatic seasonal shifts influenced how I approach these bites. The flavors and textures that sing in July feel entirely wrong in January, and vice versa. Here’s how I adapt this recipe to honor each season’s natural bounty.
- Spring and Early Summer – Feature fresh strawberries, fresh raspberries, and bright lemon zest folded into the batter. Replace some of the milk with coconut milk for a lighter feel that matches the season’s energy. Add a tiny pinch of cardamom alongside the cinnamon—it’s subtle but creates a springlike elegance that feels fresh and alive.
- Late Summer and Early Fall – This is when Alaska’s wild berries reach peak season. Use fresh blueberries, huckleberries (if you can find them), and blackberries. Add chopped peaches or local stone fruits. A quarter teaspoon of freshly grated nutmeg creates warming spice that bridges summer into fall beautifully. These versions taste like what Alaska itself tastes like in August.
- Fall and Winter – Move toward apples, pears, and dried fruits like cranberries and raisins. Increase the cinnamon slightly (up to 1 1/2 teaspoons) and add 1/4 teaspoon of ground ginger. Include chopped pecans or walnuts for deeper, earthier texture. These warmer spice profiles feel comforting during Alaska’s long, dark winter months when we all need that internal warmth.
What to Serve Alongside Baked Oat Bites Recipe
These bites are substantive enough to serve as a complete breakfast on their own, but they shine even brighter when surrounded by complementary foods. I’m thinking about building a breakfast spread that feels complete and nourishing without requiring hours of kitchen work.
I often pair these with Greek yogurt that’s been drizzled with local honey and sprinkled with those same mix-in flavors people loved in the bites. It creates flavor coherence across the spread. Fresh seasonal fruit—berries in summer, apple slices in fall, citrus in winter—provides brightness and additional fiber. And a simple green salad with mild vinaigrette works beautifully if you’re serving at brunch, as the greens balance the sweetness of the bites and add leafy vegetable nutrition.
For beverage pairing, I’m always thinking about what actually complements these foods. Strong coffee cuts through the richness beautifully. Herbal tea (especially chamomile or spearmint) offers a gentle contrast. Freshly squeezed juice adds brightness. If you’re entertaining and want to include alcohol, a mimosa made with prosecco and fresh juice works elegantly. You could also reference our brownie box mix recipe if you’re planning a more elaborate brunch that includes multiple baked goods.
- Full-fat Greek yogurt with honey and berries – Serves as a protein-rich counterpoint that adds textural variety and extends the satiety your guests experience
- Fresh fruit platter featuring seasonal options – Adds nutritional density and visual brightness to the table while supporting the wholesome narrative of your meal
- Quality butter and almond butter for additional spreads – Gives guests the option to add even more protein and fat if they’re particularly hungry or have high activity levels planned
- Herbal tea and quality coffee service – Warm beverages create a sense of hospitality and help people linger longer at the table, extending the social experience around eating
Can I Store Baked Oat Bites Recipe?
Storage is where this recipe reveals its true genius. Unlike so many breakfast options that deteriorate within hours, these bites actually maintain their quality remarkably well. As a registered dietitian who works with busy families, I can tell you that storability directly correlates with how often people actually eat nutritious food. If the food is convenient to eat, people eat it.
Room temperature storage (up to 1 day): Keep finished bites in an airtight container on your counter. They’re pleasant eaten at room temperature and don’t require any reheating. This matters on busy mornings when you’re moving quickly.
Refrigerator storage (up to 5 days): Transfer cooled bites to an airtight container and refrigerate. I recommend placing parchment paper between layers to prevent them from sticking together. They taste best when eaten straight from the fridge or gently warmed. Many people find the cool texture actually extends satiety better than room-temperature bites.
Freezer storage (up to 3 months): This is where the real magic happens. Freeze bites in a single layer on a baking sheet for 2 hours, then transfer them to a freezer bag or airtight container. They thaw at room temperature in about 30 minutes or warm gently in a 300-degree oven for 5 minutes straight from the freezer. The structure holds up beautifully through freezing and thawing, which means you can make a triple batch and have nutritious breakfasts ready for a full month.
Pro storage tip from my kitchen: I like to freeze bites individually wrapped in parchment paper. This lets you grab just one or two without thawing the entire batch. It’s especially useful for mornings when you’re running late and need a breakfast you can literally grab from the freezer and walk out the door with.
Common Mistakes to Avoid
Working with hundreds of home cooks over the years, I’ve noticed a few patterns in where this recipe goes sideways. Let me help you navigate around those pitfalls so you nail this on your first try.
- Skipping the even distribution step – If some muffin cups get significantly more batter than others, they’ll finish baking at different times. The cups with more batter will still be slightly underdone when the others are perfectly set. Use a measuring scoop and be intentional about filling each cup to the same level.
- Opening the oven door too frequently – I know it’s tempting to check on them, but each time you open the oven, you’re releasing heat and affecting baking time. Set a timer and trust the process. Check only once, around the 22-minute mark.
- Overbaking due to fear of underbaking – These bites continue cooking slightly after you remove them from the oven. If they look almost set when you pull them out—not jiggly, but not rock-hard either—they’re done. Overbaked bites become dry and dense, losing the tender quality that makes them special.
- Not accounting for your specific elevation and oven personality – If you live in Alaska’s interior at significant elevation, baking times differ from sea-level recipes. Similarly, every oven runs slightly differently. The first time you make these, pay attention to exactly when they look done in your specific kitchen. Take notes. Adjust your timing on subsequent batches based on what you observe.
Expert’s Nutritional Tip: The Role of Whole Oats in Sustained Energy
As a registered dietitian, I spend considerable time explaining why the type of carbohydrate matters far more than the total amount. Rolled oats are a perfect example of a carbohydrate source that actually supports your body’s needs rather than creating energy crashes.
Whole oats contain beta-glucan, a soluble fiber that slows glucose absorption into your bloodstream. This means the carbohydrates in these bites don’t spike your blood sugar dramatically. Instead, they provide steady, sustained energy that carries you through your morning without the mid-morning crash that comes from refined carbohydrates.
The egg in this recipe adds choline, a nutrient most people aren’t consciously thinking about but absolutely need for optimal brain function, memory, and mood regulation. The combination of complex carbohydrates plus protein plus fat creates what I call a “nutritional triad”—the three macronutrient categories your body needs to function optimally. That’s why these bites satisfy hunger more completely than, say, a bowl of refined cereal would.
Nutrition Information
Based on USDA nutritional databases, each baked oat bite (out of a batch of 12, not including optional mix-ins) contains approximately 95 calories, 3 grams of protein, 14 grams of carbohydrates, 3 grams of fat, and 2 grams of dietary fiber. When you add mix-ins like nuts, nut butters, or chocolate chips, you’re adding approximately 20-40 calories and 1-2 grams of additional protein per bite.
The sodium content is minimal at approximately 70 milligrams per bite, which means these work beautifully for anyone managing sodium intake. The sugar content comes entirely from maple syrup and any fruit inclusions—approximately 6-8 grams of natural sugar per bite, which is significantly less than most commercial breakfast options.
Macronutrient breakdown: roughly 60% carbohydrates, 20% protein, and 20% fat. This ratio creates the satiety and sustained energy I mentioned earlier. The fiber content supports digestive health and feeds your beneficial gut bacteria.

Baked Oat Bites Recipe
Ingredients
Method
- Start by preheating your oven to 350 degrees Fahrenheit. This moderate temperature allows the bites to cook through gently without the exterior browning too quickly. If you have a convection oven—common in many Alaskan homes where we're managing wood stoves alongside conventional appliances—use 325 degrees instead and reduce baking time by 2-3 minutes. While the oven warms, lightly grease your 12-cup muffin pan with unsalted butter or cooking spray. The butter works better because it provides a subtle flavor that complements the finished bites. If you're making a double batch, have your second pan ready. Silicone muffin cups work beautifully here—they release these bites with zero struggle, which matters when you're trying to maintain that tender crumb structure.
- In a medium mixing bowl, combine 2 1/2 cups of rolled oats, 1 large egg, 1 1/2 cups of milk, and 1/4 cup of pure maple syrup. Add 1 teaspoon of ground cinnamon and 1/2 teaspoon of sea salt. Stir everything together until fully combined—you're looking for a texture that's thick but still pourable, similar to pancake batter but slightly thicker. This is the critical moment where consistency matters. If your batter seems too dry, add milk one tablespoon at a time. Too wet? Add oats in small increments. At Alaskan elevations and humidity levels, your batter might behave differently than at sea level. Trust what you see in front of you more than the recipe numbers. The mixture will seem a bit loose—that's exactly right. The oats will continue absorbing liquid even as you fill the cups, and that continued hydration creates the tender texture we're after.

- Now comes my favorite part—creating the flavor profiles you actually want to eat. Divide your mix-ins into groups and fold them into specific portions of the batter. This approach means you can make four or five different varieties in a single batch without any additional effort. My most requested combinations: apple with cinnamon, banana with natural peanut butter, fresh raspberries with mini dark chocolate chips, and blueberries with chopped almonds. But you're the expert on your own preferences—these are simply starting points. Dried cranberries with orange zest, chopped dates with walnuts, fresh peaches with candied ginger—all of these work beautifully. Keep portions consistent. If you're adding fruit, aim for about 2 tablespoons per bite. Nuts should be roughly 1 tablespoon per bite. This balance prevents any single flavor from overwhelming the others and ensures even distribution across your batch.
- Using a small ice cream scoop or a 1/4-cup measure, divide the batter evenly among your 12 muffin cups. This is where precision matters—if some cups get significantly more batter than others, they'll bake at different rates. You want all twelve bites finishing at exactly the same moment with the same level of doneness. Fill each cup so the batter comes about three-quarters of the way up the side. This leaves room for slight expansion without overflow. If you're using silicone cups, place them on a baking sheet for stability and easier handling. Take a moment to ensure you've distributed the mix-ins somewhat evenly. Each cup should contain a balanced portion of your chosen add-ins so nobody gets a bite that's all nuts or all fruit.

- Place your muffin pan in the preheated 350-degree oven. Bake for approximately 25 minutes. You're looking for two specific signs of doneness: the tops should be light golden brown, and a toothpick inserted into the center of one bite should come out clean or with just a few moist crumbs clinging to it. Baking time can vary by 2-3 minutes depending on your oven's personality and your elevation. Alaska's elevation changes from sea level in Juneau to over 3,000 feet in some interior regions, which affects baking time. Start checking at 22 minutes and proceed from there. Do not overbake. These bites continue cooking slightly from residual heat even after you remove them from the oven. Slightly underbaked is far better than dry.

- Remove your pan from the oven and let the bites cool for 10-20 minutes while still in the muffin cups. This resting period allows them to firm up just enough to release cleanly without falling apart. During this time, they're still warm and pleasant to eat, but they've set enough to handle movement. After 15 minutes of cooling, run a thin knife around the edges of each cup to loosen them gently. This prevents any sticking and makes removal effortless. If you're using silicone cups, they release with almost no effort. Once loosened, carefully turn each bite out onto a wire cooling rack. Let them cool completely before storing. This final cooling step prevents condensation from building up during storage, which would make them soggy.
Notes
FAQs
Can I make these bites without eggs, and what should I substitute?
Absolutely. The egg serves as a binder and adds richness, so you need something with similar properties. I recommend using either 1/4 cup of unsweetened applesauce or 3 tablespoons of ground flaxseed mixed with 3 tablespoons of water (let it sit for 5 minutes before using). Both create similar binding properties. The applesauce version will be slightly moister and has a more delicate texture, while the flaxseed version adds additional nutrition and creates a slightly denser bite. Either works beautifully for vegan or egg-free diets.
Do I need to use pure maple syrup, or can I substitute honey or another sweetener?
You can substitute, but pure maple syrup is genuinely the best choice for this specific recipe. Honey has a slightly different moisture profile and can make the bites marginally stickier. Agave or brown rice syrup work if you have them on hand. I would avoid artificial sweeteners because they don’t provide the moisture that real sweeteners do. If you’re using a sugar substitute, you might need to add a tablespoon of extra milk to compensate for the lost moisture. Start with maple syrup first—it’s worth sourcing from a quality local producer if possible.
Can I make these with instant oats instead of rolled oats?
You can, but the texture will be significantly different. Instant oats are already partially broken down, so they create a much softer, almost porridge-like bite rather than the substantial, tender texture you get from rolled oats. If you only have instant oats available, reduce the batter-to-oat ratio slightly by using 2 cups of instant oats instead of 2 1/2 cups. Check them at 20 minutes rather than 25 minutes since they’ll bake faster.
How do I know when these are done baking if I’m at a high elevation?
High elevation baking is something I deal with frequently in Alaska. At elevations above 3,000 feet, water boils at lower temperatures, which affects baking. Increase your oven temperature by 15-25 degrees Fahrenheit, and reduce baking time by about 5-10 minutes. More importantly, use visual cues rather than relying on time entirely. The tops should look light golden brown, and a toothpick inserted into a bite should come out clean. At higher elevations, bakes sometimes finish 5-10 minutes earlier than sea-level recipes indicate.
Can I use dairy-free milk in this recipe, and does it affect the final result?
Yes, and I actually do this frequently. Almond milk, oat milk, coconut milk, and soy milk all work beautifully. Full-fat versions create slightly moister bites than low-fat options, so if you’re using a dairy alternative, choose full-fat if possible. Coconut milk creates the richest texture. The bites might be fractionally denser with almond milk but still delicious. Avoid ultra-light or skim versions as they don’t provide the same moisture. The egg (or your egg substitute) is still doing the binding work, so milk flexibility is quite high in this recipe.
More Recipes for Your Table
- Brownie Box Mix Recipe – A wholesome version of a classic that works beautifully for dessert or indulgent brunch additions
- Bravo Sauce Recipe – A versatile condiment that brings complexity to simple breakfast plates
- Cheerios Recipe Healthy – Another grain-based breakfast option if you’re looking for variety in your rotation
These baked oat bites represent something I believe deeply: nourishing your body doesn’t require complexity or sacrifice. It requires intention and real ingredients and maybe fifteen minutes of your time. I think about that morning with my nephew, how one warm bite shifted his entire perspective on what healthy eating could be. That’s what I hope happens when you make this recipe in your own kitchen—that moment when you realize nutrition can taste like comfort, that you can move through your mornings with energy and satisfaction, that feeding yourself well is one of the simplest acts of self-love available to you. The memories you build around food, the mornings that start strong because you took thirty minutes the day before to prepare—these compound into a better life. Make this recipe. Customize it completely. Share it with someone you care about. And build those breakfast rituals that set your entire day on the right foundation. Happy Cooking!