Cold Mexican Pasta Salad Recipe
This post contains affiliate links. As an Amazon Associate I earn from qualifying purchases.
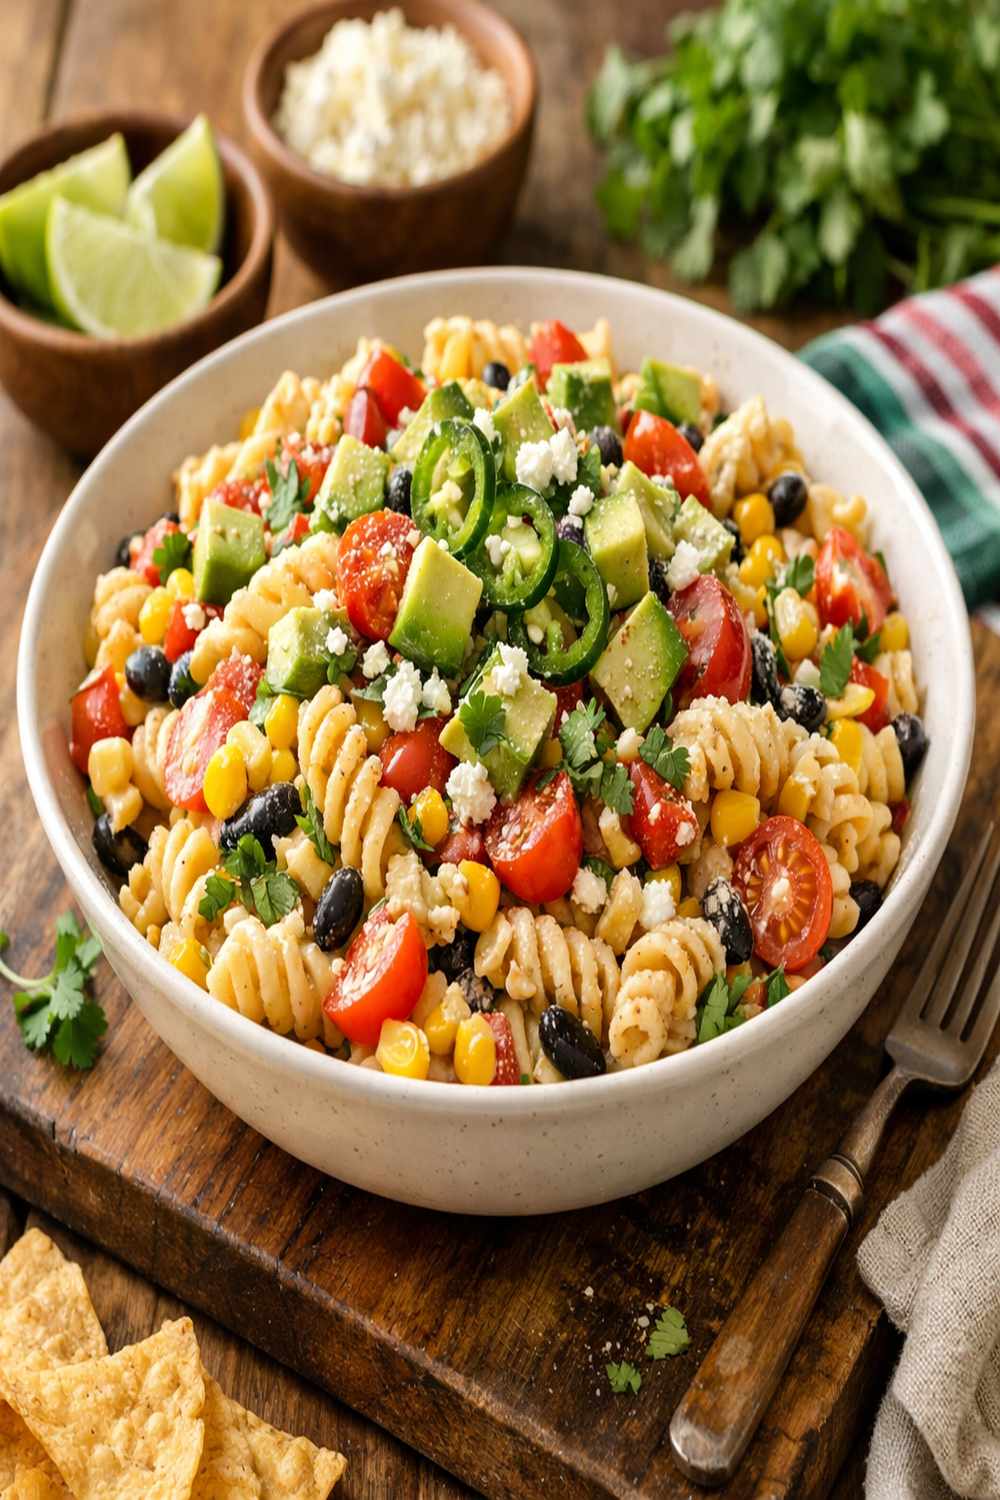
If you’ve always wanted to make a vibrant, satisfying cold pasta salad but felt intimidated by the combination of flavors, this is your starting point. I promise you—this recipe is forgiving, adaptable, and genuinely delicious. When I first moved to Alaska and wanted to recreate the bright, zesty flavors of my childhood memories mixed with local ingredients, I discovered that this particular dish became my gateway into confident cooking. You don’t need any special skills, fancy techniques, or mysterious ingredients to pull this off.
Like my best chicken salad with Greek yogurt recipe, this pasta salad relies on quality basics and proper technique rather than complexity. The beauty of this dish is that it comes together in under 30 minutes, tastes even better after a few hours in the refrigerator, and practically teaches itself as you go.
How to Make Cold Mexican Pasta Salad for the First Time (You’ve Got This)
I’ll never forget the afternoon I stood in my Anchorage kitchen, looking at a pile of fresh cilantro, perfectly ripe avocados, and a box of whole wheat pasta. It was early summer—that magical time when Alaskan farmers markets burst with color after months of dark winters. I was determined to create something that honored both my Mexican heritage and my adopted home’s commitment to fresh, wholesome eating.
My first attempt wasn’t perfect. I added the avocado too early and it turned brown. My dressing was too thin. But you know what? It was still absolutely delicious, and more importantly, it taught me that this recipe is nearly impossible to ruin. The flavors are forgiving. The components work together naturally. Most importantly, I learned that cooking isn’t about perfection—it’s about understanding your ingredients and trusting yourself to adjust as you go.
That’s what I want for you today. Not a recipe that demands precision, but a framework that invites confidence.
What to Expect Before You Start
Let’s be honest about what this recipe demands and what it doesn’t. You’re looking at approximately 30 minutes of active preparation time from the moment you pull ingredients from your pantry to the moment you taste the finished salad. Most of that time is just waiting for pasta water to boil and vegetables to be chopped—tasks that are genuinely meditative, not stressful.
The difficulty level? Beginner-friendly. There’s no sautéing, no precise temperatures to hit, no dishes that can “break” or curdle. You’re essentially cooking pasta (which you probably already know how to do) and assembling fresh ingredients with a simple dressing. The most technically challenging part might be dicing an avocado, and I’m going to walk you through that step-by-step.
- The pasta water takes 8-10 minutes to boil – This is genuinely the hardest part. While you’re waiting, begin prepping your vegetables. By the time your pasta is done, half your work is finished.
- Chopping vegetables is the real time commitment – But it’s rhythmic, forgiving, and honestly quite therapeutic. You don’t need uniform perfection; rustic-looking chunks are actually more appealing and authentic.
- You might worry the dressing will break or separate – Here’s the honest truth: it won’t. Greek yogurt creates an incredibly stable, creamy base that stays smooth whether you make it hours in advance or five minutes before serving.
- Beginners often panic about avocado browning – This only happens if you add it more than a few hours ahead. Add it in the final moments before serving (or within 2 hours max), and you’ll have beautiful green edges every single time.
Equipment You’ll Need (And What You Can Skip)
Here’s what I genuinely use in my own kitchen for this recipe. I’m not going to list fancy equipment you’ll never touch again—just the basics that make the job easier and that you probably already own.
- One large pasta pot – This is for boiling water and cooking your pasta. A regular 6-8 quart stockpot works perfectly. You need enough room that the water comes to a rolling boil and the pasta has space to move around without sticking.
- One large serving bowl – This holds all your mixed ingredients. I use a glass bowl because I can see the colors develop as I assemble everything, which makes the process feel more visual and fun.
- One small mixing bowl or measuring cup – This is where you whisk together your dressing. It needs to be small enough to handle comfortably but large enough to fit all ingredients. A 2-cup measuring cup actually works wonderfully if you don’t have a bowl nearby.
- A colander or strainer – Non-negotiable for draining pasta and canned beans. If you don’t have one, a slotted spoon works, but honestly, investing in a simple $5 colander will change your cooking life.
- A cutting board and sharp knife – Optional but recommended. You can technically chop everything on a plate with the dull end of a spoon, but a proper knife and board take maybe 30 seconds off your prep and feel infinitely more confident.
- A vegetable peeler or zester – Optional for lime zest. You can use a microplane, a zester, or even the small holes on a box grater. If you have none of these, just use the juice and skip the zest—your salad will be delicious either way.
- A whisk or fork – Optional but helpful for mixing your dressing. A simple fork works just fine for stirring together the yogurt, oil, and spices until smooth.
The Ingredients – A Beginner’s Shopping Guide
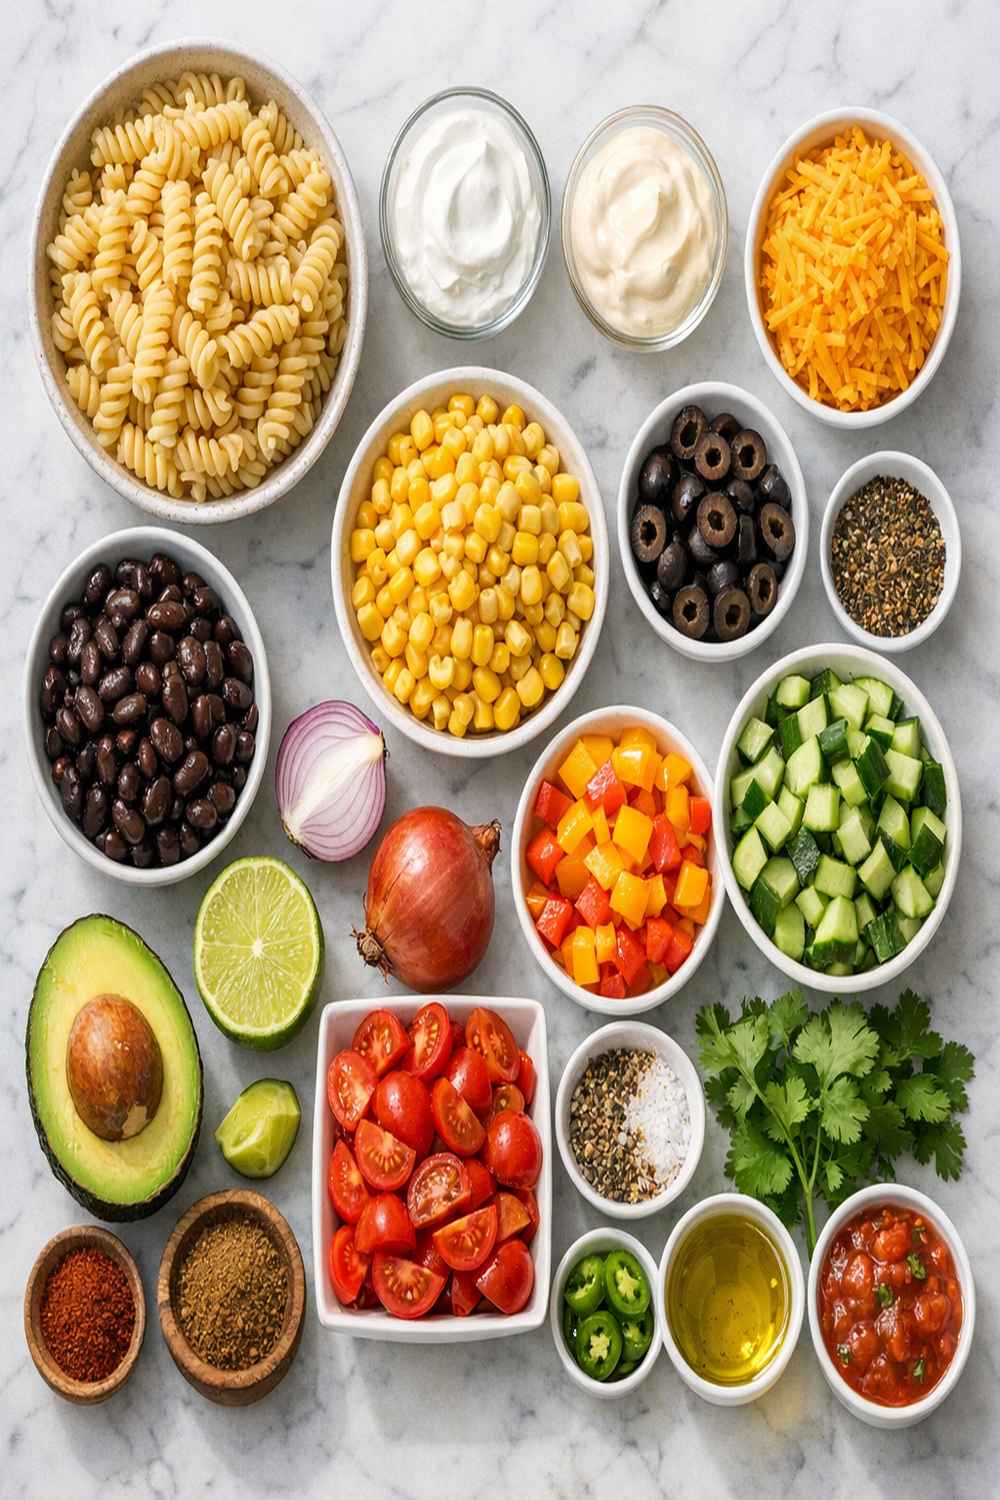
I want you to feel confident buying every single ingredient here. Let me walk you through exactly what to look for, where to find each item, and what to do if something isn’t available in your regular grocery store or farmer’s market.
For the Pasta Base
- 2 cups fresh corn kernels cut from the cob, or frozen corn thawed, or one 15-ounce can corn drained well (fire-roasted varieties add smoky depth)
- 8 ounces whole wheat pasta shapes like bow ties or elbow pasta (look for bronze-cut varieties which hold sauce better than smooth pasta)
- 1 (15-ounce) can reduced-sodium black beans drained and rinsed thoroughly under cold water (rinsing removes excess sodium and prevents mushiness)
For the Fresh Vegetables
- 3 whole green onions including white and light green parts, thinly sliced (the white parts add more punch than the tops)
- 1 large fresh jalapeño cored, seeded, and diced finely (seeds carry the heat, so remove them for less spice, keep them for more)
- ⅓ cup fresh cilantro leaves roughly chopped (this is about one large handful—don’t skip this, it’s the soul of the dish)
- 2 cups cherry tomatoes halved (choose tomatoes that feel heavy for their size—they’re juicier)
- 2 large ripe avocados peeled, pitted, and diced into bite-sized pieces (look for avocados that yield gently to thumb pressure, not rock-hard)
For the Dressing & Finishing
- ½ teaspoon kosher salt (sea salt or table salt works if that’s what you have)
- ¼ teaspoon smoked paprika (this adds color and depth—regular paprika works but tastes slightly different)
- Zest of 2 limes plus 2 tablespoons freshly squeezed lime juice (bottled juice works in a pinch but fresh is genuinely better here)
- 2 tablespoons extra-virgin olive oil cold-pressed for best flavor (cheaper oils work but taste noticeably different)
- ½ cup crumbled feta cheese (buy a block and crumble it yourself, or use pre-crumbled—both work perfectly)
- ½ teaspoon chili powder (look for pure chili powder, not chili seasoning blends which contain salt and other additives)
- ¾ cup nonfat plain Greek yogurt (the plain part is crucial—vanilla or honey-flavored versions will ruin the balance)
- 1 teaspoon hot sauce like Tabasco or similar (this adds gentle heat without overpowering—start with ½ teaspoon if you prefer milder)
Storage Hacks for Success
Keep cilantro fresh for days: Wash and dry it completely, wrap loosely in paper towels, place in a plastic bag, and refrigerate. It stays vibrant for up to a week this way. In Alaska’s dry air, I sometimes place the stems in a small glass of water like flowers.
Prevent avocado browning: Leave avocados at room temperature until you’re ready to use them. Cut them only minutes before assembly. If you must cut them early, coat the exposed flesh lightly with lime juice and wrap tightly with plastic wrap pressed directly onto the surface.
Make Greek yogurt last longer: Store it in the coldest part of your refrigerator (usually the back of the lowest shelf), and always use a clean spoon when scooping. It keeps for up to two weeks unopened, and about one week after opening if handled properly.
Step-by-Step: Your First Cold Mexican Pasta Salad
I’m going to guide you through this process assuming you’ve never made anything like this before. I’ll explain not just what to do, but why you’re doing it, and exactly what success looks like at each stage. You’ve absolutely got this.
Step 1: Bring Water to a Rolling Boil and Cook Your Pasta
Fill your large pot about three-quarters full with water. You want enough water that the pasta can move freely without sticking, but not so much that it takes 20 minutes to boil. Place the pot over high heat and wait for it to boil.
While you’re waiting (this takes about 8-10 minutes depending on your stove), begin chopping your vegetables. This isn’t wasted time—you’re being strategic and efficient. Start with items that won’t brown or soften: dice your jalapeño, slice your green onions, and halve your cherry tomatoes. Chop your cilantro and set it aside separately since it bruises easily.
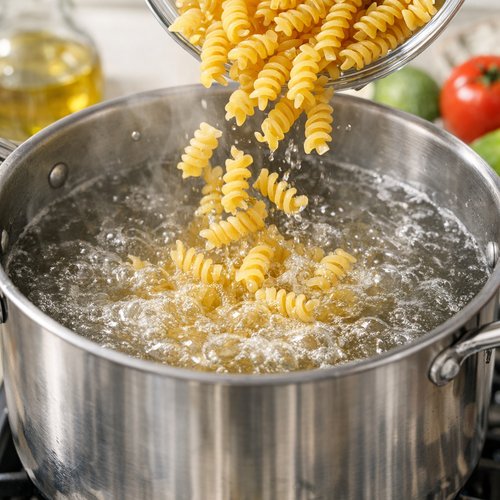
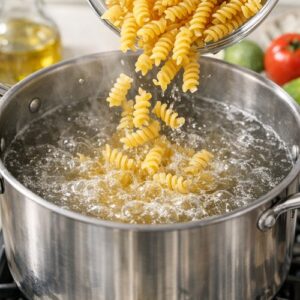
Once the water reaches a rolling boil with large bubbles rapidly breaking the surface, add a generous pinch of salt (about 1 tablespoon for a full pot). The water should taste slightly salty, like the ocean. This is how you flavor the pasta itself, not just the outside. Add your pasta all at once and stir immediately with a wooden spoon for about 30 seconds to prevent sticking.
Follow the package instructions for cooking time, but here’s my pro tip: cook it for one minute less than the package says. The pasta should be tender but still have a slight firmness when you bite into it—this is called al dente. It prevents your salad from becoming mushy as the dressing sits on it.
Step 2: Drain and Cool Your Pasta Immediately
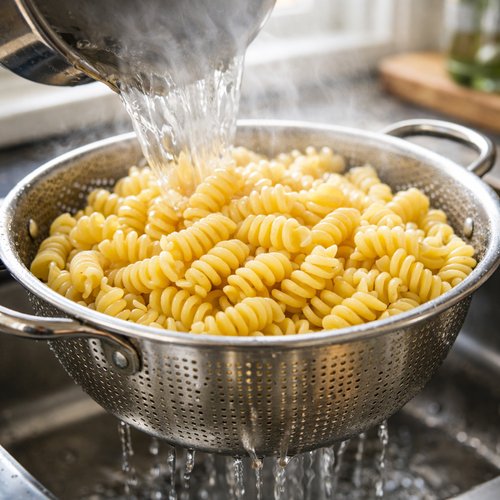
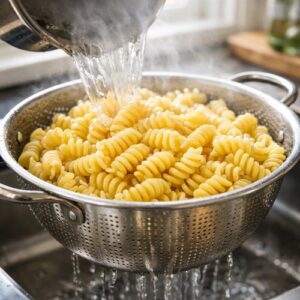
When your timer goes off, carefully pour the pasta into your colander. Let the hot water drain completely. Do not rinse it with cold water—that removes the starchy coating that helps your dressing stick to each piece. Instead, spread the warm pasta on a large plate or back into your empty pot and let it cool for about 3 minutes.
This cooling step is important. Hot pasta will wilt fresh vegetables and cause avocado to brown prematurely. You don’t need it ice-cold, just at a comfortable touch-temperature. If you’re in a real hurry, you can proceed with slightly warm pasta, but cooled is genuinely better.
Step 3: Add All Your Vegetables to the Large Serving Bowl
Move your cooled pasta into your large serving bowl. Now add, in this order: your drained and rinsed black beans, corn, cherry tomatoes, green onions, jalapeño, and cilantro. Do not add the avocado yet—that comes last to prevent browning.
At this point, your salad looks beautiful but might look a bit dry. That’s exactly right. The dressing comes next, and it’s going to bring everything together.
Step 4: Make Your Dressing in a Small Bowl
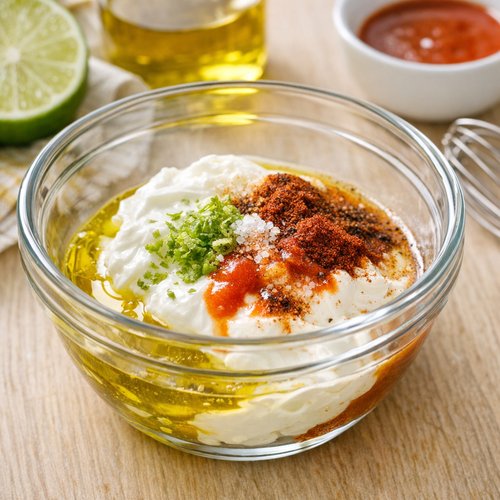
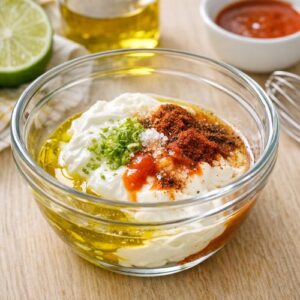
In your small mixing bowl or measuring cup, combine your Greek yogurt, olive oil, lime zest, lime juice, hot sauce, salt, chili powder, and smoked paprika. Use a fork or whisk to stir everything together until you have a smooth, creamy mixture with no streaks of yogurt or oil visible.
Taste it with a clean spoon. It should taste bright from the lime, creamy from the yogurt, with a gentle warm tingle from the chili powder and heat. Adjust to your preference: if it tastes flat, add more lime juice or salt. If it’s too spicy, add more yogurt. If it needs more depth, add a pinch more chili powder. This is your moment to make it perfectly suited to your taste.
Here’s something important: the dressing might look thinner than you expect. That’s completely normal. The Greek yogurt base is naturally thinner than mayo-based dressings, but it coats beautifully and won’t make your salad heavy or dense.
Step 5: Combine Everything and Let It Set
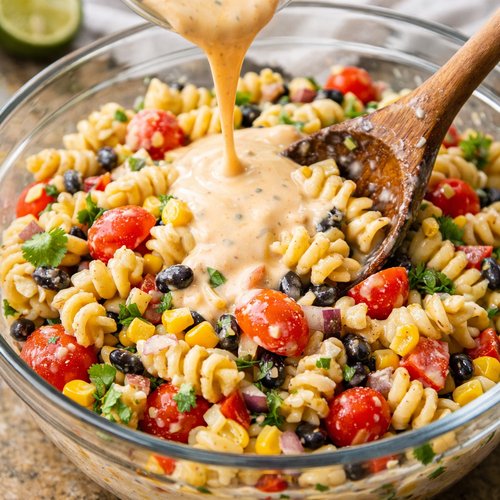
Pour your entire dressing over the pasta and vegetable mixture. Using a large spoon or wooden spoon, toss everything together gently but thoroughly. Every piece of pasta should be coated with creamy dressing. This takes about 1-2 minutes of tossing.
Taste again with a clean spoon. Adjust salt, lime, or spice one final time if needed. Now you have two options: serve immediately while everything is cool and fresh, or cover and refrigerate for up to 2 hours. The flavors actually deepen and blend beautifully if you chill it, which is why I usually prepare this a few hours ahead when I’m having guests.
Step 6: Add Your Avocado and Cheese at the Last Moment
Just before serving, dice your ripe avocados into bite-sized pieces and gently fold them into the salad. The gentleness matters here—you’re trying to distribute them without breaking them into mush. Top everything with your crumbled feta cheese.
The moment you combine the avocado is the moment you should serve this salad. It will taste wonderful for about 30 minutes, remain good for up to 2 hours, and start to look less vibrant after that. This isn’t a problem—it still tastes delicious—but if appearance matters for your meal, add the avocado as late as possible.
How to Tell If You Did It Right
Success in this recipe reveals itself through multiple sensory cues. Let me walk you through exactly what you’re looking for at each stage.
- Your pasta is cooked perfectly when a single piece bends slightly under pressure but still has a gentle firmness when you bite it. It should not be soft enough to squish between your teeth like baby food, but not so firm that you have to chew hard. When in doubt, taste a single piece while it’s still warm—that’s your guide.
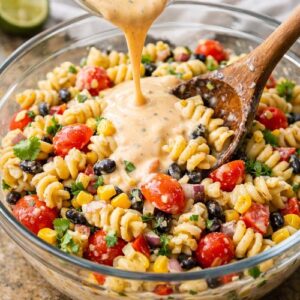
- Your dressing is mixed correctly when it looks completely smooth and creamy with no streaks of unmixed yogurt or oil. The color should be a pale yellowish-cream, and when you lift a spoon, it should coat evenly before dripping off.
- Your salad is properly dressed when each piece of pasta has a slight sheen of dressing, and the whole mixture looks cohesive rather than wet or soupy. You shouldn’t see puddles of dressing at the bottom of the bowl.
- The flavor is balanced when you taste bright lime immediately, followed by creamy richness, finishing with gentle warmth from the spices. If you taste only one note strongly (like only heat, or only sourness), adjust with the other components.
What Went Wrong? Beginner Fixes
I’ve made this dish dozens of times, and I’ve had every possible variation of “wrong” happen to me. Here’s how to fix the most common issues.
- Your pasta tastes bland – This happens when you either didn’t salt your cooking water, or when the dressing isn’t seasoned enough. Fix: Taste your dressing and add more salt gradually, tasting between additions. Salt is transformative and forgiving—a pinch at a time brings out all the other flavors.
- Your salad is too watery or soupy – This usually means you either used too much dressing or didn’t drain your canned beans well enough. Fix: If it just happened, drain off some liquid with a spoon. For next time, rinse canned beans under cold running water for a full 30 seconds, shaking the colander occasionally. Also, if you’re using fresh corn from the cob, make sure it’s not wet when you add it.
- Your avocado is brown and oxidized – You added it too far in advance. Unfortunately, this can’t be fixed, but you can prevent it next time. Add avocado within 10 minutes of serving, or store it separately and combine it individually in each serving.
- Your dressing broke or looks separated – Greek yogurt is actually quite stable, so this is rare, but it can happen if your ingredients were very hot or if you used hot sauce that was old. The fix: stir vigorously with a fork. Usually it comes back together immediately. If it doesn’t, add a tablespoon of yogurt and whisk again.
- The salad tastes too spicy – You added too much hot sauce or used fresh jalapeños with seeds intact. Fix: Add more yogurt or olive oil to dilute the heat. Next time, remove jalapeño seeds unless you want serious heat.
- It tastes too acidic or sour – Usually this means too much lime juice. Fix: Add a bit more yogurt or oil to balance it. You could also add a pinch of salt, which actually reduces the perception of sourness.
Expert’s Nutritional Insight: Why Greek Yogurt is Your Secret Weapon
As a registered dietitian, I want to explain something important about this dressing that goes beyond just “it tastes good.” Greek yogurt contains roughly 15-20 grams of protein per cup, compared to about 3 grams in regular yogurt. This turns what could be a side dish into a genuinely satiating meal. The protein helps regulate blood sugar, keeps you feeling full longer, and supports muscle recovery—which matters whether you’re hiking in Alaska’s backcountry or simply trying to avoid the 3 p.m. energy crash.
Beyond protein, Greek yogurt provides probiotics (the living cultures) which support digestive health, and calcium for bone strength. By replacing heavy mayo-based dressings with Greek yogurt, you’re reducing calories by nearly 50% while actually increasing nutritional density. This is real food doing real work in your body, not just tasting delicious.
Make-Ahead Guide: Meal Prep Like a Pro
This recipe is genuinely designed for make-ahead eating, which is why it’s become my go-to for week-ahead meal prep and entertaining.
The night before: Cook your pasta, prepare all vegetables except avocado, and make your dressing. Store the pasta and vegetables in separate containers—yes, this creates more dishes, but it keeps everything fresh and prevents the vegetables from sitting in dressing all night.
2-4 hours before serving: Combine the pasta, vegetables, and dressing in your serving bowl. Cover and refrigerate. The flavors actually improve as they sit together for 2-4 hours—the dressing penetrates the pasta, the corn becomes more flavorful, the beans soften slightly.
Just before serving: Add your diced avocado and crumbled feta, toss gently, and bring to the table. This final step takes literally 90 seconds but makes an enormous visual and textural difference.
Storage strategy in Alaska: During summer when temperatures can be unpredictable, I always keep this salad in the coldest part of my refrigerator. A thin kitchen towel placed over the bowl (not sealed) allows some air circulation while keeping it clean.
Your Next Steps After Mastering This
This recipe teaches you several foundational cooking skills that transfer directly to other dishes. You’ve learned how to cook pasta al dente, which means you can now make any pasta-based dish with confidence. You’ve practiced balancing flavors in a dressing—acid (lime), fat (oil and yogurt), salt, and spice—which is literally the foundation of all good cooking.
Once you feel confident here, try my baked fish taco recipe which uses many of the same flavor combinations and techniques. Or explore an Asian noodle soup recipe which applies the same understanding of acid-fat-salt-spice balance to a warm dish. The skills are truly transferable.
Seasonal Variations: How to Adapt This Year-Round
Living in Alaska, I’ve learned to adapt recipes to whatever’s fresh and available. Here’s how I adjust this salad through the seasons.
Summer (June-August): This is when I make the classic version with fresh corn from farmer’s markets and absolutely perfect tomatoes. I sometimes add diced cucumber for extra freshness and crispness. The cilantro is at peak flavor from the long daylight hours.
Fall (September-October): Fresh corn disappears, so I switch to roasted sweet potato cubes (roast them lightly first) or add pomegranate seeds for tart brightness. I keep the rest the same but sometimes add crumbled queso fresco instead of feta for a different flavor profile.
Winter & Spring (November-May): I rely on high-quality frozen corn and use canned black beans without apology. I add roasted red peppers from a jar for color and sweetness. I sometimes include diced radishes for crunch since fresh vegetables are limited in Alaska during these months. The lime and cilantro become even more important—they’re your connection to brightness during darker months.
The beautiful thing about this recipe is that it’s forgiving of seasonal changes. The dressing, the pasta base, and the core flavors remain constant. Everything else can shift based on what looks beautiful at your grocery store.
Can I Store Cold Mexican Pasta Salad?
In the refrigerator: This salad keeps beautifully for 3-4 days if stored properly. Keep it in an airtight container in the coldest part of your refrigerator (usually the back of the lowest shelf). After about 2 days, the vegetables release a bit more moisture, so the dressing becomes slightly thinner. This is completely normal and doesn’t affect taste—simply stir well before serving.
The avocado exception: If you’ve already added diced avocado, eat it within 30 minutes to 2 hours maximum. Beyond that, browning becomes noticeable even if the taste remains good. I always recommend storing avocado separately and combining it just before serving, especially if you’re making this days in advance.
The feta exception: Crumbled feta stored in an airtight container keeps for about 3 days. If you’re storing the salad for the full 3-4 days without serving, hold the feta and add it fresh right before eating.
Freezing: I don’t recommend freezing this salad. The texture of the vegetables and the creaminess of the dressing don’t survive freezing well. Fresh is genuinely best here.
My Alaska storage hack: During summer, I sometimes place the covered bowl on the coolest shelf and leave a small dish of ice nearby to maintain temperature if I’m serving this outdoors for a gathering. The container itself shouldn’t touch ice directly, but proximity helps on warm days.
Nutrition Information
Based on USDA nutrition data for the primary ingredients, each serving (approximately 1.5 cups) contains roughly 385 calories, 14 grams of protein, 18 grams of fat, and 42 grams of carbohydrates. The fiber content is approximately 8 grams, which supports digestive health and contributes to satiety.
The protein comes primarily from Greek yogurt and black beans, making this dish genuinely satisfying as a main course rather than just a side. The healthy fats from avocado and olive oil support nutrient absorption and hormone health. The whole wheat pasta provides sustained energy through complex carbohydrates, not simple sugars.
One important note: if you use canned black beans instead of dried, the sodium will be higher unless you specifically choose a reduced-sodium variety and rinse thoroughly. Always rinse canned beans—this removes approximately 40% of the sodium.
This salad also contains vitamin C from the lime, cilantro, and tomatoes; vitamin E from the olive oil; and beta-carotene from the tomatoes. It’s nutritionally complete enough to serve as a light main course with a simple grilled protein on the side, or as a substantial side dish at a larger meal.
What Can I Serve With Cold Mexican Pasta Salad?
This salad is genuinely versatile and plays well with many different main dishes. Here are my favorite combinations based on what I’m eating that week.
- Grilled chicken breast – A simple lime-seasoned grilled chicken breast turns this from a vegetarian dish into a balanced main course. The salad provides vegetables and whole grains; the chicken provides lean protein.
- Baked white fish – Grilled or baked halibut, cod, or salmon pairs beautifully. The fish’s richness balances the bright acidity of the dressing. In Alaska, I often use fresh-caught salmon from the season.
- Crispy fish tacos – Try my baked fish taco recipe alongside this salad. The flavors complement perfectly, and you get textural variety from the crispy shell paired with the creamy salad.
- Quick quesadillas – Make my quick quesadillas recipe as an appetizer or side. The warm, crispy tortilla contrasts beautifully with the cool, creamy pasta salad.
- Grilled vegetables – Zucchini, bell peppers, or eggplant grilled until slightly charred add smokiness and balance the cool, creamy salad.
- Black bean burgers – A vegetarian-friendly option that echoes the beans already in the salad while adding substance and heartiness.
- Simply with warm tortillas – Sometimes I just serve this salad with warm flour or corn tortillas, letting people build their own fresh wraps. It’s casual, interactive, and absolutely delicious.

Cold Mexican Pasta Salad Recipe
Ingredients
Method
- Fill your large pot about three-quarters full with water. You want enough water that the pasta can move freely without sticking, but not so much that it takes 20 minutes to boil. Place the pot over high heat and wait for it to boil. While you're waiting (this takes about 8-10 minutes depending on your stove), begin chopping your vegetables. This isn't wasted time—you're being strategic and efficient. Start with items that won't brown or soften: dice your jalapeño, slice your green onions, and halve your cherry tomatoes. Chop your cilantro and set it aside separately since it bruises easily. Once the water reaches a rolling boil with large bubbles rapidly breaking the surface, add a generous pinch of salt (about 1 tablespoon for a full pot). The water should taste slightly salty, like the ocean. This is how you flavor the pasta itself, not just the outside. Add your pasta all at once and stir immediately with a wooden spoon for about 30 seconds to prevent sticking. Follow the package instructions for cooking time, but here's my pro tip: cook it for one minute less than the package says. The pasta should be tender but still have a slight firmness when you bite into it—this is called al dente. It prevents your salad from becoming mushy as the dressing sits on it.
- When your timer goes off, carefully pour the pasta into your colander. Let the hot water drain completely. Do not rinse it with cold water—that removes the starchy coating that helps your dressing stick to each piece. Instead, spread the warm pasta on a large plate or back into your empty pot and let it cool for about 3 minutes. This cooling step is important. Hot pasta will wilt fresh vegetables and cause avocado to brown prematurely. You don't need it ice-cold, just at a comfortable touch-temperature. If you're in a real hurry, you can proceed with slightly warm pasta, but cooled is genuinely better.
- Move your cooled pasta into your large serving bowl. Now add, in this order: your drained and rinsed black beans, corn, cherry tomatoes, green onions, jalapeño, and cilantro. Do not add the avocado yet—that comes last to prevent browning. At this point, your salad looks beautiful but might look a bit dry. That's exactly right. The dressing comes next, and it's going to bring everything together.
- In your small mixing bowl or measuring cup, combine your Greek yogurt, olive oil, lime zest, lime juice, hot sauce, salt, chili powder, and smoked paprika. Use a fork or whisk to stir everything together until you have a smooth, creamy mixture with no streaks of yogurt or oil visible. Taste it with a clean spoon. It should taste bright from the lime, creamy from the yogurt, with a gentle warm tingle from the chili powder and heat. Adjust to your preference: if it tastes flat, add more lime juice or salt. If it's too spicy, add more yogurt. If it needs more depth, add a pinch more chili powder. This is your moment to make it perfectly suited to your taste. Here's something important: the dressing might look thinner than you expect. That's completely normal. The Greek yogurt base is naturally thinner than mayo-based dressings, but it coats beautifully and won't make your salad heavy or dense.
- Pour your entire dressing over the pasta and vegetable mixture. Using a large spoon or wooden spoon, toss everything together gently but thoroughly. Every piece of pasta should be coated with creamy dressing. This takes about 1-2 minutes of tossing. Taste again with a clean spoon. Adjust salt, lime, or spice one final time if needed. Now you have two options: serve immediately while everything is cool and fresh, or cover and refrigerate for up to 2 hours. The flavors actually deepen and blend beautifully if you chill it, which is why I usually prepare this a few hours ahead when I'm having guests.
- Just before serving, dice your ripe avocados into bite-sized pieces and gently fold them into the salad. The gentleness matters here—you're trying to distribute them without breaking them into mush. Top everything with your crumbled feta cheese. The moment you combine the avocado is the moment you should serve this salad. It will taste wonderful for about 30 minutes, remain good for up to 2 hours, and start to look less vibrant after that. This isn't a problem—it still tastes delicious—but if appearance matters for your meal, add the avocado as late as possible.
Notes
FAQs
Can I make this salad without avocado?
Absolutely, and I’ve done it many times when avocados weren’t available or when I was feeding a large group. The salad loses some creaminess but gains in other ways. I usually replace the avocado with diced cucumber (adds crispness), roasted red peppers (adds sweetness), or increase the feta slightly (adds creaminess and tang). The dressing remains creamy enough that the salad doesn’t feel naked without avocado.
What if I can’t find fresh cilantro?
Fresh cilantro is honestly important to this recipe’s character, but you have options. Dried cilantro is a distant second (use about 1 tablespoon dried for every ⅓ cup fresh). Parsley is a reasonable substitute if cilantro is truly unavailable—it’s milder but adds green freshness. Some people strongly dislike cilantro (it has a genetic component to how we taste it), so feel free to skip it entirely or replace it with fresh mint or basil if that’s your preference.
Can I use a different type of pasta?
Yes! I specified bow ties or elbow pasta because their shapes capture dressing beautifully, but spaghetti broken into pieces, penne, fusilli, or any small pasta shape works perfectly. The only pasta I’d avoid is long, flat ribbon pasta (like fettuccine) because it doesn’t hold dressing as well. Bronze-cut pasta (which has a rough texture) holds dressing better than smooth, polished pasta, so look for that if available.
Is this salad vegetarian or vegan?
As written, it’s vegetarian but not vegan (the Greek yogurt and feta contain dairy). To make it vegan, replace Greek yogurt with a dairy-free Greek yogurt alternative (Kite Hill makes an excellent one), and use a plant-based cheese crumble or simply omit the cheese entirely. The salad will be slightly less creamy but still absolutely delicious—the olive oil and avocado provide plenty of richness.
Can I add protein to make this a complete main course meal?
Definitely. Add grilled and cubed chicken breast, diced hardboiled eggs, or canned black beans (though beans are already in this version). Crumbled feta provides some protein, and Greek yogurt adds 15-20 grams per cup. If you’re eating this as a main dish without additional protein, the combination of whole wheat pasta, black beans, and Greek yogurt actually provides a respectable 14 grams of protein per serving.
How far in advance can I make this for a party?
You can prepare everything except the avocado and feta up to 24 hours in advance. Store the pasta mixture and dressing separately, then combine them about 2-4 hours before your guests arrive. Add the avocado and feta 10 minutes before serving. This approach keeps everything fresh-tasting while allowing you to prep during less stressful hours. I’ve been doing this for Alaskan summer gatherings for years, and it never fails.