Coconut Milk Custard Pie Recipe
This post contains affiliate links. As an Amazon Associate I earn from qualifying purchases.
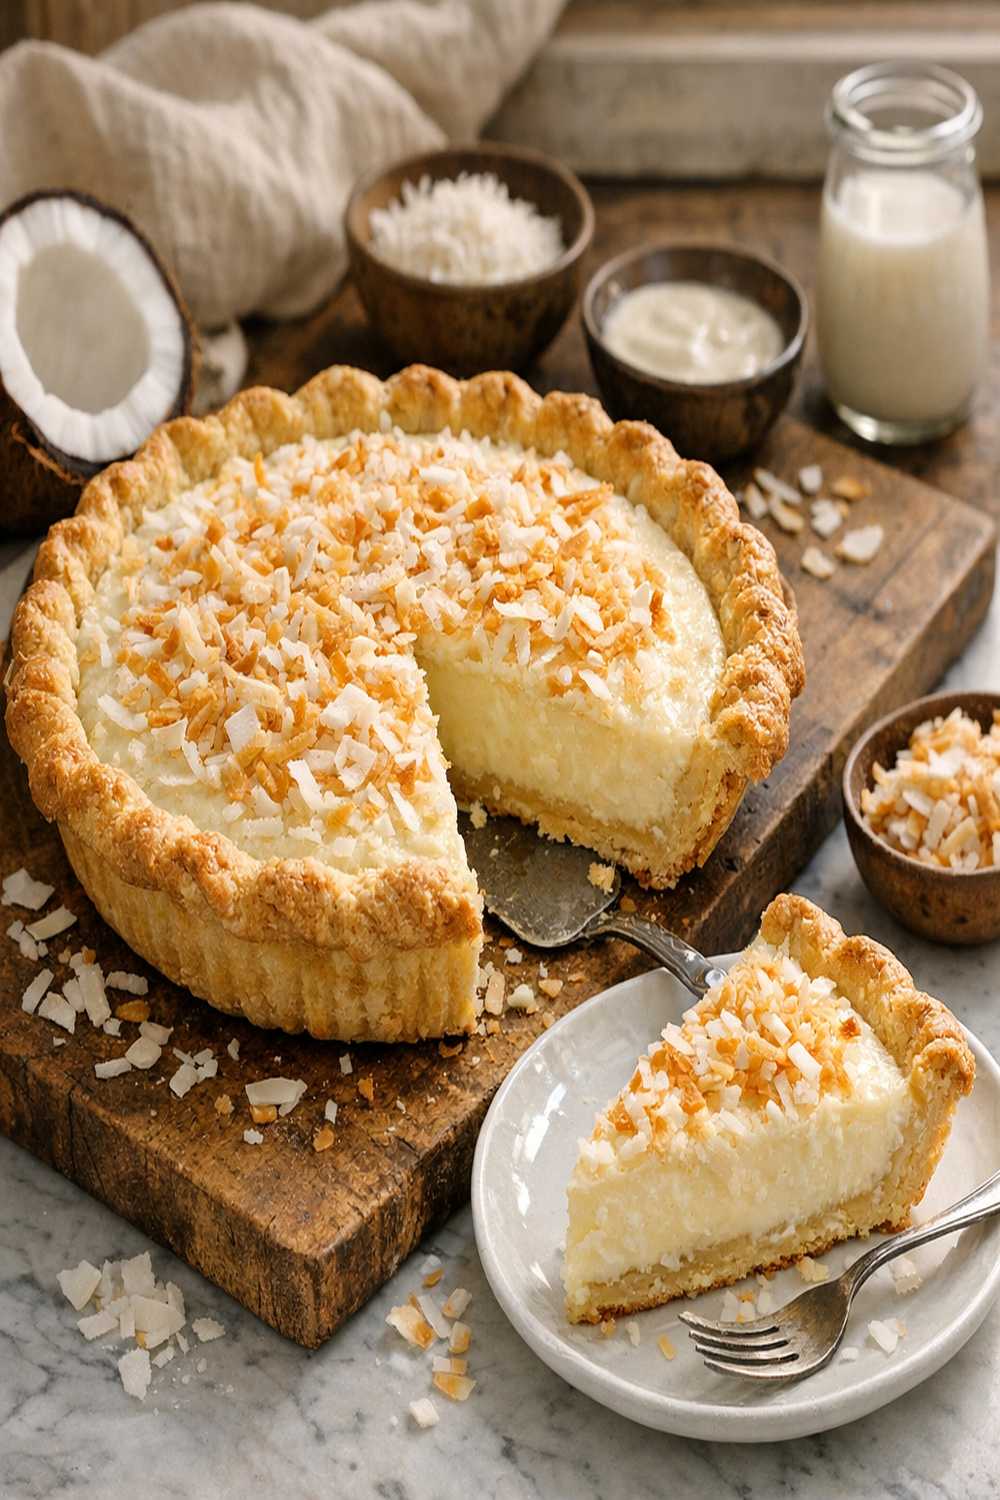
You’ve probably tried the traditional custard pie with its watery filling that separates after a day, or maybe the condensed coconut version that tastes cloyingly sweet. I spent years trying different approaches—some overcooked and rubbery, others underbaked with that unsettling wobble in the center. Then I developed this method, and honestly, it’s become my go-to for any gathering from intimate family dinners to community potlucks across Alaska.
This coconut milk custard pie combines the precision of proper blind-baking with the gentle heat control that prevents that dreaded custard curdling. The result? A silky, cloud-like filling with authentic coconut flavor that holds together beautifully. Let me walk you through exactly why this version works and how to nail it every single time.
Coconut Milk Custard Pie Recipe: Which Method Actually Works Best?
I’ve tested this recipe with three different approaches over the past five years—from my kitchen in Southeast Alaska to community cooking classes. The first method I tried was the traditional no-blind-bake approach, which seemed simpler. The second involved a higher oven temperature throughout. This third method, the one I’m sharing with you, combines proper crust preparation with intentional temperature management.
As a registered dietitian, I pay attention not just to how food tastes, but how our bodies respond to it. The cooking technique here actually affects nutrient retention and digestive comfort. That matters to me in every recipe I share.
The Methods Compared: A Honest Breakdown
Let me be completely transparent about what I’ve tested and why some methods fall short:
- No Blind-Bake Method (Traditional) – You skip pre-baking the crust and pour the custard directly into a raw shell. Sounds faster, but the bottom stays pale and soggy because it doesn’t get enough direct heat before the custard insulates it. The filling sets unevenly, and you’ll notice a gritty texture from undercooked flour in the crust. Best for: nobody, honestly. It’s a shortcut that costs you quality.
- High-Heat Throughout (375°F start to finish) – This method bakes everything at one temperature for convenience. The crust browns beautifully, but the custard edge sets too fast while the center remains undercooked. You get that curdled ring around the outside and a loose center that jiggles for days. Best for: experienced bakers who know exactly when to pull it and can monitor constantly.
- The Two-Temperature Method (This Recipe) – Toast the coconut separately at 325°F for color and aroma without burning. Blind-bake the crust at 375°F until it’s golden and structurally sound. Then pour the custard and bake at 375°F with careful monitoring. The crust is already set, so it browns without burning. The custard cooks evenly because the crust doesn’t need to firm up alongside it. Best for: anyone who wants reliability and restaurant-quality results in about 30 minutes active time.
Why This Version Beats the Rest
The magic here is sequence and temperature precision. When you blind-bake first, your crust develops a protective golden shell that stays crisp throughout. The custard then bakes into that ready-made structure instead of competing with raw dough for heat. You get a clean knife-test at 45-50 minutes instead of guessing whether the center is set.
The texture you’ll experience is genuinely silky—not grainy, not rubbery, not separated. The coconut distributes evenly instead of sinking to the bottom. The top develops a light golden color that looks like it came from a professional kitchen. And here’s what won me over: this pie slices cleanly. No collapse, no oozing custard running across your plate.
I grew up watching my grandmother pull pies from her kitchen in Juneau, and she always said the crust was non-negotiable. This method honors that wisdom by giving the crust the respect it deserves.
The Ingredients
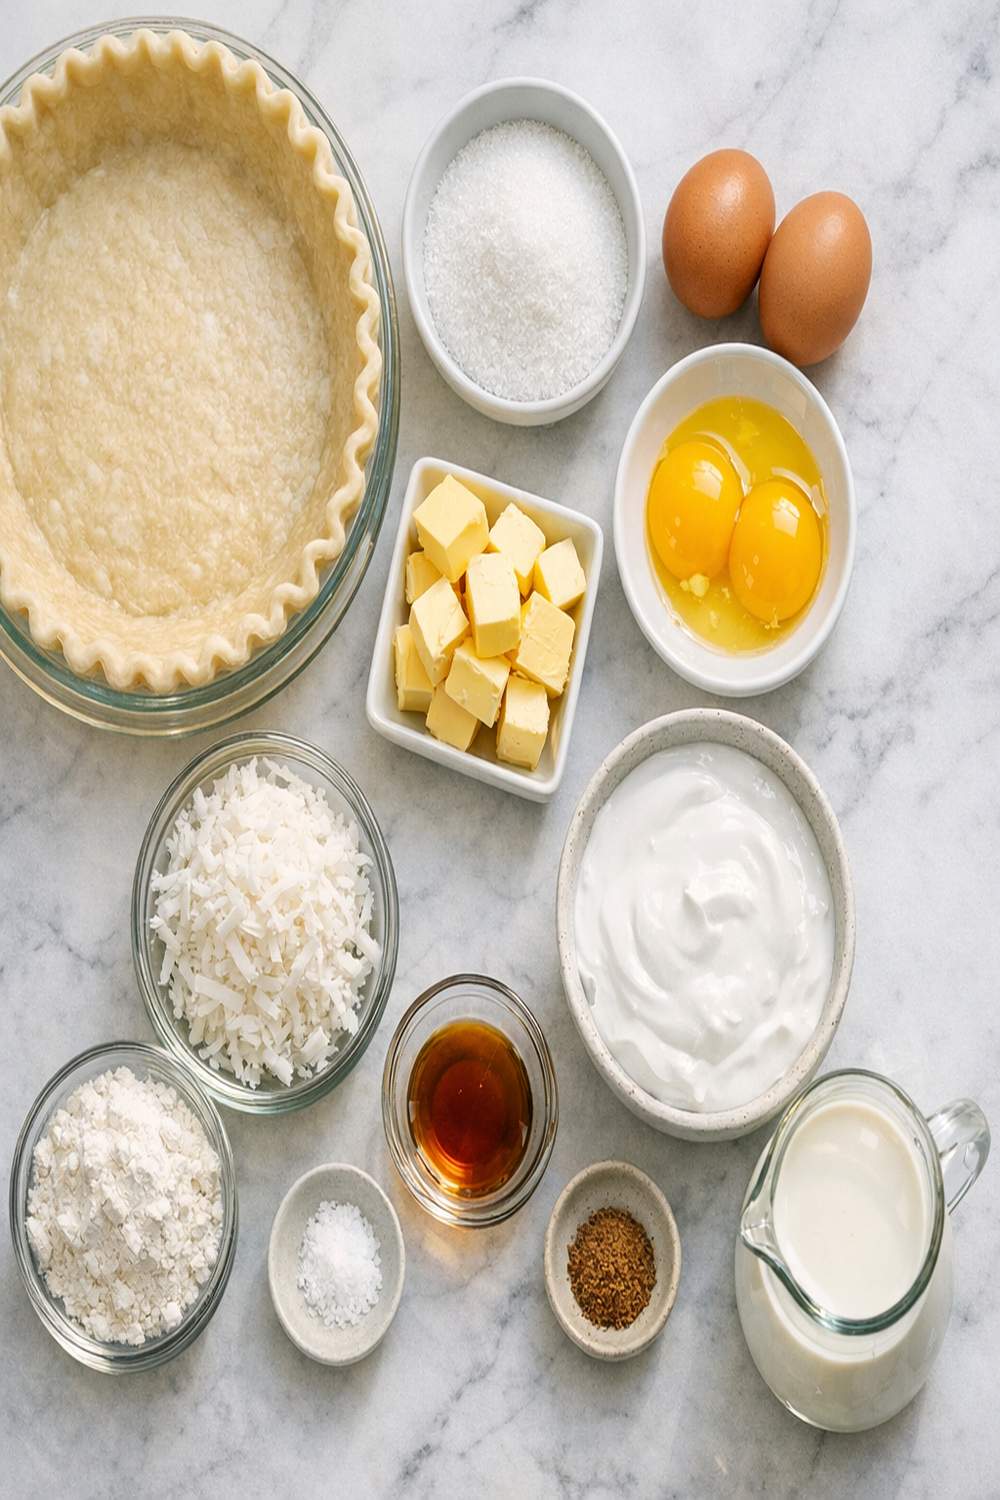
I’ve chosen these ingredients specifically to create balance—enough richness from the cream and egg yolks without the heaviness of a condensed milk custard. The fresh coconut you toast yourself tastes infinitely better than pre-toasted varieties that have oxidized in boxes. The sugar ratio gives you a custard that’s sweet without being cloying, and the vanilla-coconut combination lets both flavors shine without competing.
One critical difference from standard recipes: I use whole milk instead of all cream, which keeps the custard lighter while maintaining structure. Many recipes overload the cream, creating a custard that’s more like pudding than pie. Here, the cream adds just enough richness to set the filling properly without that heavy, dense mouthfeel.
- Pinch of ground nutmeg (optional, but adds warmth and sophistication)
- 1 teaspoon pure vanilla extract (not imitation, which tastes flat)
- ½ teaspoon coconut extract (optional but worth finding—adds depth)
- ¼ teaspoon sea salt (balances sweetness and enhances flavor)
- 1½ cups unsweetened shredded coconut (look for “angel flake” style, about 4 ounces)
- ½ recipe all-butter pie crust (homemade or quality store-bought, thawed if frozen)
- ½ to 1 cup granulated sugar (start with ½ cup and taste the mixture before adding more)
- Lightly-sweetened whipped cream for serving (homemade or quality store-bought)
- Additional toasted coconut for garnish (about ⅓ cup)
- 3 large eggs (room temperature—this prevents temperature shock when mixing)
- ½ cup heavy cream (for richness and proper custard set)
- 1½ cups whole milk (full-fat, not reduced or skim)
How to Make the Best Version of Coconut Milk Custard Pie Recipe
These steps aren’t just instructions—they’re the why behind each action. Every step prevents a common mistake I’ve seen in home kitchens.
Step 1: Toast Your Coconut Separately for Maximum Flavor
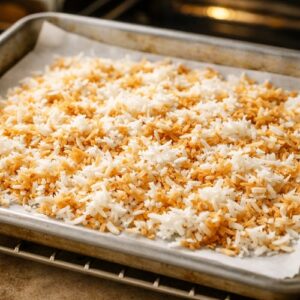
Preheat your oven to 325°F and spread the unsweetened coconut onto a parchment-lined baking sheet. This lower temperature is intentionally different from where you’ll bake the custard. At 325°F, the coconut browns slowly and evenly, developing deep nutty notes without the harsh burnt flavor that happens above 350°F.
Toast for 5-8 minutes, stirring once or twice halfway through. Watch closely—coconut can go from golden to burnt in literally 30 seconds. You’re looking for speckled golden flakes and that unmistakable toasty aroma. When it smells like you’re standing in a tropical bakery, it’s done. Set this aside.
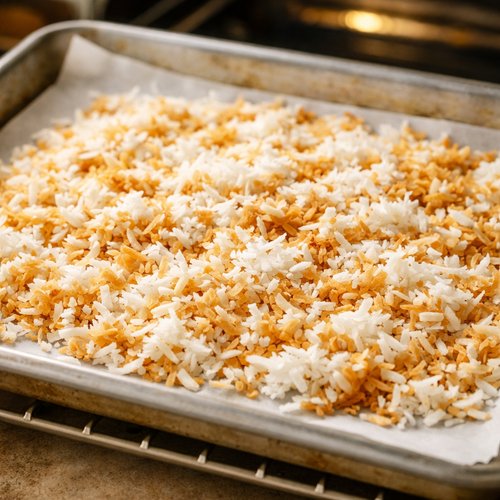
Why this matters: Most recipes add raw coconut to the filling, which never toasts properly because it’s insulated by the custard. Toasting separately brings out the coconut’s natural sweetness and complexity. It’s the difference between tasting “coconut flavoring” and tasting actual coconut.
Step 2: Increase Heat and Blind-Bake Your Crust
Now raise your oven temperature to 375°F. While it preheats, prepare your pie crust according to your recipe—either homemade or thawed frozen. Press it into a 9-inch pie plate, preferably metal rather than ceramic. Metal conducts heat more effectively and gives you a crispier, more evenly-browned crust.
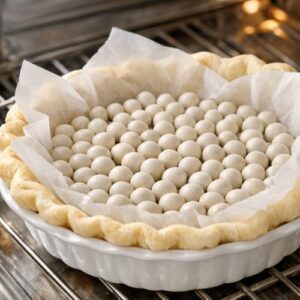
Blind-bake by lining the crust with parchment paper and filling it with pie weights (or dried beans if you don’t have weights). Bake for 12-15 minutes until the edges are light golden. Remove the weights and parchment, then bake for another 3-5 minutes until the bottom looks dry and pale golden. The crust should be partially set but not completely baked through.
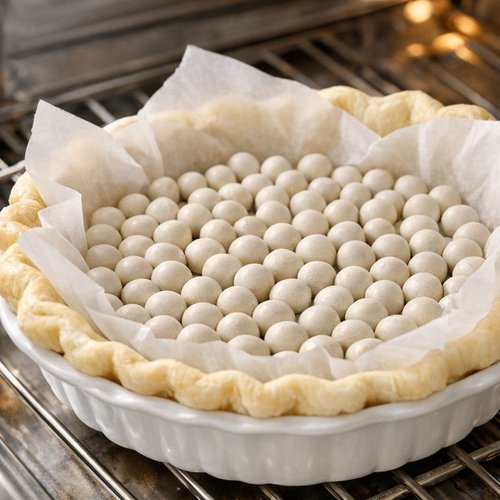
Why this matters: Blind-baking prevents sogginess and ensures the crust sets before the custard weight pressures it. The partial bake means it won’t overbake when the custard goes in. You’re creating a structure, not just a shell.
Step 3: Prepare Your Custard Base While Crust Bakes
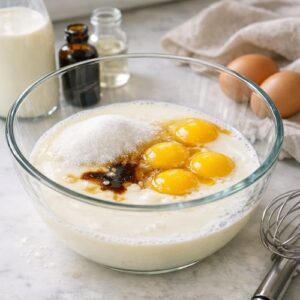
While the crust is in the oven, combine your whole milk, eggs, sugar, vanilla extract, coconut extract (if using), and sea salt in a large mixing bowl. Whisk these together thoroughly—this is important for smooth texture—until the mixture is well combined and the sugar has mostly dissolved.
The room-temperature eggs are crucial here. Cold eggs cause temperature shock when you add the warm custard base to the hot crust, which can cause uneven cooking. Let them sit on your counter for 15 minutes before you start if they’re straight from the refrigerator.
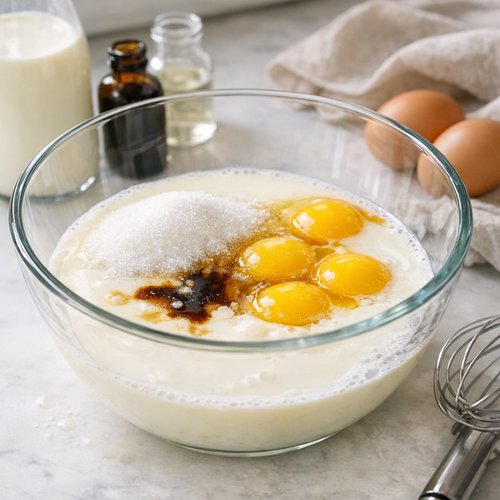
Why this matters: Proper whisking creates an emulsion that helps the custard set evenly. Under-whisked custard can have streaky texture or separate during baking.
Step 4: Add Your Star Ingredients and Combine
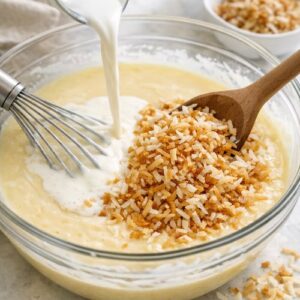
Pour the heavy cream into your custard mixture and stir to combine. Then fold in your toasted coconut—the same coconut you toasted 15 minutes ago when you started the process. The residual heat from the coconut gently warm your mixture without cooking it, which is perfect.
Stir gently but thoroughly so the coconut is evenly distributed throughout the filling. This is where patience pays off. Quick, aggressive stirring can incorporate too much air, which leads to bubbles in your baked custard (cosmetic issue) or small pockets of air that create uneven texture.
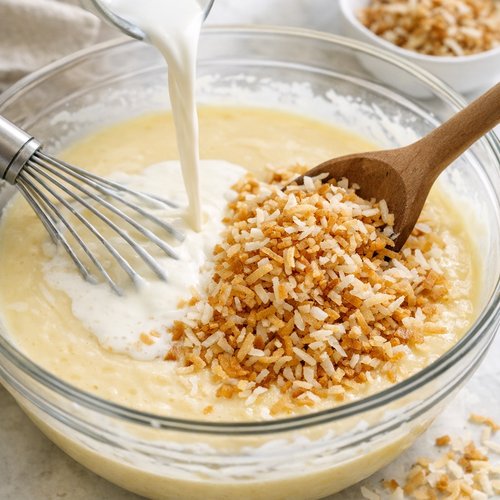
Why this matters: The toasted coconut needs to distribute evenly so you get coconut flavor in every bite. Uneven distribution means some bites taste like plain custard and others taste overly coconut-forward.
Step 5: Pour and Protect the Edges
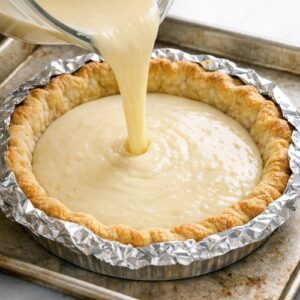
Pour your filling into the blind-baked pie crust. If you’re reusing the same baking sheet from toasting (wash it first!), place it back on your oven rack. This catches any spills and creates a larger thermal mass that helps the bottom of your pie bake evenly.
Place a pie crust shield over the edges of your crust, or cover just the edge with foil. This is non-negotiable if you want a golden crust that isn’t burnt. The edges cook much faster than the center, so protecting them ensures they stay golden while the filling sets.
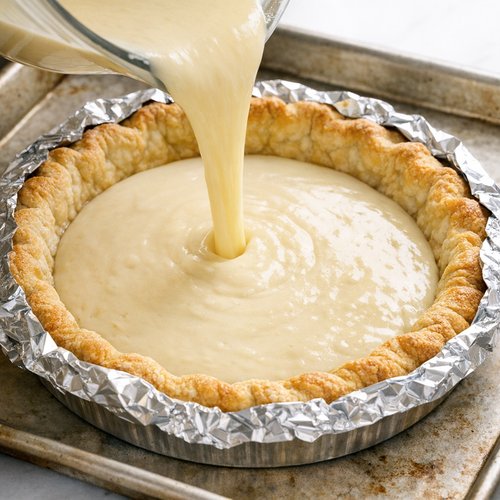
Why this matters: Unprotected edges burn because they’re exposed to direct oven heat and have no custard insulation. Protected edges bake to a perfect golden color. You can remove the shield or foil 10 minutes before the pie finishes baking if you want a bit more color.
Step 6: Bake With Precision Timing
Bake at 375°F for 45-50 minutes. The pie is done when a knife inserted into the center comes out clean or with just a tiny amount of custard clinging to it. The very center might jiggle slightly when you gently shake the oven rack, but it should not be a full liquid jiggle. Think of the consistency of barely-set gelatin.
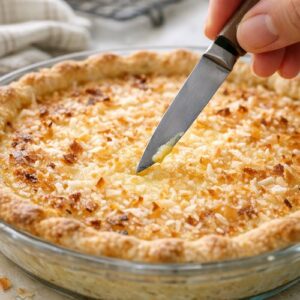
At 45 minutes, insert a knife into the center (between 12 and 1 o’clock, away from where you’ll slice). If it comes out clean, you’re done. If it still has liquid custard clinging to it, give it another 3-5 minutes. Every oven is different, so trust the knife test over the timer.
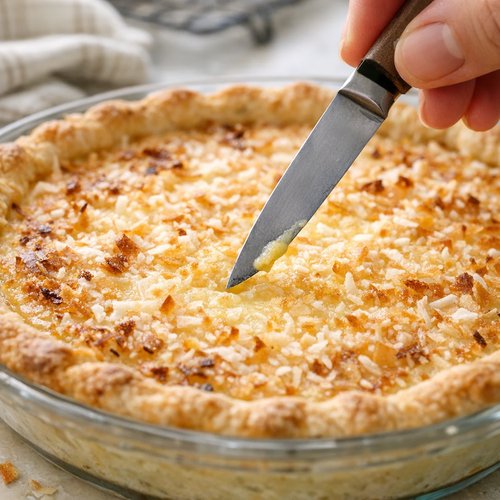
Why this matters: Overbaked custard becomes rubbery and separated. Underbaked custard is unsafe and has wrong texture. The knife test gives you certainty instead of guessing. A knife works better than a toothpick because it transfers heat slightly, giving you a more accurate reading.
Step 7: Cool and Chill for Best Flavor and Structure
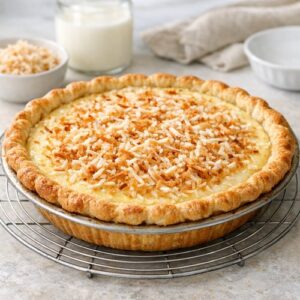
Remove the pie from the oven and let it cool to room temperature on a wire rack—about 2-3 hours. Don’t refrigerate it while it’s still warm, which creates condensation and makes the crust soggy. Once it’s completely cool, cover it loosely with plastic wrap and refrigerate for at least 4 hours, ideally overnight.
The chilling time isn’t just about temperature. It’s when the custard fully sets and the flavors develop and mellow. A custard pie tastes noticeably better the day after baking because the flavors have integrated and the texture has fully set.
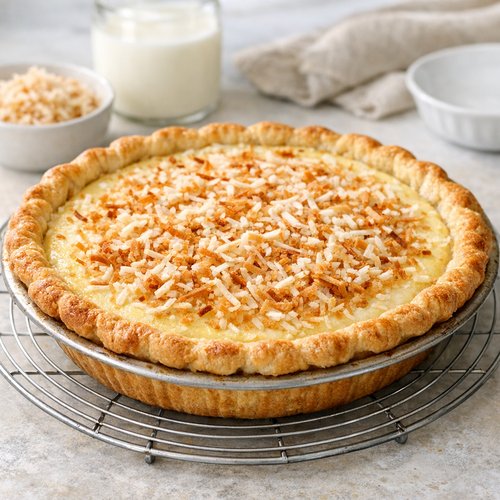
Why this matters: Chilling allows the custard to reach its final texture and flavor profile. Warm custard tastes different—the sweetness is more pronounced and the coconut flavor is harsher. Cold custard tastes balanced and refined. This is when you know your pie is actually finished cooking, even though the oven baking is done.
Side-by-Side Results: What to Expect
When you use this method correctly, your pie will have a golden-brown, crisp crust that doesn’t taste like raw flour or have any sogginess underneath. The custard will be silky and pale yellow, almost translucent when you look at a slice held up to light. The coconut will be distributed throughout, not sunk to the bottom or floating on top.
The texture when you bite into it should be creamy but not heavy—it should cut cleanly with your fork without oozing. The flavor should be subtly sweet with a pronounced coconut flavor that doesn’t taste artificial. You’ll taste the vanilla as a supporting note, not the main event. There should be absolutely no grittiness, no watery separation, no rubbery edges.
If you try an inferior method, here’s what you’ll notice: soggy crust, watery custard that separates from the filling, coconut that’s all sunk to the bottom, possible burnt crust edges, and custard that has a slightly curdled or grainy texture. The difference is like night and day once you’ve experienced the right version.
When to Use Each Method
- You’re feeding a crowd and need the most reliable result: Use this two-temperature method every time. The blind-baking eliminates variables. You’ll get consistent, beautiful results even if you’ve never made custard pie before.
- You’re experienced and want the fastest route: The high-heat method can work if you watch constantly and remove the pie exactly when the center is barely set. But honestly, the time savings (maybe 5 minutes) isn’t worth the risk of an underbaked center or burnt edges.
- You want something you can make completely from scratch in one hour: Use this method and a store-bought pie crust. The blind-baking only takes 20 minutes, the filling comes together in 5 minutes, and the final bake is 45-50 minutes. You’ll be slicing pie in about 3 hours total (including cooling), with only 30 minutes of active work.
Can I Store Coconut Milk Custard Pie Recipe?
Yes, and proper storage is crucial for both food safety and taste. Keep the pie refrigerated in a covered container for up to 3 days. The custard will stay perfectly creamy, and the crust will remain crisp if you store it uncovered or loosely covered for the first 2 hours of cooling, then sealed after that.
Don’t freeze custard pie. The freezing process breaks down the emulsion, and you’ll get watery, separated custard when it thaws. It’s not unsafe, just textually disappointing.
Slices keep for 2 days in the refrigerator when individually wrapped in plastic wrap. The flavor actually improves on day 2, so plan to make this pie at least a day ahead of when you want to serve it. This is one of the few desserts that genuinely tastes better when given time to settle.
Expert’s Nutritional Insight
As a registered dietitian, I want you to understand what you’re eating, not just how it tastes. This pie uses whole eggs and heavy cream, which means you’re getting choline (essential for brain health) and conjugated linoleic acid (which some research suggests supports healthy body composition). The coconut provides medium-chain triglycerides that your body metabolizes differently than long-chain fats, meaning they’re used for energy rather than stored.
Most commercial custard pies use cornstarch or tapioca starch as thickeners, which adds refined carbohydrates without nutritional value. This recipe relies on egg proteins to set the custard, so you’re getting complete proteins instead of empty starches. One slice contains about 12 grams of protein compared to 2-3 grams in a typical custard pie.
The sugar content is reasonable here—about 15 grams per slice when divided into 8 slices. That’s similar to a piece of fruit. The key is that you’re pairing it with fat and protein, which slows sugar absorption and prevents blood sugar spikes.
Make-Ahead Guide: Plan Your Pie Like a Professional
Up to 2 days ahead: Make your pie crust dough and refrigerate it wrapped in plastic wrap. This actually improves the crust because the gluten relaxes and the butter becomes evenly distributed.
Up to 1 day ahead: Roll out your pie crust, press it into the pie plate, and refrigerate it covered. Blind-bake it the next morning. You can also toast your coconut and store it in an airtight container.
Morning of service: Blind-bake your crust (20 minutes), prepare your custard filling (10 minutes), and pop the filled pie into the oven. It will be cooled to room temperature by early afternoon and chilled by dinner time.
The night before service (best option): Complete the entire pie from start to finish. Let it chill overnight. The flavors will be deeper and the texture more refined than a same-day pie. Bring it to the table confident that every technical step is already done.
Common Mistakes to Avoid
Mistake 1: Using Pre-Toasted Coconut – Store-bought pre-toasted coconut has oxidized in the bag, losing flavor and sometimes developing off-tastes. When you toast it fresh, you get vibrant coconut flavor that transforms the whole pie. Yes, it’s an extra step, but it’s a 10-minute step that makes an enormous difference.
Mistake 2: Skipping the Blind-Bake or Rushing It – I’ve seen people try to save 20 minutes by baking the crust and filling together. The result is always a soggy bottom and uneven baking. Blind-baking takes time because it needs to happen at your full baking temperature. Don’t shortcut it.
Mistake 3: Using Cold Eggs – Cold eggs resist mixing and can cause grainy texture when they eventually heat up. Room-temperature eggs incorporate smoothly and cook evenly. Set them on your counter while you prep everything else.
Mistake 4: Not Using a Crust Shield – I’ve watched people create burnt crusts and then blame the recipe instead of recognizing that exposed edges cook faster than the center. A crust shield costs $8 and prevents nearly every burnt-edge disaster. It’s the single best investment for pie-making.
What Can I Serve With Coconut Milk Custard Pie Recipe?
This pie is elegant enough to stand alone, but it’s even better with thoughtful accompaniments. The tropical flavors pair beautifully with both light and rich additions.
- Lightly-sweetened whipped cream – Make your own by whipping heavy cream with 1 tablespoon powdered sugar and ½ teaspoon vanilla extract. It’s fresher than store-bought and lets the pie shine instead of competing with it.
- Toasted coconut flakes for garnish – Sprinkle ⅓ cup additional toasted coconut over each slice just before serving. It adds texture and visual appeal, plus reinforces the coconut flavor.
- A small scoop of vanilla ice cream – The cold temperature and creamy texture complement the warm, silky custard. Use quality vanilla ice cream with real vanilla specks if possible.
- Passion fruit coulis – Strain passion fruit pulp and mix with a touch of honey. The tartness brightens the sweetness of the pie and adds a tropical twist that feels sophisticated.
- Alongside a cup of strong coffee – The bitter notes of coffee cut through the sweetness perfectly. This is how custard pie is traditionally served, and for good reason.
If you want to explore complementary flavors, consider pairing this pie with Champagne Cookies, which echo the elegant, slightly sweet notes of this custard. Or serve it alongside lighter appetizers like the my favorite salad for a brunch gathering where the pie is the star dessert.
Seasonal Variations: Adapt This Recipe Year-Round
Spring Version: Add the zest of 2 limes to your custard base and replace ¼ cup of the milk with fresh lime juice. This brightens the coconut flavor and makes the pie taste fresher and lighter. Perfect for Easter or May celebrations.
Summer Version: Toast your coconut with a pinch of sea salt instead of plain. This creates a salted-coconut custard that feels more sophisticated. Add fresh passion fruit coulis on top of each slice. The tartness balances the richness beautifully.
Fall Version: Add ½ teaspoon ground cardamom and ¼ teaspoon ground ginger to your filling. These warm spices complement coconut beautifully and make the pie feel more autumnal. Serve with cinnamon whipped cream instead of plain.
Winter Version: Add a pinch of ground clove and increase the nutmeg to ¼ teaspoon. Include 1 tablespoon of dark rum (optional but adds depth) in your filling. Serve with hot spiced cream or alongside warm cinnamon-dusted whipped cream. This version feels festive and warming.

Coconut Milk Custard Pie Recipe
Ingredients
Method
- Preheat your oven to 325°F and spread the unsweetened coconut onto a parchment-lined baking sheet. This lower temperature is intentionally different from where you'll bake the custard. At 325°F, the coconut browns slowly and evenly, developing deep nutty notes without the harsh burnt flavor that happens above 350°F. Toast for 5-8 minutes, stirring once or twice halfway through. Watch closely—coconut can go from golden to burnt in literally 30 seconds. You're looking for speckled golden flakes and that unmistakable toasty aroma. When it smells like you're standing in a tropical bakery, it's done. Set this aside. Why this matters: Most recipes add raw coconut to the filling, which never toasts properly because it's insulated by the custard. Toasting separately brings out the coconut's natural sweetness and complexity. It's the difference between tasting "coconut flavoring" and tasting actual coconut.
- Now raise your oven temperature to 375°F. While it preheats, prepare your pie crust according to your recipe—either homemade or thawed frozen. Press it into a 9-inch pie plate, preferably metal rather than ceramic. Metal conducts heat more effectively and gives you a crispier, more evenly-browned crust. Blind-bake by lining the crust with parchment paper and filling it with pie weights (or dried beans if you don't have weights). Bake for 12-15 minutes until the edges are light golden. Remove the weights and parchment, then bake for another 3-5 minutes until the bottom looks dry and pale golden. The crust should be partially set but not completely baked through. Why this matters: Blind-baking prevents sogginess and ensures the crust sets before the custard weight pressures it. The partial bake means it won't overbake when the custard goes in. You're creating a structure, not just a shell.
- While the crust is in the oven, combine your whole milk, eggs, sugar, vanilla extract, coconut extract (if using), and sea salt in a large mixing bowl. Whisk these together thoroughly—this is important for smooth texture—until the mixture is well combined and the sugar has mostly dissolved. The room-temperature eggs are crucial here. Cold eggs cause temperature shock when you add the warm custard base to the hot crust, which can cause uneven cooking. Let them sit on your counter for 15 minutes before you start if they're straight from the refrigerator. Why this matters: Proper whisking creates an emulsion that helps the custard set evenly. Under-whisked custard can have streaky texture or separate during baking.
- Pour the heavy cream into your custard mixture and stir to combine. Then fold in your toasted coconut—the same coconut you toasted 15 minutes ago when you started the process. The residual heat from the coconut gently warm your mixture without cooking it, which is perfect. Stir gently but thoroughly so the coconut is evenly distributed throughout the filling. This is where patience pays off. Quick, aggressive stirring can incorporate too much air, which leads to bubbles in your baked custard (cosmetic issue) or small pockets of air that create uneven texture. Why this matters: The toasted coconut needs to distribute evenly so you get coconut flavor in every bite. Uneven distribution means some bites taste like plain custard and others taste overly coconut-forward.
- Pour your filling into the blind-baked pie crust. If you're reusing the same baking sheet from toasting (wash it first!), place it back on your oven rack. This catches any spills and creates a larger thermal mass that helps the bottom of your pie bake evenly. Place a pie crust shield over the edges of your crust, or cover just the edge with foil. This is non-negotiable if you want a golden crust that isn't burnt. The edges cook much faster than the center, so protecting them ensures they stay golden while the filling sets. Why this matters: Unprotected edges burn because they're exposed to direct oven heat and have no custard insulation. Protected edges bake to a perfect golden color. You can remove the shield or foil 10 minutes before the pie finishes baking if you want a bit more color.
- Bake at 375°F for 45-50 minutes. The pie is done when a knife inserted into the center comes out clean or with just a tiny amount of custard clinging to it. The very center might jiggle slightly when you gently shake the oven rack, but it should not be a full liquid jiggle. Think of the consistency of barely-set gelatin. At 45 minutes, insert a knife into the center (between 12 and 1 o'clock, away from where you'll slice). If it comes out clean, you're done. If it still has liquid custard clinging to it, give it another 3-5 minutes. Every oven is different, so trust the knife test over the timer. Why this matters: Overbaked custard becomes rubbery and separated. Underbaked custard is unsafe and has wrong texture. The knife test gives you certainty instead of guessing. A knife works better than a toothpick because it transfers heat slightly, giving you a more accurate reading.
- Remove the pie from the oven and let it cool to room temperature on a wire rack—about 2-3 hours. Don't refrigerate it while it's still warm, which creates condensation and makes the crust soggy. Once it's completely cool, cover it loosely with plastic wrap and refrigerate for at least 4 hours, ideally overnight. The chilling time isn't just about temperature. It's when the custard fully sets and the flavors develop and mellow. A custard pie tastes noticeably better the day after baking because the flavors have integrated and the texture has fully set. Why this matters: Chilling allows the custard to reach its final texture and flavor profile. Warm custard tastes different—the sweetness is more pronounced and the coconut flavor is harsher. Cold custard tastes balanced and refined. This is when you know your pie is actually finished cooking, even though the oven baking is done.
FAQs
Why does my custard pie have a watery layer at the bottom?
This happens when the custard isn’t fully set or when you haven’t blind-baked your crust. The filling needs to reach an internal temperature of about 160°F to set properly. Use the knife test rather than timing—every oven is different. Also, watery custard happens when you refrigerate a warm pie. Always cool it to room temperature first, which takes about 3 hours.
Can I use sweetened coconut instead of unsweetened?
Technically yes, but I’d reduce your sugar by ¼ cup. Sweetened coconut is already sweetened with sugar or corn syrup, so your final pie could be too sweet. Unsweetened coconut gives you control over sweetness level and tastes more authentically coconut. Plus, when you toast unsweetened coconut, it develops nutty notes that sweetened varieties never achieve.
What’s the difference between coconut extract and coconut milk?
Coconut extract is a concentrated flavoring made from coconut oil and alcohol—it adds intense coconut flavor to custard. Coconut milk is the cream extracted from grated coconut, much thicker and creamier. I use coconut extract (½ teaspoon) for flavor intensity and heavy cream for richness, rather than substituting coconut milk. This gives you better texture control and cleaner flavor.
How do I know if my pie is done without opening the oven door constantly?
Use the knife test starting around 45 minutes. Insert it into the center and pull it out. If it comes out clean or with just a tiny amount of custard clinging to it, you’re done. If it’s dripping with liquid custard, give it 3-5 more minutes. The pie keeps cooking slightly after you remove it from the oven (carryover cooking), so it’s actually better to slightly underbake than to overbake. An underbaked pie firms up as it cools; an overbaked pie stays rubbery.
Can I make this pie with a store-bought crust?
Absolutely. Use a thawed pie crust from the freezer section and blind-bake it according to package directions or the instructions in this recipe. Quality store-bought crusts (especially all-butter versions) produce excellent results. The custard is what makes this pie special, so there’s no shame in using a shortcut for the crust if you’re short on time.
More Recipes You’ll Love
- Champagne Cookies Recipe – elegant, slightly sweet cookies that pair beautifully with custard pie for an elegant tea service
- Best Chicken Salad With Greek Yogurt Recipe – serve this as a light brunch option before featuring the custard pie as your dessert
- this cozy soup – a light, fresh option if you’re planning a full meal around your pie service
Final Thoughts: This Is Your Coconut Pie Standard Now
I grew up in a kitchen where pies weren’t just desserts—they were the measure of a cook’s skill. My grandmother knew that a truly great pie meant respecting every component, from the butter in the crust to the timing of the bake. This recipe honors that philosophy while using modern techniques that guarantee success.
You now have a method that eliminates guesswork, prevents common failures, and produces a pie that tastes like you’ve been making custard pies for decades. The blind-baking ensures a crisp crust. The separate toasting of coconut brings out flavors you’ve probably never experienced in a custard pie. The two-temperature approach gives you even baking and the silky texture that separates good custard pie from exceptional custard pie.
Make this pie for someone you want to impress. Make it for yourself on a Sunday afternoon. Make it in the spring with lime, in the fall with cardamom, in the winter with warming spices. This is the recipe you’ll return to again and again, and every time you make it, you’ll understand why proper technique matters so much in baking.
Happy Cooking!