Club Cracker Christmas Crack Recipe
This post contains affiliate links. As an Amazon Associate I earn from qualifying purchases.
Picture this: it’s mid-December in Anchorage, snow piling up outside the kitchen window, and I’m preparing for my annual holiday open house. My guests will arrive in three hours, and I need something that looks like I spent all day in the kitchen—but honestly takes just 30 minutes to assemble. That’s when club cracker Christmas crack comes to mind. It’s the kind of showstopper that bridges my love for Alaskan tradition with modern entertaining. The buttery toffee base, layers of melted chocolate, and white chocolate drizzle create something that tastes far more complex than the effort required. Whether you’re hosting a cozy family gathering or need an impressive contribution to a potluck, this recipe delivers every single time. I’ve also learned that pairing it alongside something refreshing like a Tom Collins Cocktail makes the whole experience feel elevated and intentional.
Club Cracker Christmas Crack Recipe That Will Steal the Show at Your Next Dinner Party
I’ll never forget the first time I made this at 22, fresh out of my dietetics program and trying to prove I could host a “sophisticated” holiday party. My mentor had shared her version, and I was convinced it would be too difficult. That night, watching my guests’ faces light up as they bit into that crispy-yet-gooey first piece—while having no idea I’d made it in under an hour—changed everything. Since then, I’ve made it for Christmas parties, Thanksgiving potlucks, office celebrations, and quiet moments when I just need something that feels celebratory. The magic isn’t in complexity; it’s in understanding how simple ingredients transform when they’re layered with intention. This isn’t fancy cooking. This is practical, achievable kitchen magic that honors both nutrition and joy.
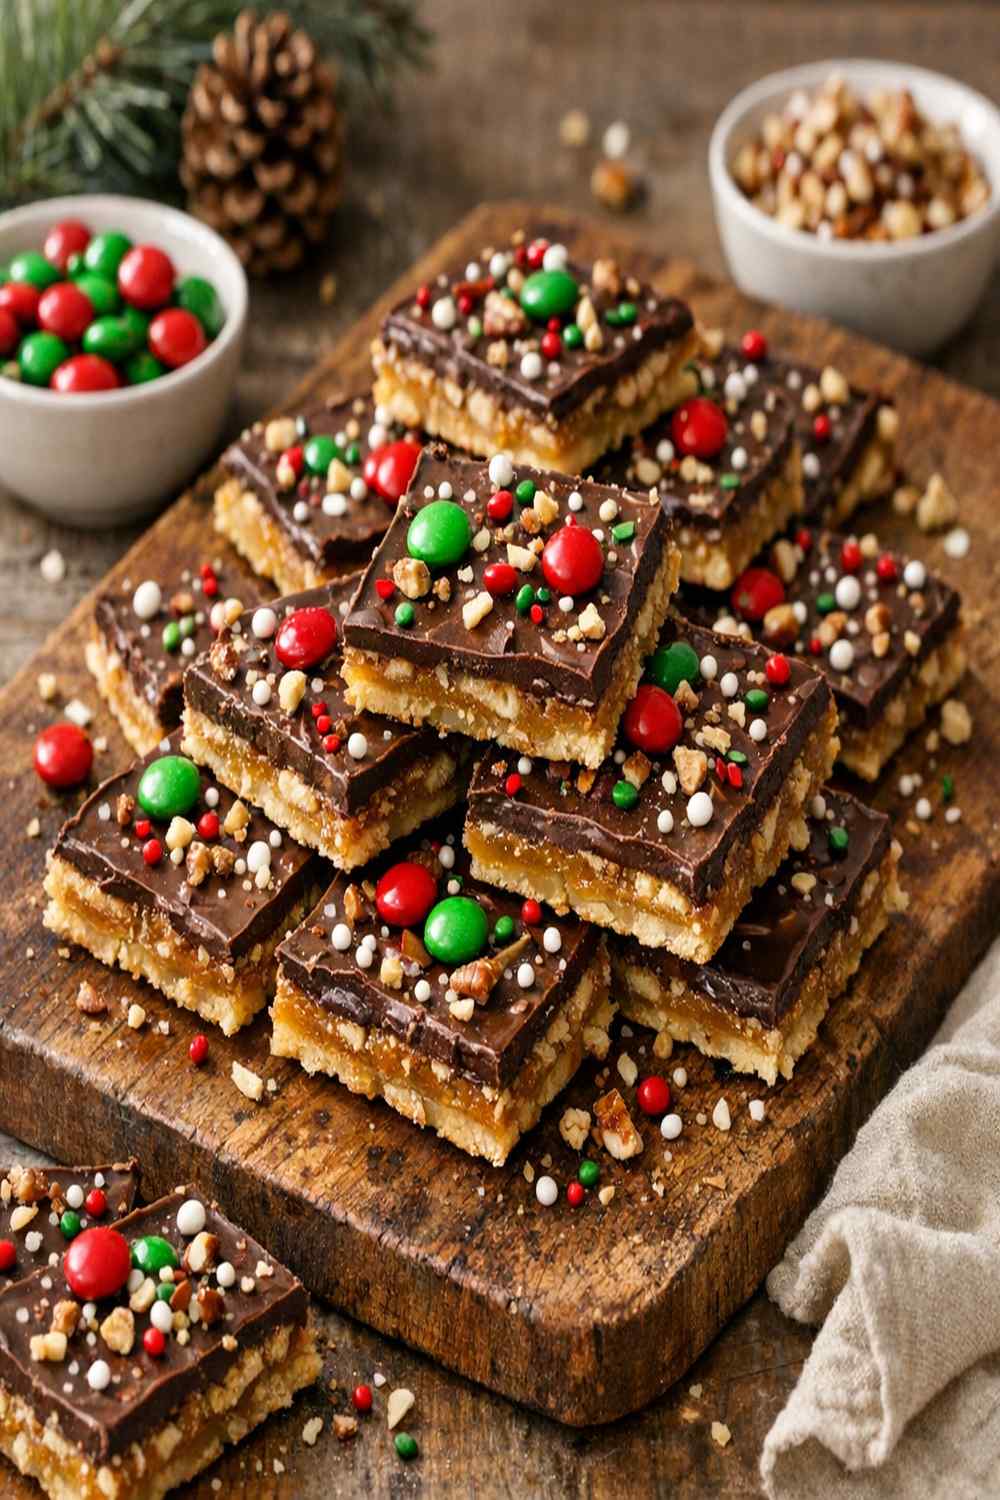
When to Make Club Cracker Christmas Crack Recipe
This treat is incredibly versatile and fits into so many moments throughout the year. Let me paint the specific occasions where this recipe truly shines and makes you feel like a culinary magician.
- Holiday open houses and December entertaining – This is the obvious one. It’s festive, requires no reheating, travels beautifully, and guests expect something sweet. You can make it three days ahead, which takes stress off your timeline.
- Last-minute hostess gifts or potluck contributions – Store it in a clear container with a simple ribbon, and you’ve got an elegant gift that took 30 minutes of active work. No one will suspect how easy it was.
- Cozy weeknight gatherings with close friends – When you’re having people over casually and want something that feels special without the fuss, this fits perfectly between a savory main and coffee service.
- New Year’s Eve parties before midnight – It’s festive, doesn’t require last-minute preparation, and pairs beautifully with champagne or cocktails.
- Gift-giving during the winter season – Package it in wax paper-lined boxes tied with twine. In Alaska, when daylight is scarce and morale needs boosting, homemade treats feel deeply personal.
- Office celebrations and workplace events – It looks professionally made, travels safely in a container, and disappears quickly from potluck tables.
What Makes This Club Cracker Christmas Crack Recipe Special
From a nutritional perspective, I think about this as intentional indulgence rather than mindless snacking. The combination of salty crackers with sweet toffee, chocolate, and white chocolate creates what I call “flavor complexity”—meaning your palate stays engaged longer, you’re satisfied with less, and you’re more likely to savor each piece rather than consume mechanically. The buttery toffee layer bridges the cracker and chocolate in a way that creates textural interest—crispy, chewy, and smooth all at once.
What truly elevates this recipe is understanding the science behind the toffee layer. When butter and brown sugar boil for exactly three minutes, the sugars caramelize to the perfect point: deep flavor without bitterness, and a set that’s firm but not rock-hard. Many home cooks either undercook (leaving it too soft) or overcook (creating something tough). That three-minute window is crucial, and it’s the difference between “nice treat” and “why does everyone ask for this recipe?”
The chocolate layering matters too. Dark chocolate and toffee bits create bittersweet contrast, while the white chocolate drizzle adds visual elegance and another layer of sweetness. This isn’t random stacking—it’s intentional flavor architecture. And because it travels well, keeps for days, and requires zero reheating, it honors the practical realities of holiday entertaining.
Scaling for Your Crowd
The beauty of this recipe is how easily it scales. I’ve made it for intimate dinner parties of six and office celebrations of fifty. Here’s how to adjust quantities and baking time based on your crowd size.
- For 8-12 people (intimate gathering) – Use the full recipe as written. One batch on a standard rimmed sheet pan feeds this size perfectly, with about four to five pieces per person. Bake for exactly five minutes at 375°F, and chill for two hours in the refrigerator.
- For 20-30 people (cocktail party or larger event) – Double the entire recipe and use two rimmed sheet pans, baking them simultaneously on separate racks. Rotate pans halfway through the five-minute bake time to ensure even caramelization. Chill both pans for at least two hours, then break and store together in one large airtight container layered with parchment.
- For 40+ people (office event or major celebration) – Triple the recipe across three pans. Bake in batches if your oven space is limited, keeping finished pans in the refrigerator while the others cook. This approach also allows you to stagger preparation over two days if needed.
The Ingredients
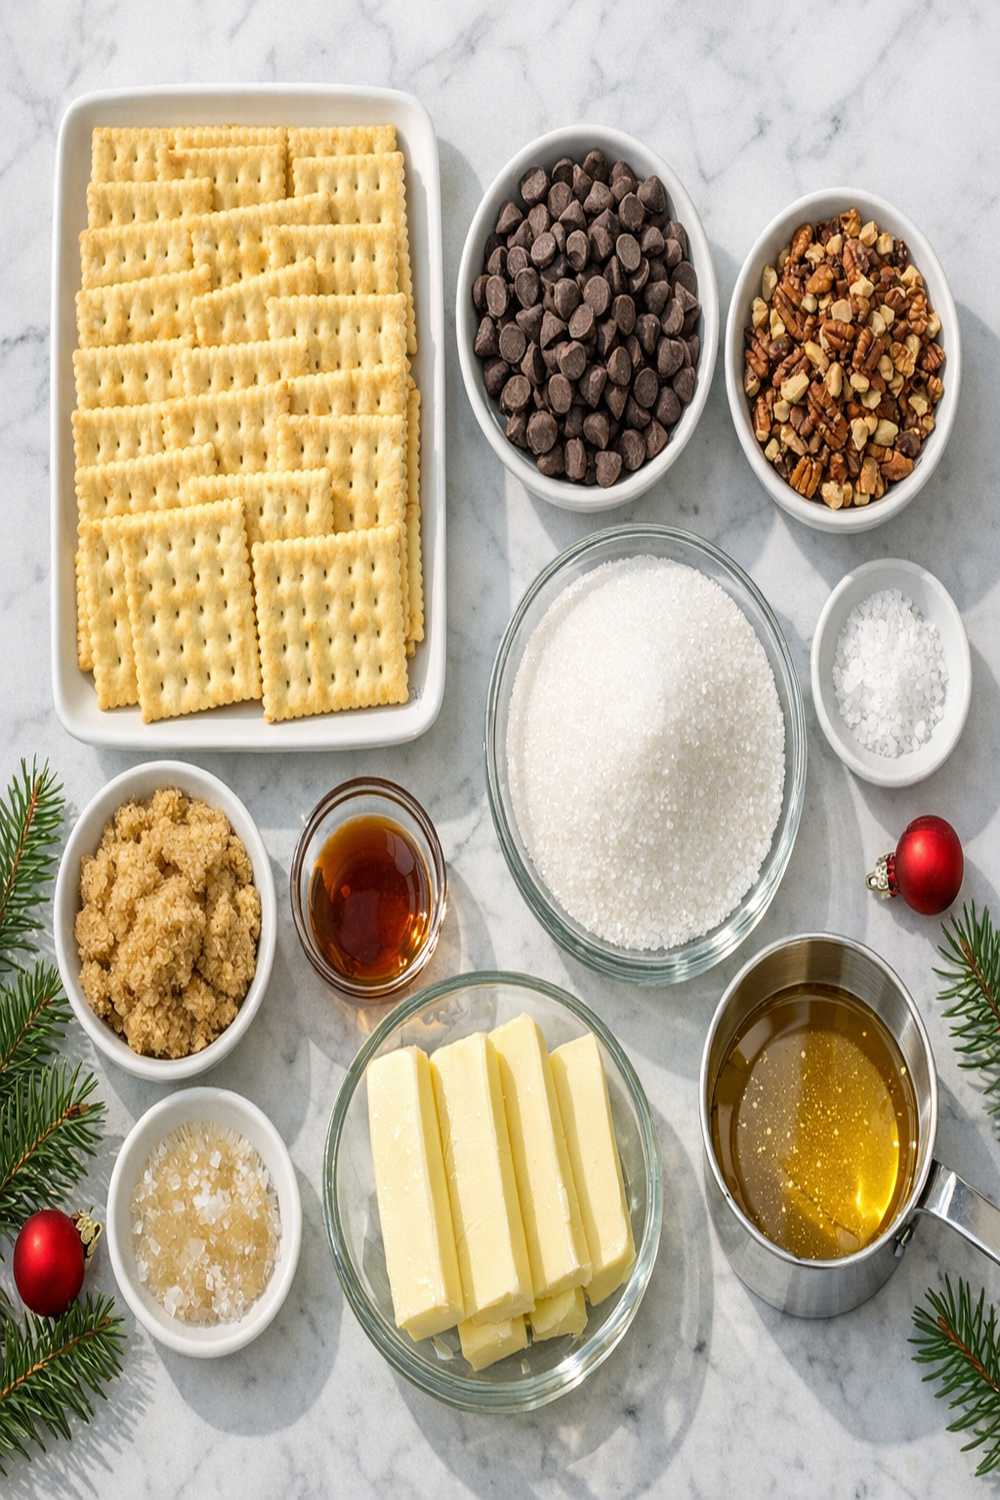
Here’s everything you need to create this impressive holiday treat. I’ve chosen quality ingredients that work together harmoniously, and I’ve included my personal storage hacks so nothing goes to waste.
- 4 ounces white chocolate, chopped into small pieces (for drizzling)
- 1 cup unsalted butter (two standard sticks, softened slightly)
- 1 cup brown sugar, packed firmly (this creates the proper caramel consistency)
- ¼ teaspoon fleur de sel or finishing sea salt (optional but transforms the flavor profile)
- 1 sleeve club crackers, salted (approximately 42 crackers—the foundation of everything)
- ¾ cup toffee bits (these add crunch and depth)
- 12 ounces dark chocolate chips (or semi-sweet if you prefer less intensity)
Storage Hacks from My Alaska Kitchen
Over the years, I’ve learned specific ways to store each ingredient for maximum longevity and freshness. Brown sugar hardens quickly in Alaska’s dry climate—I store mine in an airtight container with a small piece of parchment that I’ve slightly dampened, which keeps it soft for months. Chocolate chips separate into their own sealed container away from the pantry door, where temperature fluctuates. White chocolate is sensitive, so I keep it in the coolest part of my kitchen, never near the oven. Club crackers stay in their sleeve inside a ziplock bag to maintain crispness. Toffee bits live in a glass jar with a tight seal—moisture is their enemy, and glass prevents any flavor transfer.
How to Make Club Cracker Christmas Crack Recipe for Your Occasion
This recipe is genuinely approachable, even if you’ve never made it before. I’m going to walk you through each step with specific timing notes and my insider tips. The entire active preparation takes about 30 minutes, plus chilling time. You’ll feel accomplished and look like a kitchen wizard.
Step 1: Prepare Your Workspace and Preheat
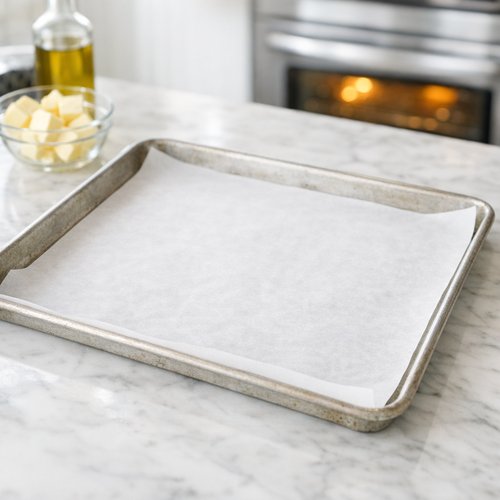
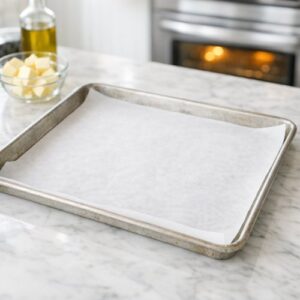
Start by preheating your oven to 375°F. While it warms, line a standard rimmed sheet pan (approximately 13×18 inches) with parchment paper. This is crucial—parchment prevents sticking and makes cleanup effortless. Once the parchment is in place, lightly coat it with cooking spray, paying special attention to the corners where crackers tend to catch. Set the prepared pan aside within arm’s reach of your stovetop. This might seem like a small detail, but having everything ready before you begin the toffee cooking prevents scrambling once the butter starts melting.
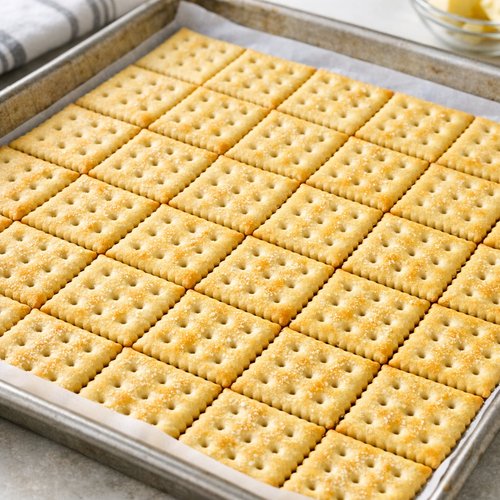
Step 2: Arrange Crackers in Single Layer
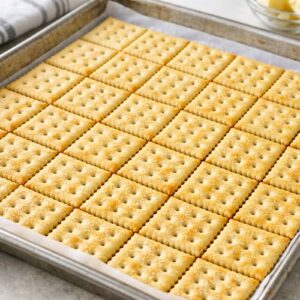
Place your salted club crackers directly onto the prepared parchment in a single, tight layer. They should fit snugly across the entire pan—gaps are fine, but overlap creates uneven thickness. If a few crackers break during placement, use those pieces to fill small spaces. This base layer is what makes this recipe work; the crackers provide structural integrity and absorb the buttery toffee in the next step. Don’t be tempted to skip parchment or use foil instead—parchment truly makes the difference in preventing sticking.
Step 3: Create the Toffee Layer
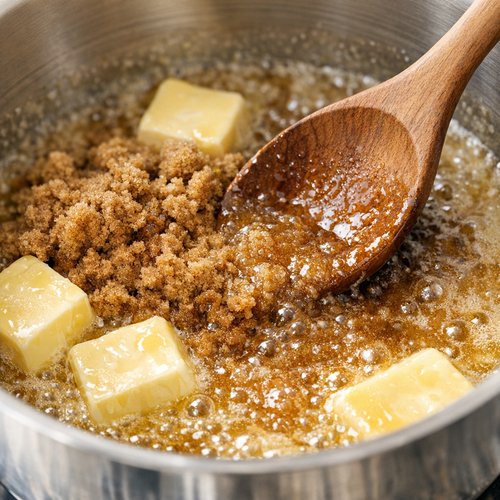
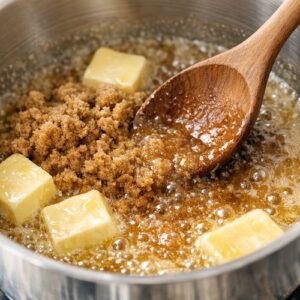
In a large saucepan, combine the unsalted butter and packed brown sugar over medium heat. This is where precision matters. Stir occasionally as the butter melts and the sugar begins to dissolve—this takes about two to three minutes. Once the mixture is fully combined and starting to bubble, set a timer for exactly three minutes and stir constantly. This boiling time is what transforms simple butter and sugar into true toffee with deep, complex caramel flavor. If you boil shorter, it won’t set properly. If you boil longer, it becomes tough and bitter. Three minutes is the magic window.
After three minutes, immediately remove from heat and carefully pour the hot toffee evenly over your cracker layer. Work quickly but carefully—the toffee cools fast and becomes harder to spread. You don’t need to spread it; gravity will do most of the work, but tilt the pan slightly to encourage even distribution. If some crackers have less coverage, don’t worry; the chocolate layers will help balance this.
Step 4: Bake Until Golden
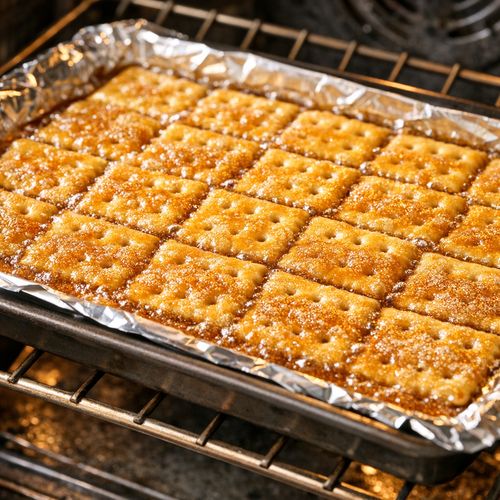
Place the pan in your preheated 375°F oven and bake for exactly five minutes. You’re not baking the crackers or the toffee—you’re creating the perfect temperature for the next chocolate step. At five minutes, remove the pan from the oven. The toffee should look slightly darker and smell absolutely incredible. This is the moment I love most in cooking: that olfactory signal that something delicious is happening.
Step 5: Layer Dark Chocolate
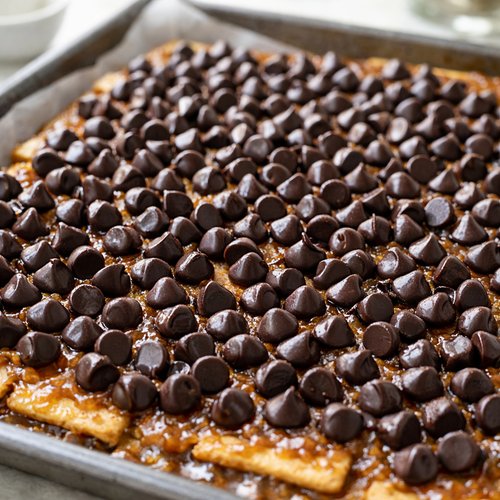
Immediately upon removing from the oven, sprinkle the dark chocolate chips evenly across the entire hot toffee surface. The residual heat will begin melting them within seconds. Let them sit undisturbed for five minutes—this is patience, but it’s crucial. The chips need this time to soften enough to spread smoothly. After five minutes, using the back of a spoon, spread the melted chocolate in one even layer across the crackers. Work gently to avoid dragging up toffee or cracker crumbs. If the chocolate isn’t melting cooperatively, place the pan back in the warm oven for one minute—this gentle heat is all you need.
Step 6: Add Toffee Bits and White Chocolate Drizzle
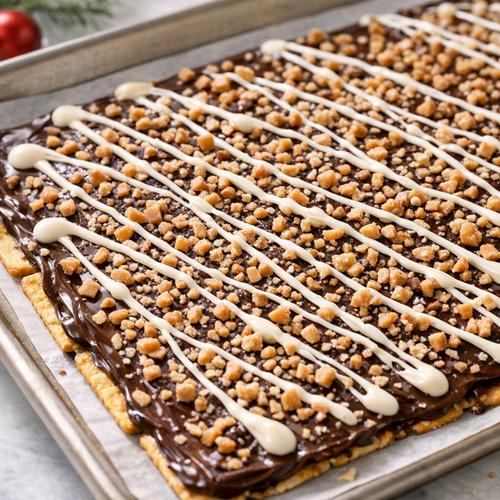
Once the dark chocolate is spread, immediately sprinkle toffee bits across the entire surface. These won’t sink into the chocolate—they’ll adhere beautifully and create wonderful crunch. Now for the white chocolate drizzle: melt your chopped white chocolate either over a double boiler or in 15-second bursts in the microwave, stirring between bursts until completely smooth. Pour into a small ziplock bag, snip a tiny corner, and drizzle decoratively across the toffee bits in thin lines. The white chocolate cools quickly, so work efficiently but don’t stress about perfection—rustic drizzles look more appealing than overly controlled patterns anyway.
Step 7: Chill and Break Into Pieces
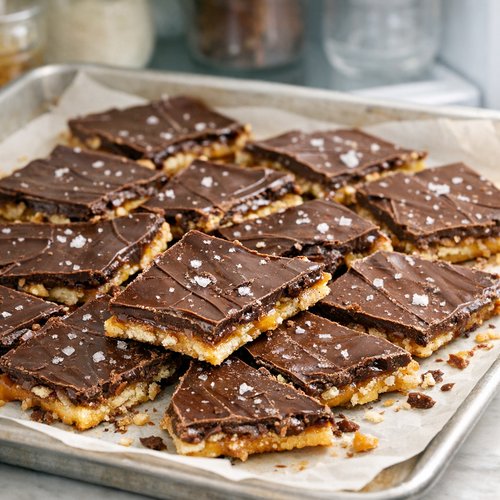
This is the final patience test. Transfer the entire pan to your refrigerator and chill for at least two hours. The chocolate needs to fully set before you break the candy into pieces. If you’re in a hurry, the freezer works in about one hour, but refrigerator chilling is gentler on the texture. Once set, use your hands to break the crackers into irregular pieces—aim for roughly two-inch shards. Some will be larger, some smaller, and that’s exactly right. Transfer to an airtight container for storage.
Make-Ahead Timeline
One of my favorite aspects of this recipe is how beautifully it fits into advance planning. Here’s exactly when you can prepare each component without any quality loss.
- Up to four days before your event – Make the entire batch. Store in an airtight container in the refrigerator. The crackers remain crispy, the toffee stays set, and the chocolate doesn’t separate. This is genuinely one of the best make-ahead desserts for busy entertaining.
- Two days before – If you want to avoid any last-minute kitchen time, this is your ideal prep window. Make the full batch and store as directed. Your kitchen is already done.
- Day before – You can absolutely make this the evening before. Store in a cool spot (not necessarily refrigerated if your home is under 70°F). I often prepare mine in the afternoon and have it ready for evening entertaining.
- Day of event – If you prefer fresh preparation, the entire recipe takes 30 minutes active time plus chilling. Start in early afternoon for an evening event, or mid-morning for afternoon gatherings. This timing removes any stress from your day-of schedule.
How to Present and Plate Club Cracker Christmas Crack Recipe
Presentation matters tremendously with this treat. Even though it’s relatively simple to make, thoughtful plating elevates the entire experience and makes your guests feel special. Here are my specific techniques for stunning presentation.
- Use clear containers or glass plates for display – The beauty of the layered chocolate, toffee bits, and white chocolate drizzle deserves to be visible. Arrange pieces so the cross-section of toffee and chocolate shows clearly. If serving at a party, pile pieces in a clear glass cake stand or on a white ceramic platter—the contrast makes the colors pop.
- Dust lightly with finishing salt just before serving – A mere pinch of fleur de sel on top of each piece (or across the entire platter) highlights the sweet-salty contrast that makes this so crave-worthy. It’s optional, but it’s my signature move that makes people ask for the recipe.
- Wrap individual pieces in small parchment or wax paper for gifting – If you’re giving this as a present, this presentation transforms it from homemade treat to artisanal gift. Tie with twine or a thin ribbon, and it looks professionally made.
- Serve within one hour of removing from refrigeration – If the pieces start to soften in a warm room, the texture becomes less interesting. Keep them cool until serving, then let guests enjoy immediately.
Seasonal Variations
While this is quintessentially a winter holiday treat, I’ve experimented with seasonal adaptations that keep the technique but honor each season’s flavors. These variations maintain the same 30-minute active prep time.
- Spring and summer version: Lemon and white chocolate variation – Replace the dark chocolate with white chocolate and add one teaspoon of lemon zest to the toffee layer. Replace toffee bits with crushed candied lemon peel. The result feels fresh and summery while maintaining the same satisfying texture. This version is perfect for Easter gatherings or spring showers.
- Fall version: Maple and pecan variation – Substitute the brown sugar with an equal measure of pure maple sugar, and replace toffee bits with crushed candied pecans. Use dark chocolate as your base. This honors fall flavors and feels perfect for Thanksgiving potlucks and autumn celebrations.
What to Serve Alongside Club Cracker Christmas Crack Recipe
This treat shines as part of a complete entertaining spread. Here’s how I build a menu around it to create balanced, memorable gatherings. One trick from my dietetics background: serving it with something refreshing prevents flavor fatigue and keeps guests coming back for more pieces than they might otherwise eat.
- Fresh sparkling beverages – Pair with sparkling water with fresh citrus, a Classic Mojito Recipe, or simple prosecco. The effervescence and slight acidity cut through the richness beautifully.
- Savory appetizers – Serve alongside cheese boards with sharp cheddar, herbed crackers, and cured salmon if you want to honor Alaska’s traditions. The salty-savory elements balance the sweet treat perfectly.
- Coffee or tea service – Dark roast coffee or Earl Grey tea both pair elegantly with this dessert. These warm beverages complement the richness without overwhelming the palate.
- Fresh fruit platters – Arrange fresh raspberries, apple slices, or citrus segments on the same serving table. This gives guests who want lighter options something refreshing without making them feel like they’re missing the celebration.
- Nuts and seeds – Raw almonds, roasted walnuts, or Candy Corn And Peanuts Recipe variations offer additional textural contrast and keep the spread interesting.
Can I Store Club Cracker Christmas Crack Recipe?
Storage is one of the reasons I love this recipe for entertaining. It’s genuinely one of the most stable homemade treats you can make, and it actually improves slightly as it sits.
Once chilled and broken into pieces, store in an airtight container at room temperature for up to five days if your home stays below 72°F. In warmer climates or during hot months, refrigerate and it lasts up to two weeks without any quality loss. The chocolate doesn’t separate, the crackers don’t soften, and the flavors actually meld and deepen over the first few days. Freezer storage extends this to up to one month—wrap the entire container in plastic wrap before freezing, then thaw at room temperature for 30 minutes before serving. Never refrigerate and freeze repeatedly, as this temperature cycling creates condensation that affects texture.
I always store mine with parchment or wax paper between layers to prevent pieces from sticking together. For gifting, I wrap individual pieces in wax paper, then pack in a decorative box or clear container. This presentation keeps for the same timeframe as bulk storage, and it feels significantly more thoughtful than handing over a container.
Common Mistakes to Avoid
Over the years, I’ve made every mistake possible with this recipe and learned from each one. Here are the stumbles I see most frequently, plus how to prevent them.
- Boiling the toffee too long or too short – This is the #1 mistake. Too short, and it doesn’t set; too long, and it hardens like a hockey puck. Use a timer. Seriously. This three-minute window is sacred. If you’re anxious about timing, reduce heat to medium and stir constantly—this gives you slightly more grace period.
- Not using parchment paper or greasing inadequately – I’ve seen people try to make this on foil or ungreased pans, and it sticks permanently. Parchment is non-negotiable. Spend the $5 on good quality parchment, and spray it thoroughly. Your sanity depends on this.
- Spreading chocolate too vigorously or too late – If you wait more than five minutes after removing from the oven, the chocolate firms up and becomes difficult to spread smoothly. If you spread too hard, you pull up toffee and cracker crumbs into the chocolate, making it look messy. Gentle, confident movements work best. If it’s not spreading, return to the warm oven for 60 seconds rather than forcing it.
- Skipping the chilling time or chilling inadequately – I understand the impatience. You’ve made something delicious and want to eat it immediately. But the two-hour refrigerator chill (or one-hour freezer chill) is when all the layers set properly and create that satisfying snap. If you skip this, you end up with a soupy, oily mess that tastes fine but feels disappointing texture-wise.
Expert’s Nutritional Tip: Understanding the Role of Brown Sugar
From my perspective as a registered dietitian, I want to highlight something often overlooked: brown sugar’s role in this recipe goes beyond sweetness. Brown sugar contains molasses, which provides deeper flavor complexity than white sugar alone. This means your palate registers satisfaction more quickly, potentially leading to eating smaller portions with greater enjoyment. Additionally, the molasses contains minerals like calcium and potassium that aren’t present in refined white sugar—another small nutritional advantage. The toffee layer also creates what I call “satiety architecture”: the combination of fat (butter), carbohydrates (sugar), and salt creates a flavor profile that genuinely satisfies, preventing the “chasing” sensation you get with overly sweet, one-note treats. This is intentional indulgence, not empty calories.
Nutrition Information
Based on USDA nutritional database analysis for a standard two-inch piece (approximately 30 grams), this recipe yields the following per serving:
- Calories: 165
- Total Fat: 11 grams (7 grams saturated fat)
- Carbohydrates: 16 grams (15 grams sugar)
- Protein: 1 gram
- Sodium: 185 milligrams
- Fiber: 0 grams
The entire batch yields approximately 36-40 pieces depending on your breaking size, so plan for 2-3 pieces per serving as a dessert or 1-2 pieces as a small treat. The sodium content comes from both the crackers and the toffee bits—if you’re sodium-conscious, you can reduce the toffee bits by one-quarter cup without significantly affecting the recipe.

Club Cracker Christmas Crack Recipe
Ingredients
Method
- Start by preheating your oven to 375°F. While it warms, line a standard rimmed sheet pan (approximately 13x18 inches) with parchment paper. This is crucial—parchment prevents sticking and makes cleanup effortless. Once the parchment is in place, lightly coat it with cooking spray, paying special attention to the corners where crackers tend to catch. Set the prepared pan aside within arm's reach of your stovetop. This might seem like a small detail, but having everything ready before you begin the toffee cooking prevents scrambling once the butter starts melting.
- Place your salted club crackers directly onto the prepared parchment in a single, tight layer. They should fit snugly across the entire pan—gaps are fine, but overlap creates uneven thickness. If a few crackers break during placement, use those pieces to fill small spaces. This base layer is what makes this recipe work; the crackers provide structural integrity and absorb the buttery toffee in the next step. Don't be tempted to skip parchment or use foil instead—parchment truly makes the difference in preventing sticking.
- In a large saucepan, combine the unsalted butter and packed brown sugar over medium heat. This is where precision matters. Stir occasionally as the butter melts and the sugar begins to dissolve—this takes about two to three minutes. Once the mixture is fully combined and starting to bubble, set a timer for exactly three minutes and stir constantly. This boiling time is what transforms simple butter and sugar into true toffee with deep, complex caramel flavor. If you boil shorter, it won't set properly. If you boil longer, it becomes tough and bitter. Three minutes is the magic window. After three minutes, immediately remove from heat and carefully pour the hot toffee evenly over your cracker layer. Work quickly but carefully—the toffee cools fast and becomes harder to spread. You don't need to spread it; gravity will do most of the work, but tilt the pan slightly to encourage even distribution. If some crackers have less coverage, don't worry; the chocolate layers will help balance this.
- Place the pan in your preheated 375°F oven and bake for exactly five minutes. You're not baking the crackers or the toffee—you're creating the perfect temperature for the next chocolate step. At five minutes, remove the pan from the oven. The toffee should look slightly darker and smell absolutely incredible. This is the moment I love most in cooking: that olfactory signal that something delicious is happening.
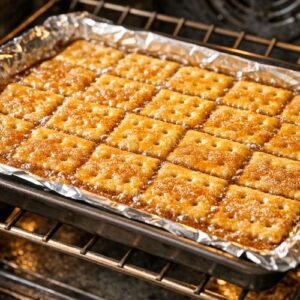
- Immediately upon removing from the oven, sprinkle the dark chocolate chips evenly across the entire hot toffee surface. The residual heat will begin melting them within seconds. Let them sit undisturbed for five minutes—this is patience, but it's crucial. The chips need this time to soften enough to spread smoothly. After five minutes, using the back of a spoon, spread the melted chocolate in one even layer across the crackers. Work gently to avoid dragging up toffee or cracker crumbs. If the chocolate isn't melting cooperatively, place the pan back in the warm oven for one minute—this gentle heat is all you need.

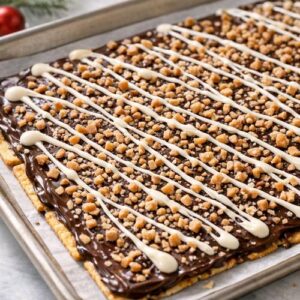
- Once the dark chocolate is spread, immediately sprinkle toffee bits across the entire surface. These won't sink into the chocolate—they'll adhere beautifully and create wonderful crunch. Now for the white chocolate drizzle: melt your chopped white chocolate either over a double boiler or in 15-second bursts in the microwave, stirring between bursts until completely smooth. Pour into a small ziplock bag, snip a tiny corner, and drizzle decoratively across the toffee bits in thin lines. The white chocolate cools quickly, so work efficiently but don't stress about perfection—rustic drizzles look more appealing than overly controlled patterns anyway.
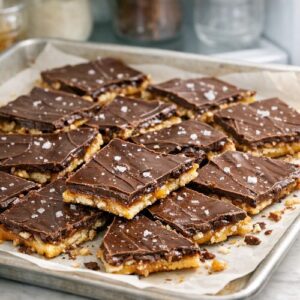
- This is the final patience test. Transfer the entire pan to your refrigerator and chill for at least two hours. The chocolate needs to fully set before you break the candy into pieces. If you're in a hurry, the freezer works in about one hour, but refrigerator chilling is gentler on the texture. Once set, use your hands to break the crackers into irregular pieces—aim for roughly two-inch shards. Some will be larger, some smaller, and that's exactly right. Transfer to an airtight container for storage.
Notes
FAQs
Can I make this recipe in advance for a holiday party two weeks away?
Absolutely, and I actually recommend it. Make the full batch up to four days before your event and store in an airtight container in the refrigerator. The flavors actually deepen and marry over a few days, making the toffee taste more sophisticated. If you want to prepare even further in advance, make it up to one month before, freeze it in an airtight container wrapped in plastic wrap, then thaw at room temperature for 30 minutes before your event. The texture and flavor remain essentially unchanged. This approach removes stress from your entertaining timeline.
What if my crackers break during assembly or my layers crack while setting?
This is completely normal and not a problem. Broken crackers actually create more surface area for the toffee to coat, and they still taste identical. When the chocolate and toffee set, they hold everything together structurally. Cracks in the chocolate layer are also fine—they actually help you break pieces later and create more rustic, appealing edges. Homemade treats don’t need to look factory-perfect to taste incredible.
Can I substitute the club crackers with saltines or other crackers?
Club crackers are ideal because they’re slightly thicker and have a particular crispness that holds up beautifully under the toffee layer. Saltines would work but are thinner and might become too soft. Oyster crackers would be too delicate. Rice crackers would introduce an unintended flavor. I’d stick with club crackers for the best result, but in a pinch, premium saltines would be my second choice—just prepare to eat it within 2-3 days rather than 4-5.
Is there a vegan or dairy-free version of this recipe?
You can create a vegan version by substituting unsalted vegan butter (like Earth Balance) for the dairy butter, using vegan chocolate chips, and dairy-free white chocolate. The technique remains identical. The one challenge is that vegan chocolate sometimes behaves slightly differently when melting—monitor it carefully during the five-minute standing time and return to the oven for additional 30-second intervals if needed. Toffee bits are typically vegan, but check your specific brand as some contain dairy.
What’s the serving size recommendation, and can I eat this daily or should it be occasional?
This is a dessert treat, not a regular meal component. I recommend serving 2-3 pieces per person as an end to a meal, or 1-2 pieces as a small sweet indulgence. At approximately 165 calories per piece, it’s a legitimate dessert portion. From a nutritional standpoint, I encourage people to treat this as a seasonal or occasional celebration item rather than a daily snack. It’s nutrient-dense in fat and sugar, with minimal fiber or protein, so it’s most satisfying when paired with balanced meals and when consumed mindfully. The salt content is worth noting if you monitor sodium intake—if that’s a consideration for you, reduce the toffee bits or choose low-sodium alternatives.
More Recipes for Your Table
- my favorite salad – A lighter, protein-forward option for balanced entertaining alongside sweeter treats
- Sweet and Salty Stovetop Popcorn Recipe – Another sweet-salty treat that pairs beautifully with this candy for creating varied snack spreads
- this cozy soup – A savory option for building complete entertaining menus around your dessert centerpieces
Making club cracker Christmas crack isn’t just about creating a delicious treat—it’s about creating moments of connection. There’s something deeply human about offering others something you’ve made with your own hands, especially during the holidays when time feels precious and scarce. I think about the Alaska winters when daylight disappears and warmth becomes essential. Sharing homemade sweets is one of those small rituals that sustains us through darkness, that says “I thought of you” and “you matter enough for me to spend time in my kitchen.”
This recipe has become part of my entertaining identity over the years. It’s reliable enough that I trust it for important events, simple enough that it doesn’t steal my energy, and impressive enough that guests genuinely feel celebrated. The 30-minute active preparation time means I can make this while managing a hundred other hosting details. The four-day advance prep window means I can eliminate last-minute stress. The straightforward technique means even someone cooking for the first time feels capable and successful.
So gather your ingredients, set your timer to three minutes for that toffee stage, and trust the process. Your guests will taste the care in every layer. Your kitchen will smell incredible. And you’ll join the club of people who know that the most impressive desserts are often the ones that don’t require stress or advanced techniques—just attention, intention, and ingredients that work together beautifully. Happy Cooking!