Canned Cranberry Sauce Recipe
This post contains affiliate links. As an Amazon Associate I earn from qualifying purchases.
You know that store-bought cranberry sauce you’ve been reaching for every Thanksgiving? The one that slides out of the can in that perfect cylinder shape, looking a little too uniform and tasting a little too sweet? I spent years making it myself before realizing I could create something infinitely better in my own kitchen—and it takes less than 30 minutes. This homemade version tastes fresher, feels more intentional, and honestly, costs about a third of what you’d spend on multiple cans. Whether you’re planning a holiday feast or want to preserve Alaska’s wild bounty, this is the recipe that changed everything for me.
Why I Ditched Canned Cranberry Sauce for Good
Growing up in Alaska, my family didn’t rely on canned anything if we could help it. My grandmother would harvest wild cranberries in the fall—those tiny, tart berries that grow in the boggy areas near our homestead—and she’d transform them into something that made the whole kitchen smell like autumn. But it wasn’t until I became a registered dietitian that I understood why her version tasted so much better than what came in a can.
Store-bought cranberry sauce is designed for shelf stability and uniform slicing. That means added thickeners, stabilizers, and honestly, more refined sugar than the berries themselves deserve. When I started reverse-engineering what makes homemade version superior, I discovered three non-negotiables: fresh or frozen cranberries (not concentrate), strategic sweetness that lets the tartness shine, and aromatics that elevate the whole experience.
The moment I served my homemade version to a dinner party, someone asked for the recipe before dessert. That’s when I knew I’d cracked the code. And because I’m passionate about both nutrition and Alaska’s traditions, I wanted to share how anyone can make this in under 30 minutes, with techniques for preserving it if you’re looking ahead to next season.
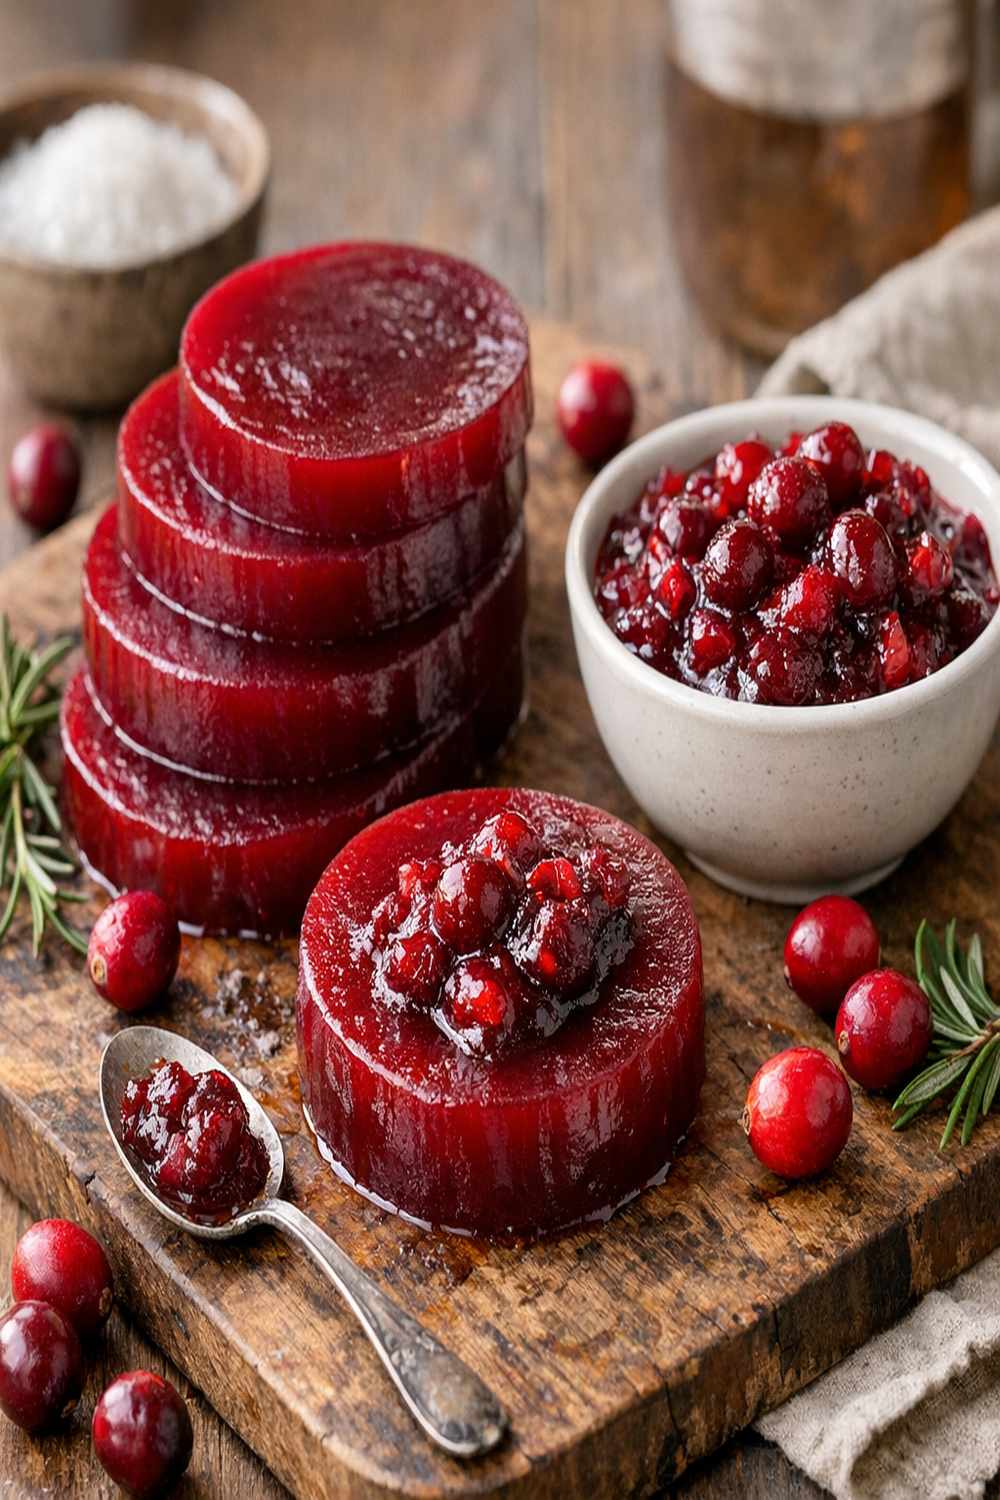
What Makes the Restaurant and Specialty Version So Addictive
Before I developed my own method, I spent months studying what made premium versions—the kind served at high-end restaurants and specialty food shops—so distinctly better than supermarket cans. Here’s what I discovered:
- The Perfect Tartness-to-Sweetness Ratio – Quality versions use less total sugar than canned varieties, but they add it strategically so the sour punch of cranberries never disappears. It’s about balance, not masking the fruit.
- Whole Berries With Strategic Breakdown – Professional versions include some berries that pop completely into the syrup while others stay intact. This creates texture variation that makes each spoonful interesting.
- Subtle Aromatic Complexity – The best versions include warm spices and citrus in proportions that complement rather than dominate. You taste cranberry first, then discover these notes underneath.
- Hand-Harvested or Premium Frozen Fruit – They use berries at peak ripeness, which changes the cooking time and final flavor profile entirely.
How This Homemade Version Compares to Store-Bought
Let’s be honest about where homemade wins and where convenience matters. My version tastes fresher because you control every ingredient and can use berries at their peak. You’ll also pay about 40% less per serving compared to premium canned versions, and you avoid artificial thickeners completely.
The trade-off? Store-bought wins on shelf-life without any work from you. If you need sauce ready to go five minutes before guests arrive, opening a can is faster. But if you have 30 minutes and care about what you’re serving, homemade is the clear winner. Plus, homemade freezes beautifully for up to three months, which means you can make a batch in September using fresh-harvested berries and have restaurant-quality sauce waiting all winter.
The Ingredients—Carefully Sourced and Tested
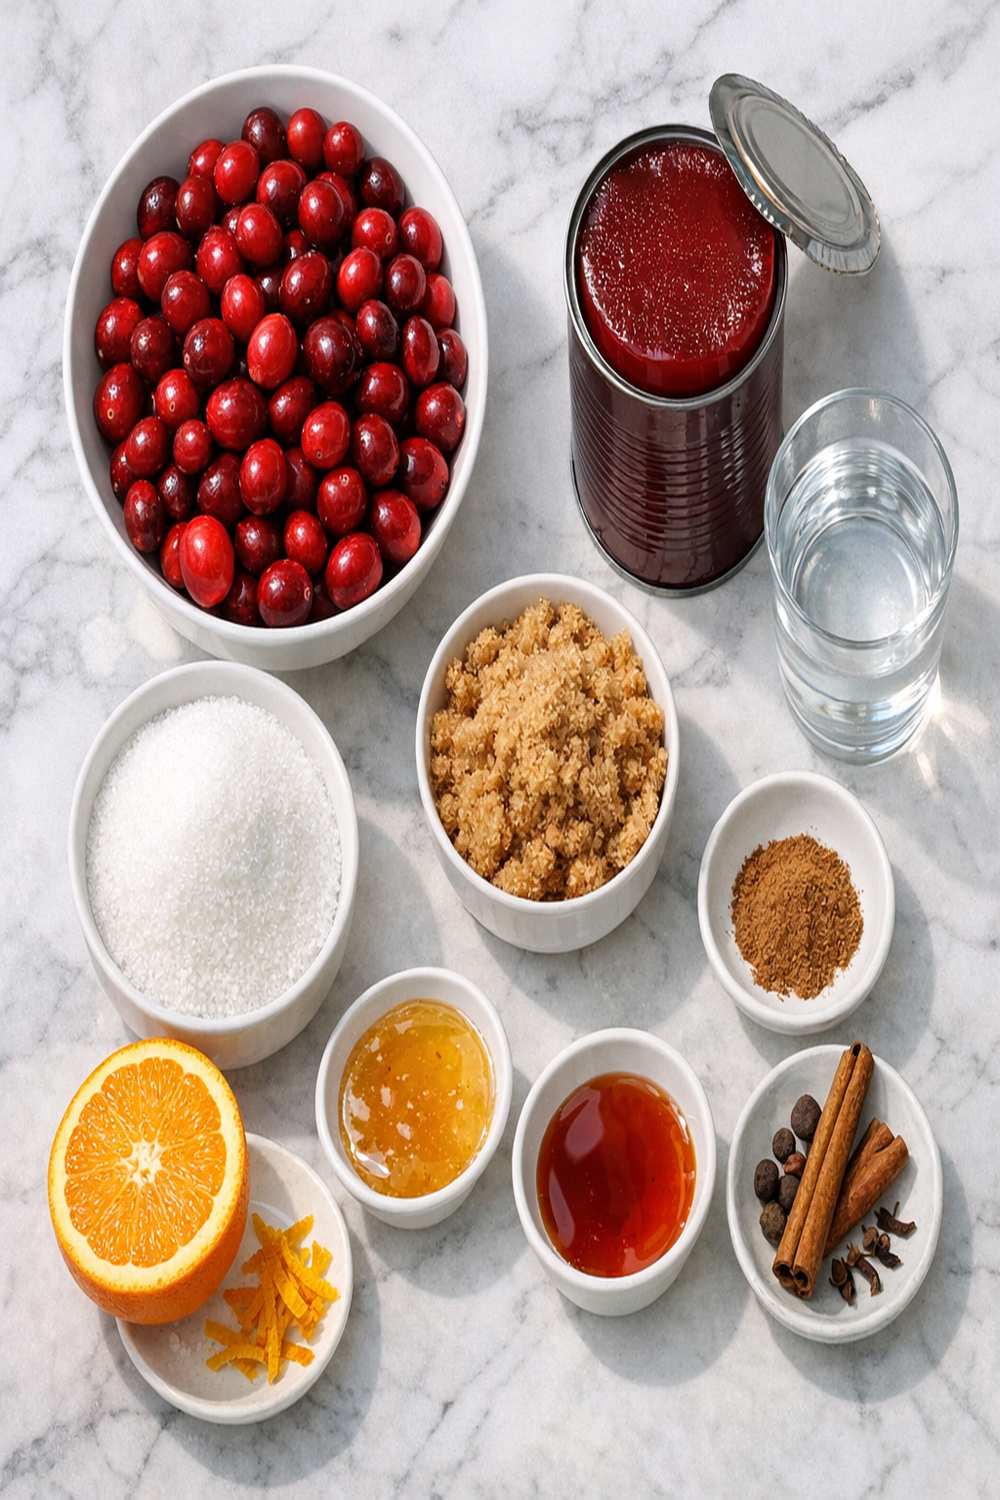
I tested dozens of ingredient combinations to replicate that premium restaurant quality at home. Here’s what ended up in my final version, with explanations for why each element matters:
- 4 cups organic cane sugar or honey blend (the ratio balances tartness while letting berry flavor dominate; avoid high-fructose corn syrup entirely)
- 2 tablespoons fresh lemon juice, added at the very end (prevents crystallization and adds brightness that transforms the final flavor)
- 8 cups fresh cranberries or premium frozen cranberries (thawed if frozen; fresh berries from farmers markets or local harvests create the brightest flavor)
- ½ teaspoon sea salt (enhances all flavors and reduces perception of sweetness without adding sodium noticeably)
- 1 tablespoon fresh orange zest, finely minced (brightens the syrup and adds complexity; always use organic citrus)
- 4 cups filtered or spring water (chlorine-free water prevents any off-flavors from developing during cooking)
- 1 whole cinnamon stick, preferably Ceylon cinnamon (adds warmth without spice-forward notes; more refined than ground cinnamon)
Makes approximately 4 cups of finished sauce (about 16 servings of ¼ cup each)
The Copycat Method: Cracking the Code at Home
What I love about this method is that it mirrors professional kitchen technique but adapts perfectly for a home stovetop. The key is understanding why each step matters, not just following instructions blindly. When you understand the technique, you can troubleshoot if anything feels off and adjust for your specific berries and elevation.
Step 1: Prepare Your Ingredients While Water Heats
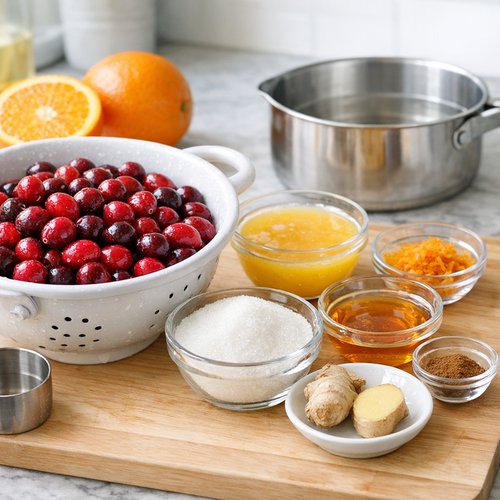
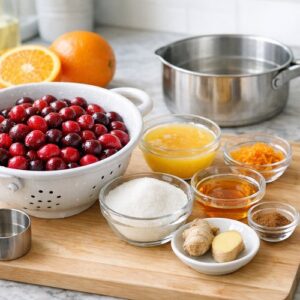
I always mise en place my ingredients before turning on the heat—it’s a professional habit that prevents scrambling later. Rinse your fresh cranberries under cool water and pick through them, discarding any soft or discolored berries (these can introduce off-flavors). If using frozen berries, thaw them completely in a colander to drain excess liquid; this prevents the syrup from becoming diluted.
Pro tip from my professional kitchen days: Measure your orange zest before you zest the fruit. If you zest first and then measure, you’ll always end up with too much since zesting separates the oils and makes it seem like more than it is.
Step 2: Create the Sugar Syrup Foundation
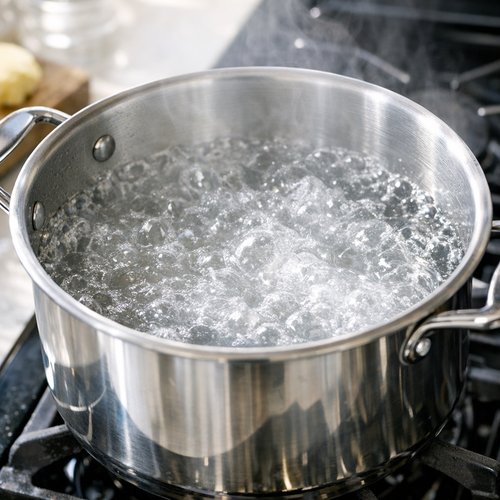
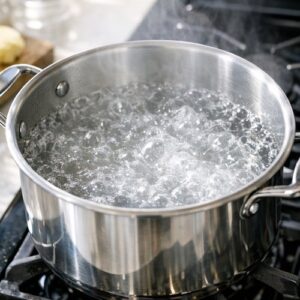
Pour your filtered water into a heavy-bottomed stainless steel pot (not aluminum, which can react with acidic fruit) and bring it to a rolling boil over medium-high heat. Once boiling, add your sugar gradually while stirring constantly. The key here is dissolving sugar completely before adding fruit—if you add berries to undissolved sugar, they’ll release moisture that interferes with the syrup setting properly.
Let the syrup boil for exactly 5 minutes. This time is crucial because it allows the sugar to reach soft-ball stage, which is what creates that beautiful, glossy coating on each berry when they cook. You’re not making candy, but you’re using candy-making principles to control the texture.
Step 3: Add Cranberries and Begin the Pop
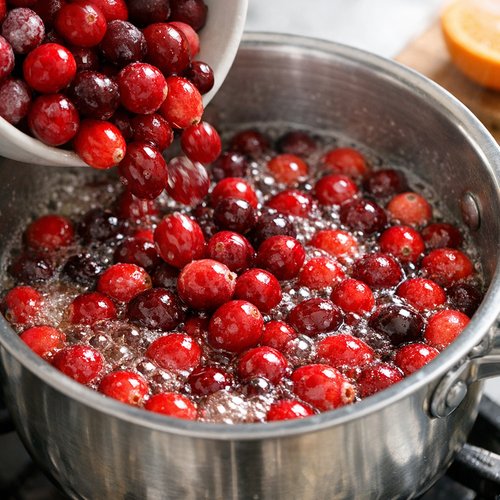
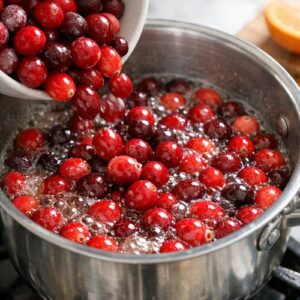
Carefully add your prepared cranberries to the boiling syrup. The temperature will drop slightly—this is normal. Increase heat back to medium-high and let the berries cook for 8 to 12 minutes, stirring occasionally. You’re waiting for the moment when most berries split open and release their seeds and juice into the syrup. You’ll know it’s happening when the syrup turns a deep, jewel-toned red and you start seeing the berry skins floating separately.
This is where patience matters. If you rush this step and cook the berries too briefly, they’ll stay too firm and your sauce won’t achieve that beautiful, spoonable consistency. If you cook too long, the sauce becomes muddier in color and loses some of that bright tartness.
Step 4: Add Aromatics and Continue Cooking
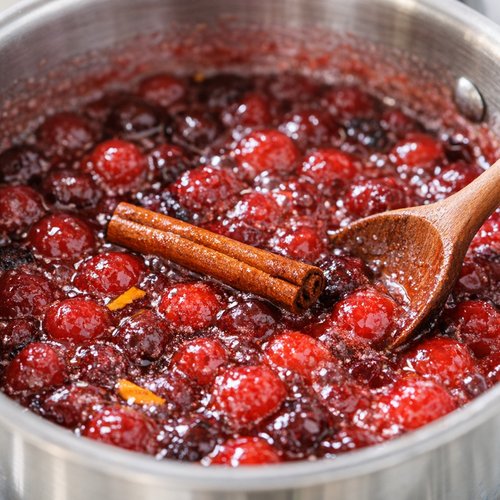
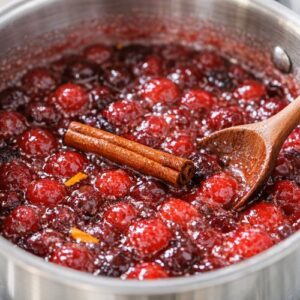
Once most berries have popped, add your cinnamon stick and reduce heat to medium. Continue simmering for about 12 to 15 minutes more, stirring occasionally, until the sauce reaches what I call the “sheet test.” Dip a cold metal spoon into the sauce, hold it horizontally, and let it cool for just a moment. If the sauce runs slowly off the spoon in a sheet rather than dripping, you’ve reached the right consistency.
Why cinnamon stick instead of ground? Whole spices infuse more gently and you can remove them before serving. Ground cinnamon distributes unevenly and can create spice-heavy pockets in your sauce.
In the final 2 minutes of cooking, add your fresh orange zest. The heat will gently warm the oils in the zest and release their aromatic compounds without cooking them away. Add your sea salt at the same time.
Step 5: Final Brightness and Cooling
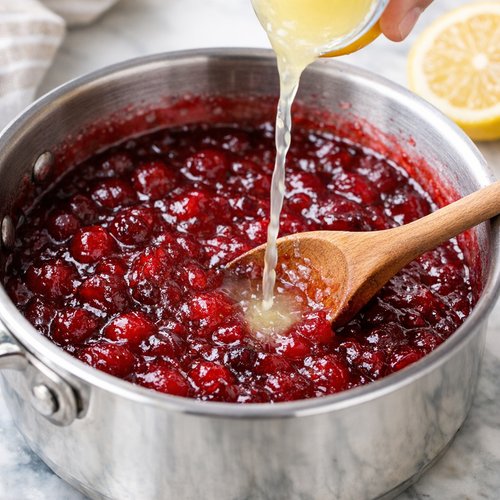
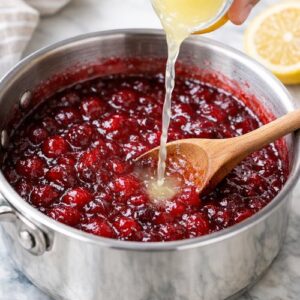
Remove the pot from heat and immediately stir in your fresh lemon juice. Taste the sauce at this point. It should taste bright and tart with sweetness underneath, not the other way around. If it’s too sweet, squeeze in more lemon juice by the teaspoon. If it’s too tart for your family’s preference, dissolve a tablespoon of honey in a small amount of warm water and stir it in.
Remove the cinnamon stick with a slotted spoon. Let the sauce cool to room temperature, stirring occasionally—this helps the sauce set evenly and prevents a skin from forming on top.
The Secret to Restaurant-Quality Texture
The biggest difference between mediocre homemade cranberry sauce and exceptional versions is understanding the role of pectin—the natural thickening compound in cranberries. Fresh cranberries contain more pectin than frozen ones, which is why frozen berries sometimes need an extra minute or two of cooking to reach the right consistency.
You’ll notice I don’t add any artificial thickeners or even cornstarch. The sauce thickens entirely from the natural pectin in the cranberries, which activates around 180°F and becomes stable as it cools. This is why the sheet test matters so much—you’re looking for the exact moment when pectin has done its work and the sauce has the right body.
If your sauce seems too thin after cooling, you overestimated cooking time or your berries had lower pectin content. Simply reheat gently and cook for 3 to 5 more minutes. If it’s too thick and stiff, stir in a tablespoon of water or lemon juice to loosen it. The sauce will continue to set slightly as it cools completely, so aim for consistency that’s just slightly looser than your final preference.
How to Make It Even Better Than the Original
- Use Hand-Harvested or Recently Foraged Berries – If you live in the Pacific Northwest or Alaska like I do, September and October are prime foraging season for wild cranberries. They’re smaller and more intensely flavored than cultivated varieties. If wild harvesting isn’t an option, visit a farmers market in early fall and ask the grower when their berries were picked. Recently harvested berries make a noticeably better sauce.
- Create Seasonal Variations – Once you master the base recipe, adapt it based on what’s in season. In early fall, add fresh thyme. In winter, swap the orange zest for a touch of cardamom. In spring, add a vanilla bean or a whisper of rose water. Each variation tastes restaurant-special without requiring specialized ingredients.
- Make a Spiced Version for Deeper Flavor – Toast a star anise, a few cloves, and a piece of fresh ginger in a dry skillet for 2 minutes, then add to your syrup with the cinnamon stick. Remove all spices before serving. This creates complexity that makes people ask what the secret ingredient is.
- Create a Maple and Bourbon Version – Replace half the cane sugar with pure maple syrup and add a tablespoon of bourbon whiskey in the final step instead of lemon juice. This version pairs beautifully with roasted meats and feels restaurant-sophisticated.
Cost Comparison: Homemade vs. Store-Bought
Let’s talk numbers, because this is where homemade really shines. A can of premium cranberry sauce typically costs $4 to $6 for about 14 ounces (roughly 1¾ cups). My homemade version makes 4 cups of sauce using approximately $8 to $10 in ingredients, depending on whether you source berries at farmers markets or buy organic frozen ones.
That’s about 50 cents per serving homemade versus $1.50+ per serving store-bought. If you serve cranberry sauce at even one holiday meal per year, homemade pays for itself. If you’re someone who enjoys it year-round or makes it regularly for entertaining, you’re looking at $40 to $60 in annual savings while enjoying noticeably better quality.
Additional savings: Making your own allows you to purchase larger quantities when berries are in season and most affordable (September through November) and freeze the finished sauce. One batch made in October can provide sauce for four different occasions over the next eight months.
Expert’s Nutritional Insight
As a registered dietitian, I need to be honest about sugar in cranberry sauce. One quarter-cup serving contains approximately 60 to 70 grams of carbohydrates, with about 55 to 60 grams coming from sugar. This is higher than many foods, but it’s important context: cranberries are naturally extremely tart and contain virtually no natural sugars of their own. The sugar is essential for palatability and for the sauce’s function as a condiment rather than a standalone food.
What makes homemade superior nutritionally is that you control the type and amount of sugar. You’re using cane sugar or honey rather than high-fructose corn syrup, you’re including the whole cranberry fruit (pectin and all), and you’re adding citrus and spices that provide antioxidants and polyphenols. Store-bought versions often include additional stabilizers, preservatives, and sometimes food coloring that my version avoids entirely.
The nutritional advantage: Homemade cranberry sauce retains more of the cranberry’s natural tannins and anthocyanins—powerful antioxidants that studies suggest may support urinary and cardiovascular health. Heat reduces some of these compounds, but not as dramatically as commercial processing does.
Can I Store Cranberry Sauce? The Complete Guide
Refrigerator storage: Homemade cranberry sauce keeps in an airtight glass container for up to 3 weeks when refrigerated. I always use glass rather than plastic because plastic can absorb the sauce’s color and the acidic berries can leach chemicals from plastic over time.
Freezer storage: This is where homemade sauce becomes a year-round staple in my kitchen. Pour cooled sauce into ice cube trays and freeze until solid (about 4 hours), then transfer cubes to freezer-safe containers. The cubes thaw quickly and you can use exactly the amount you need. Frozen sauce keeps for up to 3 months and tastes virtually identical to freshly made.
Water-bath canning: If you want traditional shelf-stable preservation, pour hot sauce into sterilized canning jars, leaving ¼ inch of headspace. Run a thin knife around the inside of the jar to release air bubbles. Wipe the rim clean and place a hot, sterilized lid on top, then screw a ring on finger-tight. Process in a boiling water bath for 15 minutes, then remove and allow to cool to room temperature undisturbed. Properly sealed jars keep at room temperature for up to 1 year. Check seals before storing—the lid should be concave and shouldn’t flex when pressed.
Storage hack from my Alaska kitchen: If you live in a cold climate, you can also store sealed jars in an unheated garage or cold room. The naturally cold temperature acts as extended preservation insurance and frees up freezer space.
Nutrition Information (per ¼-cup serving)
- Calories: 185
- Total Fat: 0g
- Sodium: 35mg
- Total Carbohydrate: 47g
- Dietary Fiber: 1.5g
- Sugars: 43g
- Protein: 0g
- Vitamin C: 8% of Daily Value
- Calcium: 4% of Daily Value
These values are based on USDA food composition data for cranberries and reflect the entire batch divided into 16 servings. The fiber content is relatively low because some soluble fiber from the berries breaks down during cooking, but the insoluble fiber remains. If you’re making the spiced or bourbon versions, calorie and macronutrient content remains virtually identical; the additions are negligible by weight.
What to Serve Alongside for the Complete Experience
Homemade cranberry sauce transforms ordinary proteins into restaurant-quality meals. This is where you complete the experience. I pair my sauce with perfectly roasted turkey, of course, but I’ve discovered it’s equally stunning with rich, savory dishes that benefit from its tartness and brightness.
Serve alongside a best chicken salad with Greek yogurt for a light but satisfying lunch where the sauce adds complexity without heaviness. If you’re planning a warm dinner, try it with beef stroganoff recipe without cream of mushroom soup—the tart cranberry cuts through the richness of the stroganoff in a way that feels both traditional and surprisingly modern.
- Roasted Root Vegetables – Drizzle your homemade sauce over roasted beets, carrots, or sweet potatoes. The tartness brings out the natural sweetness of the vegetables and looks restaurant-beautiful on the plate.
- Creamy Cheese Boards – Offer cranberry sauce as a condiment alongside aged cheddar, brie, or sharp provolone. It transforms cheese from a snack into a sophisticated appetizer.
- Roasted Pork or Duck – The brightness of cranberry sauce is the perfect complement to the richness of pork belly or roasted duck breast.
- Wild Rice Dishes – Stir a spoonful into warm wild rice for a side dish that feels restaurant-polished and tasted intentionally seasoned.
Make-Ahead Guide: Strategic Meal Prep
One of my favorite strategies as a dietitian is making cranberry sauce weeks in advance and building holiday meals around it. Here’s my professional approach:
Four Weeks Before Your Meal: Make a double batch of cranberry sauce if you can source fresh berries. At peak season (September through November), this is when berries are most abundant and affordable. Cool completely and freeze in ice cube trays.
One Week Before: Thaw one batch in the refrigerator overnight. This allows you to taste it and make any adjustments to sweetness or tartness. If you’re making spiced or bourbon variations for the first time, test them at this point.
Two Days Before: Decant your sauce into the serving dish you’ll use on the day. This prevents a last-minute scramble and allows the flavors to develop and marry together even more.
Day-Of Strategy: If serving chilled, remove from the refrigerator 15 minutes before guests arrive so the sauce reaches the perfect consistency—cold enough to be sturdy on a spoon but not so cold that the berry flavors are muted. If serving warm (which I recommend for root vegetables or pork), gently reheat in a saucepan over low heat, stirring occasionally, until warmed through.
Common Mistakes to Avoid
Mistake 1: Using Canned Cranberry Sauce as Your Base – I’ve seen recipes that start with canned sauce and doctor it up with spices and citrus. This skips the entire benefit of homemade. Start with fresh or frozen whole berries every time. If you can’t find them, wait until next season when they’re available. Canned is already past its prime.
Mistake 2: Cooking the Berries Too Briefly – If you stop cooking before most berries have popped, your sauce will be too chunky and won’t hold together when plated. It should flow slightly when warm but hold its shape when cool. The sheet test is your guide—trust it.
Mistake 3: Adding Ground Spices Instead of Whole – Ground cinnamon, nutmeg, and cloves will make your sauce taste grainy and create bitter, one-note spice flavoring. Use whole spices or freshly ground spices from whole versions. The flavor is infinitely more refined.
Mistake 4: Skipping the Lemon Juice at the End – This single step transforms good sauce into exceptional sauce. The acid brightens everything and prevents the sauce from tasting one-dimensionally sweet. Don’t skip it, even if the recipe seems complete without it.
Seasonal Variations to Try
Fall Version (September-November): The base recipe with fresh-harvested berries is perfect as-is. If you want a variation, add 2 teaspoons of fresh thyme leaves in the final minutes of cooking, then remove before serving. The herbal note feels autumn-appropriate without being overwhelming.
Winter Version (December-February): Add ½ teaspoon of ground cardamom and ¼ teaspoon of ground ginger to the cinnamon stick. If you want to go deeper, add a splash of bourbon or cognac instead of lemon juice. This version pairs beautifully with ham, duck, or rich beef dishes.
Spring Version (March-May): Make the base recipe but replace half the orange zest with fresh lemon zest instead. Add a vanilla bean (split lengthwise) with the cinnamon stick, then remove before serving. This version tastes lighter and brighter, perfect for spring entertaining or pairing with lighter proteins like chicken or fish.
Summer Version (June-August): Use frozen berries from the previous fall and lighten the spicing. Skip the cinnamon stick entirely and instead add a whisper of fresh mint and a tablespoon of elderflower cordial if you can find it. This creates a sauce that feels refreshing rather than heavy—perfect for roasted vegetables or grilled meats.

Canned Cranberry Sauce Recipe
Ingredients
Method
- I always mise en place my ingredients before turning on the heat—it's a professional habit that prevents scrambling later. Rinse your fresh cranberries under cool water and pick through them, discarding any soft or discolored berries (these can introduce off-flavors). If using frozen berries, thaw them completely in a colander to drain excess liquid; this prevents the syrup from becoming diluted. Pro tip from my professional kitchen days: Measure your orange zest before you zest the fruit. If you zest first and then measure, you'll always end up with too much since zesting separates the oils and makes it seem like more than it is.
- Pour your filtered water into a heavy-bottomed stainless steel pot (not aluminum, which can react with acidic fruit) and bring it to a rolling boil over medium-high heat. Once boiling, add your sugar gradually while stirring constantly. The key here is dissolving sugar completely before adding fruit—if you add berries to undissolved sugar, they'll release moisture that interferes with the syrup setting properly. Let the syrup boil for exactly 5 minutes. This time is crucial because it allows the sugar to reach soft-ball stage, which is what creates that beautiful, glossy coating on each berry when they cook. You're not making candy, but you're using candy-making principles to control the texture.
- Carefully add your prepared cranberries to the boiling syrup. The temperature will drop slightly—this is normal. Increase heat back to medium-high and let the berries cook for 8 to 12 minutes, stirring occasionally. You're waiting for the moment when most berries split open and release their seeds and juice into the syrup. You'll know it's happening when the syrup turns a deep, jewel-toned red and you start seeing the berry skins floating separately. This is where patience matters. If you rush this step and cook the berries too briefly, they'll stay too firm and your sauce won't achieve that beautiful, spoonable consistency. If you cook too long, the sauce becomes muddier in color and loses some of that bright tartness.
- Once most berries have popped, add your cinnamon stick and reduce heat to medium. Continue simmering for about 12 to 15 minutes more, stirring occasionally, until the sauce reaches what I call the "sheet test." Dip a cold metal spoon into the sauce, hold it horizontally, and let it cool for just a moment. If the sauce runs slowly off the spoon in a sheet rather than dripping, you've reached the right consistency. Why cinnamon stick instead of ground? Whole spices infuse more gently and you can remove them before serving. Ground cinnamon distributes unevenly and can create spice-heavy pockets in your sauce. In the final 2 minutes of cooking, add your fresh orange zest. The heat will gently warm the oils in the zest and release their aromatic compounds without cooking them away. Add your sea salt at the same time.
- Remove the pot from heat and immediately stir in your fresh lemon juice. Taste the sauce at this point. It should taste bright and tart with sweetness underneath, not the other way around. If it's too sweet, squeeze in more lemon juice by the teaspoon. If it's too tart for your family's preference, dissolve a tablespoon of honey in a small amount of warm water and stir it in. Remove the cinnamon stick with a slotted spoon. Let the sauce cool to room temperature, stirring occasionally—this helps the sauce set evenly and prevents a skin from forming on top.
FAQs About Homemade Cranberry Sauce
Can I use frozen cranberries instead of fresh?
Absolutely, and honestly, frozen berries often work better than “fresh” berries that have been shipped cross-country and sitting in grocery stores for days. Freezing concentrates the flavor and actually increases pectin activation during cooking. The only difference you’ll notice is that frozen berries may release slightly more liquid, so you might need to cook your sauce an extra 1 to 2 minutes to reach the proper thickness. Allow frozen berries to thaw completely before cooking and drain off excess liquid to prevent diluting your syrup.
What’s the difference between whole berry and jellied cranberry sauce?
My recipe creates whole berry sauce because I love the texture and the visual appeal—you can see what you’re eating. If you prefer a smooth, jellied sauce like traditional canned versions, after the berries have popped (Step 3), you can use an immersion blender to puree the sauce until it reaches your desired consistency. Some people prefer it completely smooth; others like it slightly chunky. Blend to your preference, then continue with the aromatic cooking and final steps. The flavor profile remains identical.
Why does my sauce seem too thin after cooling?
This typically happens with lower-pectin berries (sometimes older frozen berries or berries that were stored too long before freezing). The solution is simple: reheat the sauce gently over medium heat and cook for another 3 to 5 minutes, stirring occasionally, until it reaches the sheet-test consistency again. If your berries simply have low pectin no matter what, you can add a tablespoon of powdered pectin mixed with 2 tablespoons of water (whisked together first) and stir it in while the sauce simmers. This provides the thickening without any off-flavors.
Can I make this recipe without sugar, or with alternative sweeteners?
Yes, with caveats. Sugar isn’t just about sweetness—it’s essential for pectin activation and creating the right texture. If you want to reduce sugar, you can replace up to half with honey (which also helps with thickening due to its natural enzymes) without major texture problems. For alternative sweeteners like maple syrup, use it as a direct 1:1 replacement by volume, but know that the sauce may not set quite as firmly because alternative sweeteners behave differently during cooking. For zero-sugar versions, you’d need to add powdered pectin as described above. I’d test any major substitution in a small batch first before committing to a full recipe.
How do I know if my sauce has properly sealed when canning?
After the water-bath canning process and complete cooling (usually 12 to 24 hours), press the center of each lid. If it’s concave (curved inward) and doesn’t flex or pop when you press it, the seal is successful. If the lid is flat or pops up and down, the jar didn’t seal properly. Store sealed jars at room temperature (they’ll keep for a year). Store unsealed jars in the refrigerator and use within 3 weeks, or reprocess them within 24 hours using a fresh lid and the same 15-minute water bath.
What’s the best way to gift homemade cranberry sauce to friends?
This is one of my favorite ways to share—homemade cranberry sauce makes an elegant gift. Use beautiful glass jars with decorative lids, add a handwritten label with the flavor variation and date made, and include simple serving suggestions on a tag. Store the gift in a cool place, and if it’s shelf-stable canned sauce, it will travel beautifully. Include a note suggesting they can serve it warm or cold, with poultry or pork, or even alongside cheese. The personal touch of homemade sauce paired with thoughtful presentation makes this a gift that feels far more expensive than it actually cost to create.
More Restaurant Copycat Recipes
- Roasted Acorn Squash Recipe – A beautiful autumn side dish that pairs perfectly with cranberry sauce and roasted proteins
- Baked Corn Recipe With Cream Style Corn – Restaurant-quality comfort food that completes your holiday spread
- Pineapple Salsa – A brighter, tropical variation on the cranberry sauce concept with similar technique
- The Best Mimosa Recipe – The perfect brunch drink to serve alongside dishes featuring your homemade cranberry sauce
The Satisfaction of Cracking the Code
There’s something deeply satisfying about standing in your kitchen, tasting a sauce you made with your own hands, and realizing it’s better than what you’ve been paying for. That’s the moment this recipe stops being about following instructions and becomes about ownership—you’ve created something genuinely excellent that reflects your standards and your values.
Homemade cranberry sauce represents everything I love about cooking: it honors traditional ingredients (especially Alaska’s wild harvests), it respects the craft of balance and technique, and it delivers restaurant-quality results without pretension. You’re not making something complicated; you’re making something honest.
Next time you’re planning a meal worthy of your best effort, make this sauce. Make it weeks ahead and freeze it, or make it the morning-of and serve it warm. Notice how your guests react. Listen to the compliments. Smile knowing you created something from simple ingredients and technique alone, with no shortcuts or hidden additives.
That’s the real magic—not in the ingredients themselves, but in understanding how to use them intentionally. Now you know how. Happy cooking!