Banoffee Pie Recipe
This post contains affiliate links. As an Amazon Associate I earn from qualifying purchases.
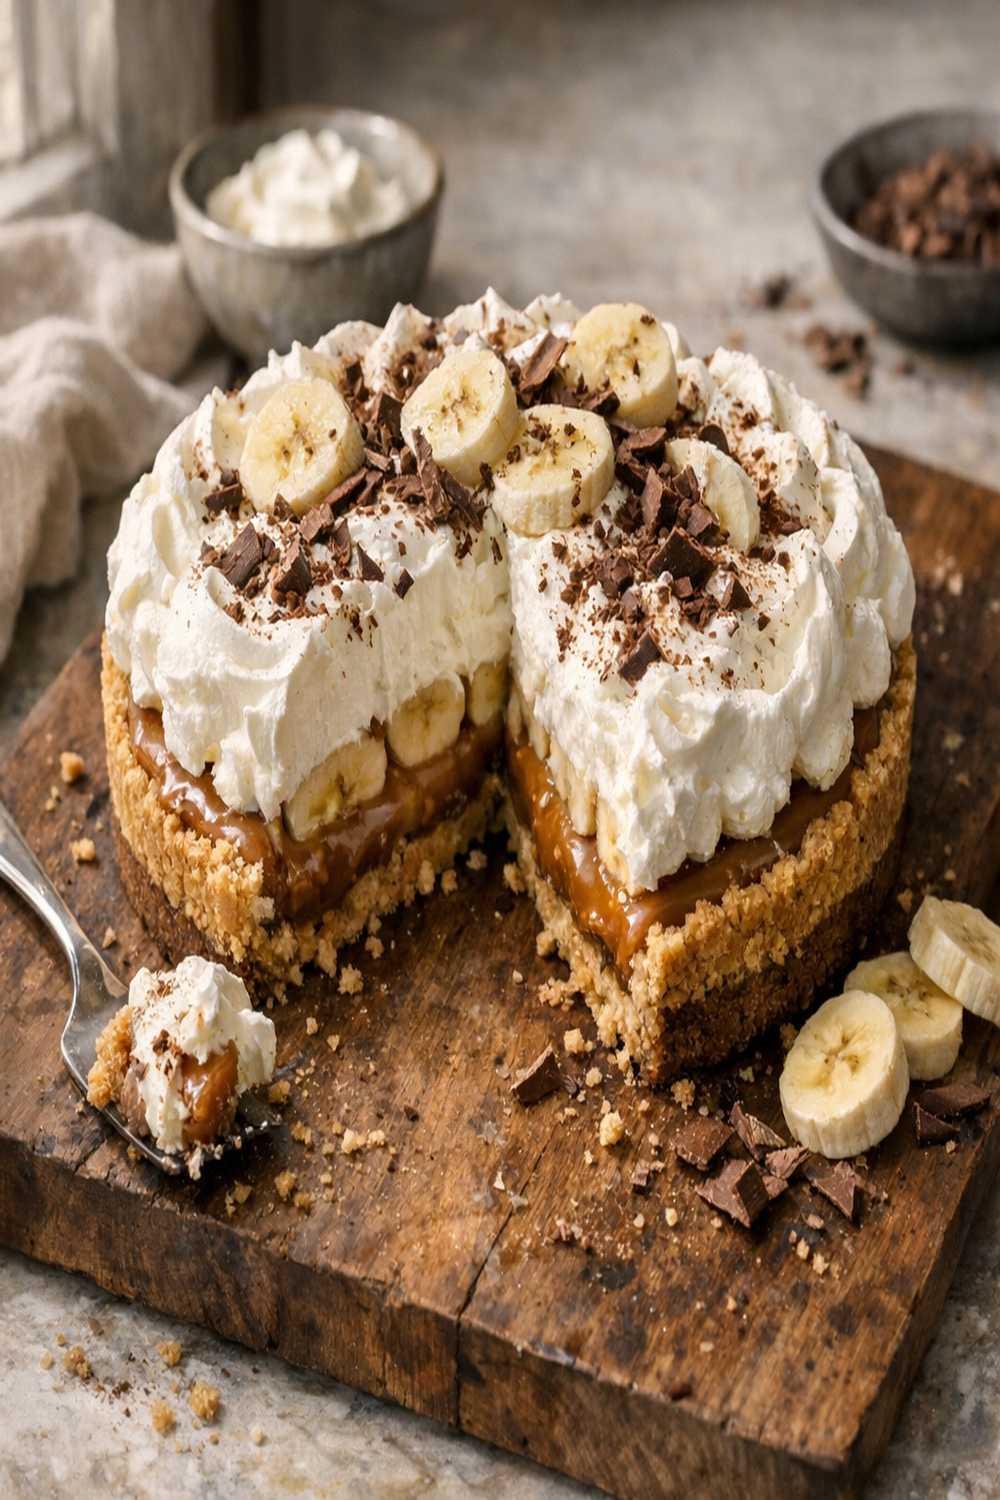
I still remember the first time I tasted banoffee pie—it was at a little café in Juneau, and I was completely unprepared for how three simple layers could create something so magical. The buttery crunch, the silky caramel, the fresh fruit. I’ve spent years perfecting this recipe, testing methods in my kitchen here in Alaska, and I’ve finally cracked the code. You’ve probably tried the overnight chilling method, the double-boiler caramel approach, and maybe even the store-bought caramel shortcut. Here’s why this version wins: it takes just 30 minutes of hands-on time, requires zero special equipment, and produces a pie so beautiful you’ll actually want to serve it to people you like.
Banoffee Pie Recipe: Which Method Actually Works Best?
I’ve tested every single banoffee pie technique out there—literally. From the traditional boiling-a-can-of-condensed-milk method my grandmother swore by to the trendy no-bake versions flooding social media, I’ve made this pie more times than I care to admit. As a registered dietitian who bridges Alaska’s wild harvest traditions with practical nutrition, I’ve learned that the best recipes aren’t always the most complicated ones. This particular method combines speed with reliability, and that’s something worth talking about.
The magic happens when you understand the science behind caramel and biscuit bases. Most home bakers either oversimplify or overcomplicate this dessert. I’ve found the sweet spot—literally and figuratively.
The Methods Compared: An Honest Breakdown
When you’re deciding how to make banoffee pie, you’re really choosing between three philosophies: the traditional boil-the-can approach, the quick-stovetop-caramel version, and the make-ahead freeze method. Each has merit depending on your situation. Let me break down exactly what you’re getting with each:
- The Boiling Method – This involves placing an unopened can of condensed milk in boiling water for 2-3 hours. Pros: hands-off, deeply golden caramel, classic results. Cons: requires advance planning, potential safety concerns, uses significant energy, and you absolutely cannot leave it unattended. Best for: people who plan ahead and have afternoon time to monitor a pot.
- The Quick-Serve Method – This uses store-bought dulce de leche or caramel spread directly from the jar. Pros: fastest option (literally 10 minutes total), zero cooking required, consistent results. Cons: less control over caramel flavor and texture, more processed ingredients, and honestly, it never tastes quite as bright. Best for: last-minute gatherings or when you’re serving 30 people and need efficiency.
- The Stovetop Caramel Method (This Recipe) – This involves making caramel from scratch on your stovetop by combining butter, brown sugar, and condensed milk. Pros: superior flavor control, beautiful golden color, faster than boiling a can, requires minimal equipment, tastes genuinely homemade, fits into a 30-minute timeline. Cons: requires gentle attention for about 3-5 minutes, and you need to follow the heat instructions carefully. Best for: home bakers who want restaurant-quality results without the stress.
Why This Version Beats the Rest
After making this pie dozens of times, I can tell you exactly why the stovetop method produces superior results. First, there’s the flavor depth—when you melt butter with brown sugar on a gentle heat, you’re developing nutty, complex caramel notes that canned versions simply cannot match. The texture is another story entirely. You get a caramel layer that’s thick enough to hold structure but still creamy enough to spread without cracking the biscuit base underneath.
Second, there’s the ingredient transparency. I know exactly what’s going into this pie because I’m making it myself. No mysterious preservatives, no stabilizers I can’t pronounce. As someone trained in clinical nutrition, I appreciate knowing the source and composition of every ingredient that makes it into my desserts. When I make this in my Alaskan kitchen, I know the butter came from quality sources, the brown sugar is pure, and the condensed milk is just milk and sugar.
Third, the time investment is realistic. You’re not spending 3 hours hovering over a boiling pot, and you’re not compromising quality by using shortcuts. You get restaurant-quality results in about 45 minutes total (including chilling), with just 30 minutes of actual prep work. That’s the sweet spot between convenience and genuine care.
The Ingredients
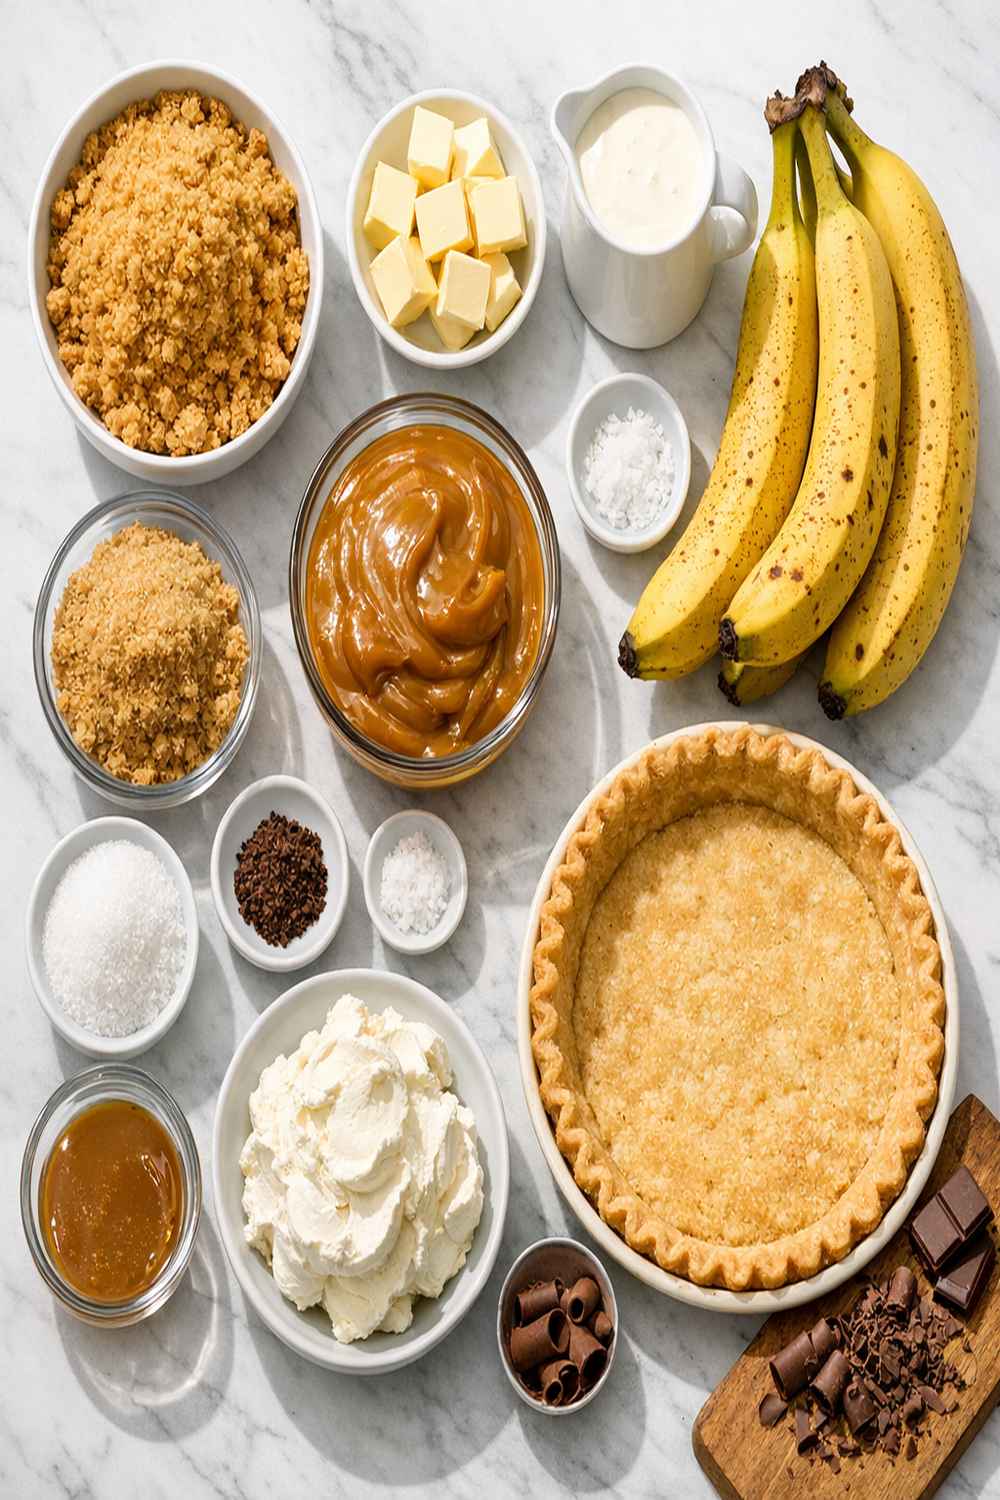
Here’s where I differ from traditional banoffee pie recipes you’ll find online. Instead of using equal parts butter and biscuits (which creates a greasy, heavy base), I’ve adjusted the ratio to create a crunchier crust that holds up better. I’ve also included a touch of sea salt in the base—this is the trick pastry chefs use to make every flavor pop. The caramel layer uses dark brown sugar instead of light because it develops deeper, more complex notes. And finally, I add a small amount of vanilla extract to the whipped cream because it’s the difference between “this is nice” and “this is *remarkable*.” Makes one 9-inch pie, serving 8-10 people.
For the Biscuit Base
- 200 grams digestive biscuits or graham cracker crumbs (crushed into fine crumbs, not powder)
- 100 grams unsalted butter (melted and slightly cooled)
- 1 tablespoon honey (helps bind the base and adds subtle sweetness)
- ½ teaspoon fine sea salt (enhances all flavors)
For the Caramel Layer
- 397 grams can of sweetened condensed milk (one standard can)
- 80 grams unsalted butter (high-quality, if possible)
- 1 pinch fleur de sel or Maldon salt (finishing touch for the caramel)
- 80 grams dark brown sugar (packed, for deep caramel notes)
For the Topping
- 2 medium bananas (peeled and sliced just before assembly)
- 300 milliliters heavy whipping cream (cold, for proper whipping)
- 2 teaspoons pure vanilla extract (not imitation)
- 10 grams dark chocolate (70% cacao or higher, for shaving)
- 2 tablespoons powdered sugar (sifted to prevent lumps)
How to Make the Best Version of Banoffee Pie Recipe
I’m breaking down each step with the reasoning behind it. This isn’t just a recipe—it’s a masterclass in why each technique matters. Once you understand the “why,” you’ll never make a mediocre banoffee pie again.
Step 1: Create Your Perfect Biscuit Base (5 minutes active time)
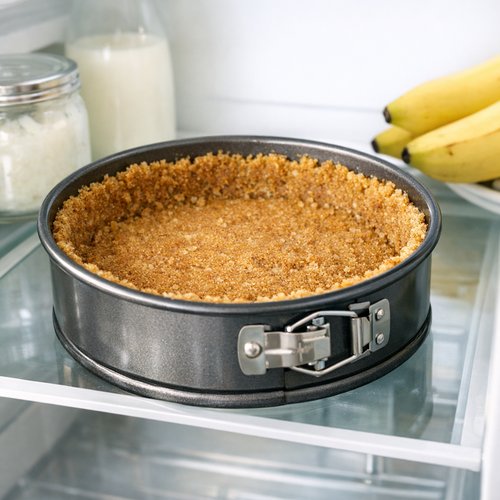
Pour your crushed digestive biscuits into a medium bowl. The key is achieving fine, uniform crumbs—not powdery dust, but not chunky either. I pulse mine in a food processor for about 20 seconds, then finish by hand. This matters because uneven crumbs create weak spots in your crust. Add the melted butter, honey, and salt. Here’s the crucial part: mix until it resembles wet sand. You want every single crumb coated but not soggy. Press firmly into your 9-inch removable-base tart tin using the back of a spoon dipped in water (the water prevents sticking). Work from the center outward, creating even pressure. You’re not crushing—you’re compacting gently.
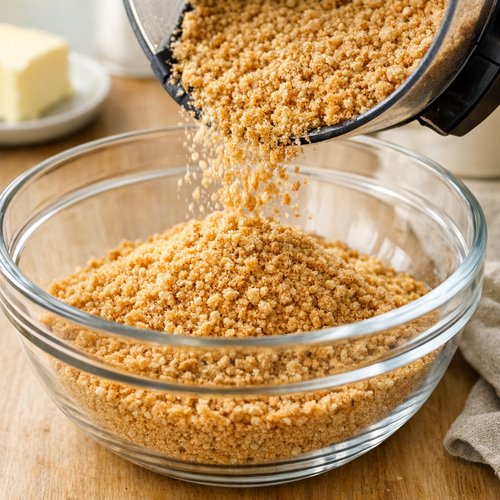
Why this works better than other methods: A base that’s pressed too firmly becomes hard and dense. A base that’s barely compacted falls apart. This middle ground creates a crust that’s sturdy enough to hold the layers but still has a pleasant texture you actually want to eat.
Step 2: Chill the Base (30 minutes, hands-off time)
Place your prepared base in the refrigerator while you make the caramel. This isn’t optional—it’s essential. A cold base absorbs the caramel differently than a room-temperature one, creating better adhesion and preventing the bottom from becoming soggy. If you’re in a rush, even 15 minutes helps significantly.
This is when I prep my other ingredients: slicing bananas just before assembly (more on that in a moment), whipping my cream, and grating my chocolate.
Step 3: Make Your Caramel Layer (5 minutes active time)
Add the butter and dark brown sugar to a small, non-stick saucepan. Turn your heat to low. I mean genuinely low—if you rush this step with medium heat, you’ll end up with burnt sugar and a ruined batch. Stir continuously as the butter melts and the sugar dissolves. You’re looking for a homogeneous, smooth liquid. This should take about 2 minutes.
Once your sugar is completely dissolved, pour in your entire can of condensed milk. Stir well to combine. Now increase the heat to medium. Continue stirring constantly. You’ll see the mixture bubble and darken. Keep going for about 1-2 minutes. You’re watching for a deep golden color and a noticeably thicker consistency. The best way to test: drag your spoon through the caramel—it should leave a brief trail before filling back in. If it’s still thin and pours like honey, keep going. If it’s suddenly dark brown and thick, remove it immediately. Finish with a tiny pinch of fleur de sel.
This is where experience matters most. You want caramel, not burnt sugar. The condensed milk contains sugar that will continue darkening off-heat, so pull it from the stove when it’s slightly lighter than your target color. It will deepen as it cools.
Step 4: Assemble the Caramel and Chill (1 minute active time, 1 hour passive time)
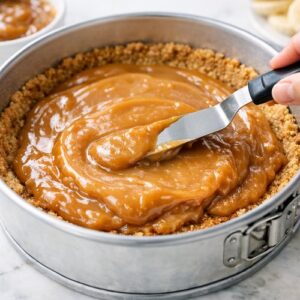
Remove your chilled base from the refrigerator. Immediately spoon the warm caramel onto the biscuit crust. Using an offset spatula or the back of a spoon, spread it evenly in a thin, consistent layer. Work quickly before it sets. You want coverage but not a caramel that’s so thick it overwhelms the other flavors.
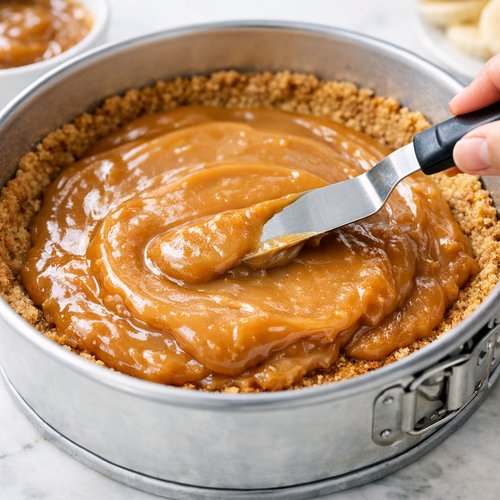
Place the pie back in the refrigerator for at least 1 hour. This is crucial. The caramel needs to set completely, or it’ll squish around when you add the bananas and cream. If you have time, chill overnight—this develops even better flavor.
Step 5: Whip Your Cream and Prepare Toppings (5 minutes)
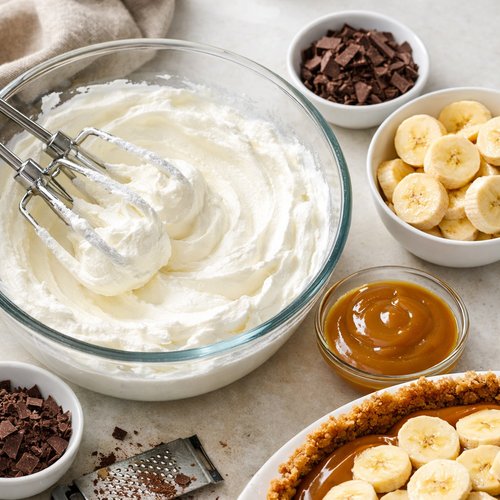
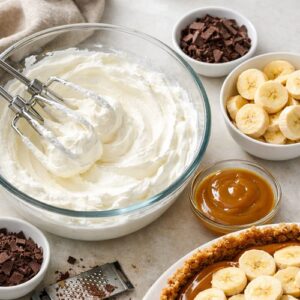
Remove your pie from the refrigerator about 10 minutes before assembly. While it softens slightly (this makes it easier to eat), prepare your whipped cream. Pour cold heavy cream into a chilled bowl. Whip on high speed until soft peaks form (when you pull the whisk up, the cream holds a peak that gently curls over). This takes about 2-3 minutes with an electric mixer, longer by hand.
At soft peak stage, add your powdered sugar and vanilla extract. Whip another 30 seconds until combined. Stop immediately at this point. Overwhipping turns cream into butter—not the goal here.
Slice your bananas thinly just before you’re ready to serve. This prevents browning and oxidation. Pro tip: slice on a slight bias for a more elegant presentation.
Step 6: Final Assembly (3 minutes)
Remove the tart tin’s removable ring by placing the whole pie on a small can or glass and gently pushing down while the ring falls away. This prevents fingerprints on your beautiful crust. Arrange banana slices in overlapping concentric circles across the caramel layer. Spoon or pipe the whipped cream over the bananas, creating gentle peaks and valleys. Finish by grating dark chocolate across the top.
Serve immediately. This pie is best eaten within 2 hours of final assembly, though the base and caramel layers will stay fresh for up to 3 days when stored properly (more on that below).
Side-by-Side Results: What to Expect
When you make banoffee pie using the stovetop caramel method, you get a pie with distinctly superior texture and appearance compared to other approaches. The biscuit base stays crispy rather than becoming sandy or greasy. The caramel layer develops a beautiful deep-golden color (almost amber) rather than the brownish tone that boiled cans sometimes produce. You’ll notice the caramel has a silky, spreadable consistency that doesn’t crack when you bite through it.
The banana layer brings brightness and freshness—it’s essential for cutting through the richness of the caramel and cream. Unlike boiled-can methods that sometimes produce an overly thick, almost fudgy caramel, this version stays creamy and luxurious. The whipped cream provides aeration and coolness that balances everything perfectly. The dark chocolate finishing brings a sophisticated bittersweet note that prevents the pie from becoming cloying.
The overall experience is more elegant and refined than store-bought versions, but without the pretentious fussiness of traditional methods. It’s genuinely achievable in your home kitchen.
When to Use Each Method
- You’re entertaining and want to impress – Use the stovetop caramel method (this recipe). It produces visibly superior results and tastes genuinely homemade. Guests notice the difference immediately.
- You forgot about dessert until an hour before guests arrive – Use the quick-serve method with store-bought caramel. Speed matters more than perfection, and your pie will still be delicious, just slightly more processed.
- You have an entire afternoon free and want zero stress – Use the boiling method. If you’re genuinely fine with hands-off time and advance planning, the traditional method produces beautiful results. Just ensure you stay home and monitor it.
- You’re baking for yourself or family, without strict timing constraints – This stovetop method. It’s the most versatile and forgiving, and it genuinely tastes better.
Can I Store Banoffee Pie Recipe?
Storage depends on which components you’re keeping. The biscuit base lasts up to 4 days in an airtight container at room temperature, or up to 1 week refrigerated. The caramel layer keeps for 5 days refrigerated—you can actually make this component ahead and assemble the rest later. Simply rewarm gently before spreading if it’s become too firm.
The complete assembled pie (with bananas and whipped cream) is best served immediately, but will stay fresh for up to 2 hours at room temperature or 4-6 hours refrigerated. The bananas will gradually darken and soften, and the cream will absorb moisture from the caramel, so eat sooner rather than later for optimal texture.
Make-Ahead Strategy: Prepare the base 2-3 days ahead, store in the tart tin covered with plastic wrap. Make your caramel layer up to 5 days prior. Assemble the bananas and cream no more than 4 hours before serving. This approach gives you maximum flexibility while maintaining quality.
Do not freeze the complete assembled pie—the bananas become mushy and the texture suffers. However, you can freeze the base and caramel together (uncut) for up to 1 month. Thaw overnight in the refrigerator before adding fresh toppings.
Expert’s Nutritional Tip: Understanding Caramel’s Role
As a registered dietitian, I need to be honest about this dessert: it’s rich, it’s sweet, and it should be served in modest portions. A proper slice of banoffee pie runs about 350-420 calories depending on component ratios, with approximately 18-22 grams of sugar per serving. That’s significant, and it matters.
Here’s what I appreciate nutritionally: the bananas contribute potassium and fiber (about 200mg potassium per 2-banana serving), and they’re real fruit. The eggs in your crust provide protein. The dark chocolate contains polyphenols and antioxidants. The butter provides fat-soluble vitamins. None of these things make this a “healthy” dessert, but they make it an intentional one.
My approach: serve proper portions (one 1/8th or 1/10th slice), pair with something bitter like espresso or strong tea to balance sweetness, and don’t apologize. This is celebration food. The key is enjoying it mindfully rather than routinely.
Common Mistakes to Avoid
Mistake 1: Pressing the biscuit base too hard. People often compress the base until it’s nearly rock-solid, creating something that feels more like eating a brick than enjoying a crust. Gentle, even pressure is all you need. The base should hold together but still have some structural integrity that makes biting through a pleasure, not a challenge.
Mistake 2: Skipping the biscuit base chill. A warm base absorbs caramel unevenly and becomes soggy faster. That 15-30 minute chill is the difference between a crisp base that lasts through serving and one that turns into paste. Don’t skip it, even when you’re in a rush.
Mistake 3: Adding bananas too early. If you slice bananas more than 15-20 minutes before serving, they begin oxidizing and browning. They also release moisture that seeps into the caramel and cream, making everything soggy. Slice at the absolute last moment. This single habit improves your pie dramatically.
Mistake 4: Making caramel too dark. The moment you see dark brown, pull it off the heat. Caramel continues darkening for 30-60 seconds after you remove the pan from heat. People rushing this step end up with burnt, bitter caramel that tastes acrid rather than sweet. Patient, gentle heat is essential.
Seasonal Variations: Adapting Banoffee Pie Year-Round
Spring/Summer Version: Add a layer of fresh raspberry or strawberry compote between the bananas and whipped cream. The bright acidity cuts beautifully through the caramel’s richness. Or replace half the bananas with fresh raspberries.
Fall Version: Toast your digestive biscuits with a pinch of cinnamon and nutmeg before crushing. Add a touch of maple syrup to the whipped cream. The warm spice notes complement banoffee’s sweetness beautifully, and you can tie it into your fall table setting easily.
Winter Version: Reduce bananas slightly and add a small layer of dark chocolate ganache between the caramel and cream for extra richness. The chocolate-banana-caramel combination feels more decadent and winter-appropriate. You can also add a pinch of sea salt to the chocolate for sophistication.
Year-Round Alaska Twist: I sometimes add a tiny drizzle of salted caramel sauce (additional to the main layer) for visual drama and a salt-sweet contrast that makes people pause and notice. It’s simple but elevated.
What Can I Serve With Banoffee Pie Recipe?
Banoffee pie is rich and sweet, so pairing matters. Coffee is the obvious choice—a strong, bitter espresso or Americano cuts through the sweetness beautifully. Tea works too, particularly something like Earl Grey or a robust black tea.
For a more substantial dessert spread, I love serving banoffee pie alongside something crisp and clean. A simple green salad with a lime vinaigrette, served right after the main course, cleanses the palate perfectly before you move to dessert. You could also consider pairing with one of my favorite lighter desserts like these homemade cookies, which provides an elegant, less-heavy contrast on the same dessert board.
- Strong coffee or espresso – The bitter notes create perfect contrast with banoffee’s sweetness
- Earl Grey or robust black tea – The tannins and bergamot brighten the palate
- Vanilla ice cream – For a more decadent approach, serve a slice warm with melting vanilla ice cream on top
- Fresh citrus water or lemon sorbet – If your meal was rich, serve something acidic and refreshing alongside
- Whipped cream and fresh berries on the side – Allows guests to add more cream or contrast with tartness if desired

Banoffee Pie Recipe
Ingredients
Method
- Pour your crushed digestive biscuits into a medium bowl. The key is achieving fine, uniform crumbs—not powdery dust, but not chunky either. I pulse mine in a food processor for about 20 seconds, then finish by hand. This matters because uneven crumbs create weak spots in your crust. Add the melted butter, honey, and salt. Here's the crucial part: mix until it resembles wet sand. You want every single crumb coated but not soggy. Press firmly into your 9-inch removable-base tart tin using the back of a spoon dipped in water (the water prevents sticking). Work from the center outward, creating even pressure. You're not crushing—you're compacting gently. Why this works better than other methods: A base that's pressed too firmly becomes hard and dense. A base that's barely compacted falls apart. This middle ground creates a crust that's sturdy enough to hold the layers but still has a pleasant texture you actually want to eat.
- Place your prepared base in the refrigerator while you make the caramel. This isn't optional—it's essential. A cold base absorbs the caramel differently than a room-temperature one, creating better adhesion and preventing the bottom from becoming soggy. If you're in a rush, even 15 minutes helps significantly. This is when I prep my other ingredients: slicing bananas just before assembly (more on that in a moment), whipping my cream, and grating my chocolate.
- Add the butter and dark brown sugar to a small, non-stick saucepan. Turn your heat to low. I mean genuinely low—if you rush this step with medium heat, you'll end up with burnt sugar and a ruined batch. Stir continuously as the butter melts and the sugar dissolves. You're looking for a homogeneous, smooth liquid. This should take about 2 minutes. Once your sugar is completely dissolved, pour in your entire can of condensed milk. Stir well to combine. Now increase the heat to medium. Continue stirring constantly. You'll see the mixture bubble and darken. Keep going for about 1-2 minutes. You're watching for a deep golden color and a noticeably thicker consistency. The best way to test: drag your spoon through the caramel—it should leave a brief trail before filling back in. If it's still thin and pours like honey, keep going. If it's suddenly dark brown and thick, remove it immediately. Finish with a tiny pinch of fleur de sel. This is where experience matters most. You want caramel, not burnt sugar. The condensed milk contains sugar that will continue darkening off-heat, so pull it from the stove when it's slightly lighter than your target color. It will deepen as it cools.
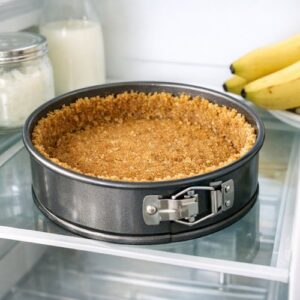
- Remove your chilled base from the refrigerator. Immediately spoon the warm caramel onto the biscuit crust. Using an offset spatula or the back of a spoon, spread it evenly in a thin, consistent layer. Work quickly before it sets. You want coverage but not a caramel that's so thick it overwhelms the other flavors. Place the pie back in the refrigerator for at least 1 hour. This is crucial. The caramel needs to set completely, or it'll squish around when you add the bananas and cream. If you have time, chill overnight—this develops even better flavor.
- Remove your pie from the refrigerator about 10 minutes before assembly. While it softens slightly (this makes it easier to eat), prepare your whipped cream. Pour cold heavy cream into a chilled bowl. Whip on high speed until soft peaks form (when you pull the whisk up, the cream holds a peak that gently curls over). This takes about 2-3 minutes with an electric mixer, longer by hand. At soft peak stage, add your powdered sugar and vanilla extract. Whip another 30 seconds until combined. Stop immediately at this point. Overwhipping turns cream into butter—not the goal here. Slice your bananas thinly just before you're ready to serve. This prevents browning and oxidation. Pro tip: slice on a slight bias for a more elegant presentation.
- Remove the tart tin's removable ring by placing the whole pie on a small can or glass and gently pushing down while the ring falls away. This prevents fingerprints on your beautiful crust. Arrange banana slices in overlapping concentric circles across the caramel layer. Spoon or pipe the whipped cream over the bananas, creating gentle peaks and valleys. Finish by grating dark chocolate across the top. Serve immediately. This pie is best eaten within 2 hours of final assembly, though the base and caramel layers will stay fresh for up to 3 days when stored properly (more on that below).
FAQs
Can I make the banoffee pie components in advance?
Absolutely, and I recommend it. Make the biscuit base up to 3 days ahead—store it in the tart tin covered with plastic wrap at room temperature. Prepare the caramel layer up to 5 days in advance, storing it in an airtight container in the refrigerator. You can even assemble the base and caramel together and refrigerate for up to 4 days before adding the fresh banana and cream topping. This approach lets you stress less on the day of serving.
What’s the difference between using canned caramel and making it fresh?
The flavor difference is remarkable. Fresh caramel develops nutty, complex notes from the butter-sugar interaction that canned versions simply can’t achieve. Canned caramel (dulce de leche) is often thicker and more fudgy, which changes the eating experience—some people prefer this texture, but most find fresh caramel more elegant. Fresh also lets you control sweetness and salt levels, which matters when you’re a trained dietitian who thinks about flavor balance.
Why do bananas brown so quickly on banoffee pie?
Bananas contain an enzyme called polyphenol oxidase that browns when exposed to air. The longer bananas sit sliced, the more they oxidize. There’s no way to prevent this entirely, which is why slicing bananas just before assembly is essential. If you must slice early, toss them in a tiny bit of fresh lemon or lime juice—the acid slows oxidation significantly.
Can I use a different type of biscuit for the base?
You can, but the result changes. Digestive biscuits (British-style) provide a slightly sweet, buttery base with subtle cocoa notes. Graham crackers create a more honey-sweet flavor. Vanilla wafers make it more delicate. Ginger biscuits add spice. Each option works, but digestive biscuits are traditional for a reason—they complement the caramel-banana-cream combination perfectly. If substituting, use a similar weight and assume the flavor profile will shift.
My caramel didn’t thicken—what went wrong?
Most likely, you didn’t reach the proper temperature or you removed it from heat too early. After adding the condensed milk, you need a solid 1-2 minutes on medium heat with constant stirring. The mixture should visibly darken and thicken. If your caramel stayed thin, you can return it to the heat, but watch carefully—it darkens faster the second time around. Alternatively, if this happens and you’re short on time, reduce it in the refrigerator for an hour; it will set as it cools.
Make-Ahead Guide for Perfect Timing
Five Days Before Serving: Make your caramel layer and store in an airtight container in the refrigerator. This frees up stress later and actually improves flavor as the caramel mellows.
Three Days Before Serving: Prepare your biscuit base and store in the tart tin covered with plastic wrap at room temperature. The base stays fresh this way and won’t absorb excess moisture.
One Day Before Serving: Assemble the base and caramel together (if your caramel has solidified, warm it gently before spreading). Cover and refrigerate overnight. This actually improves texture and makes final assembly faster.
Two Hours Before Serving: Remove the pie from the refrigerator to let it soften slightly. Prepare your whipped cream and store in the refrigerator.
15 Minutes Before Serving: Slice your bananas and arrange on the caramel layer. Top with whipped cream. Grate chocolate over the top.
Immediately Before Serving: Slice and serve.
More Recipes You’ll Love
- this simple cake – A completely different approach to dessert that requires zero fussing
- Champagne Cookies Recipe – Elegant, refined cookies that pair beautifully with banoffee pie on a dessert board
- Cheerios Recipe Healthy – A lighter breakfast option to balance your dessert indulgences
After all these years of making banoffee pie in my Alaska kitchen, I can tell you with absolute certainty: this stovetop method is the one. It respects your time, honors your ingredients, and produces results that taste genuinely homemade. The combination of a crispy biscuit base, silky caramel, fresh bananas, and billowy cream is unbeatable—and now you know exactly how to achieve it. The fact that it takes just 30 minutes of actual work is simply the cherry on top. Make this pie for someone you love, watch their eyes light up when they taste it, and understand why this particular dessert has remained beloved for decades. Happy Cooking!