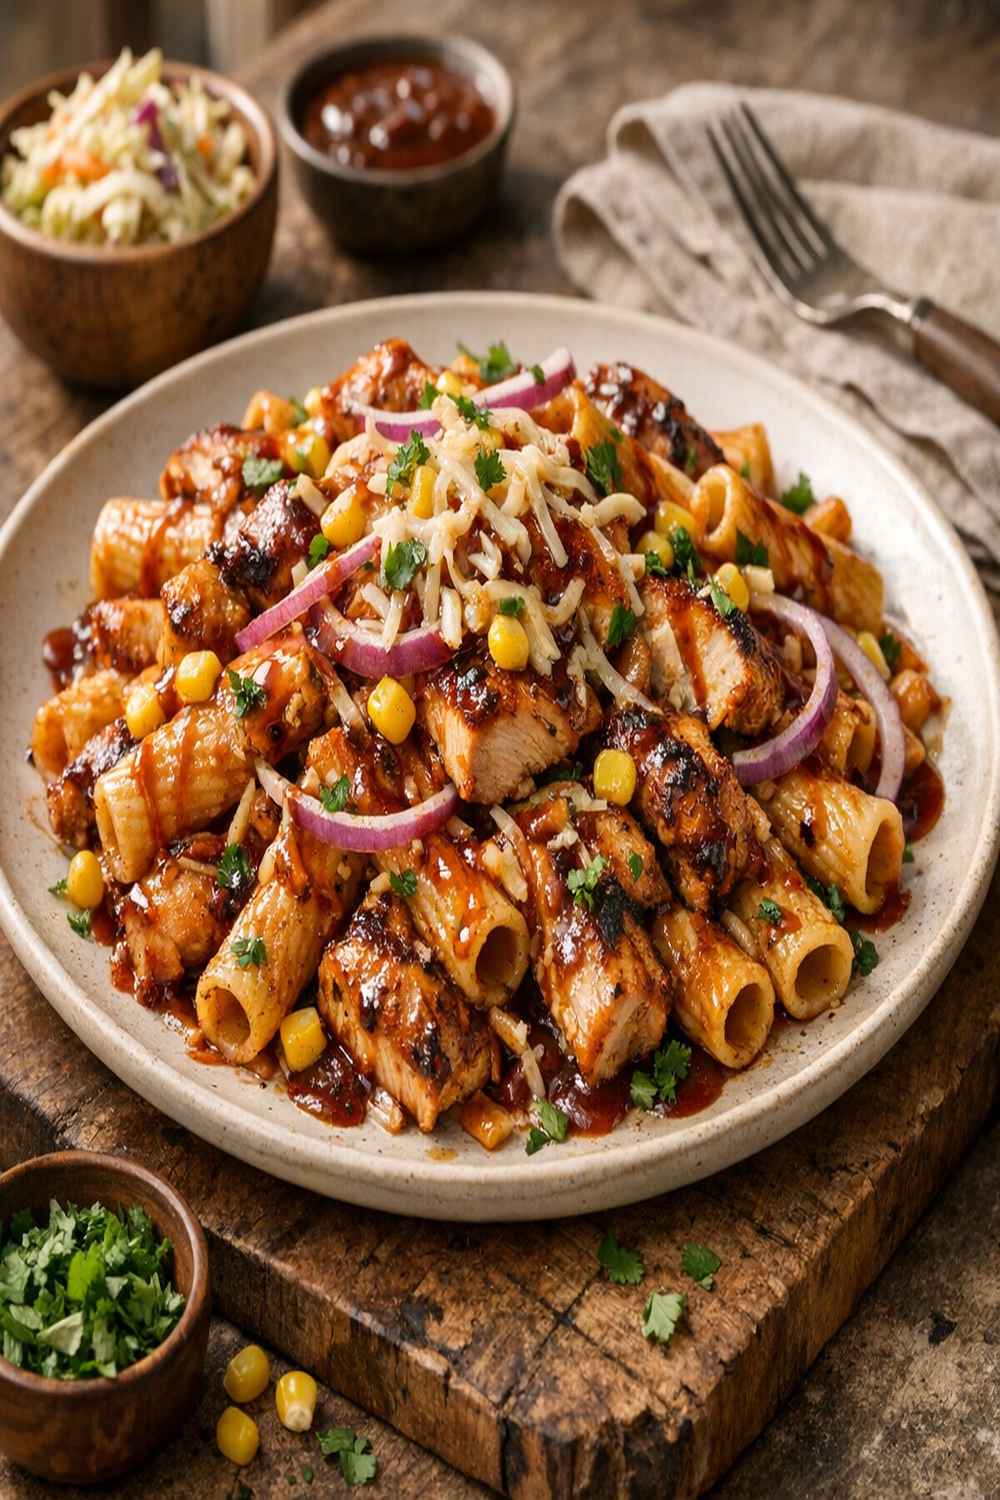
BBQ Chicken Pasta Recipe
This post contains affiliate links. As an Amazon Associate I earn from qualifying purchases.
If you’ve always wanted to make BBQ chicken pasta but felt intimidated by the idea of balancing smoky flavors, tender chicken, and perfectly cooked noodles all in one pan, this is your starting point. I’m going to walk you through this dish step-by-step, and I promise you—by the time you finish, you’ll have created something that tastes like it came from a restaurant kitchen, not your everyday stovetop. This recipe teaches you foundational skills you’ll use forever, from searing protein to building layers of flavor. If you’re already comfortable in the kitchen, you might also enjoy exploring sides like our Best Green Beans Recipe to round out your meal.
How to Make BBQ Chicken Pasta for the First Time (You’ve Got This)
I still remember the first time I attempted a one-pan pasta dish. It was a rainy Anchorage evening, and I’d invited friends over without thinking through what I’d actually cook. I grabbed chicken, some pantry staples, and a bottle of BBQ sauce—honestly, because I was nervous about getting the flavors right from scratch. What happened next surprised me: the bacon rendered its fat naturally, the chicken sealed beautifully, and when I added that BBQ sauce alongside the tomatoes and stock, something magical happened. The pasta absorbed all those flavors while it cooked, and what could have been a disaster became one of my most-requested dishes.
That night taught me that cooking doesn’t require perfection—it requires presence. You’re going to stand at your stove for about thirty minutes total, and most of that time, the pan is doing the work while you simply watch and stir occasionally. There’s no fancy technique here, just honest cooking with ingredients that respect both your time and your taste buds.
What to Expect Before You Start
Let me set realistic expectations so you walk into this with confidence. This recipe takes approximately thirty minutes from start to finish, with most of that time being hands-off cooking. You’re not rushing; you’re not stressing. The difficulty level is genuinely beginner-friendly—if you can chop vegetables and stir a pan, you can make this.
- The searing step feels dramatic but isn’t difficult — When the bacon and chicken hit the hot pan, you’ll hear sizzling and see browning. This is exactly what should happen. Browning = flavor. Many beginners fear they’re “burning” things when they’re actually creating depth. You’re not burning; you’re creating.
- The pasta cooks directly in the sauce (this isn’t a mistake) — One of the things that makes this recipe special is that dried pasta cooks right in the broth and sauce, absorbing all those smoky, tangy flavors instead of sitting in plain salted water. If this sounds chaotic, I understand. It’s not. It’s actually simpler than traditional pasta cooking, and the result is pasta that tastes like something instead of a neutral canvas.
- The cheese melts under the broiler at the end — This final step is pure magic and takes three to five minutes. Your oven does the work while you clean a dish or breathe deeply about what you’ve accomplished.
Equipment You’ll Need (And What You Can Skip)
I’m an Alaskan cook, which means I believe in efficiency and function over fancy gadgets. You don’t need special equipment for this dish. Here’s what actually matters and what’s nice-to-have.
- One large sauté pan or wide skillet (12 inches if possible) — This is the only essential piece. Cast iron works beautifully here, as does stainless steel. Avoid non-stick if you want real browning on your chicken and bacon. A 12-inch pan gives you space to work without crowding ingredients.
- A wooden spoon or silicone spatula — Metal can be harsh on certain cookware. Wood feels good in your hand and does the job perfectly for stirring.
- A cutting board and sharp knife — Essential for prepping. Sharp knives are safer and faster than dull ones. A beginner’s knife doesn’t need to be expensive; it needs to hold an edge.
- Measuring cups and spoons — Standard kitchen measuring tools. Nothing fancy required.
- Optional: a lid for your pan — If your sauté pan has a lid, use it. If not, aluminum foil works perfectly for trapping steam and heat while the pasta cooks.
The Ingredients – A Beginner’s Shopping Guide
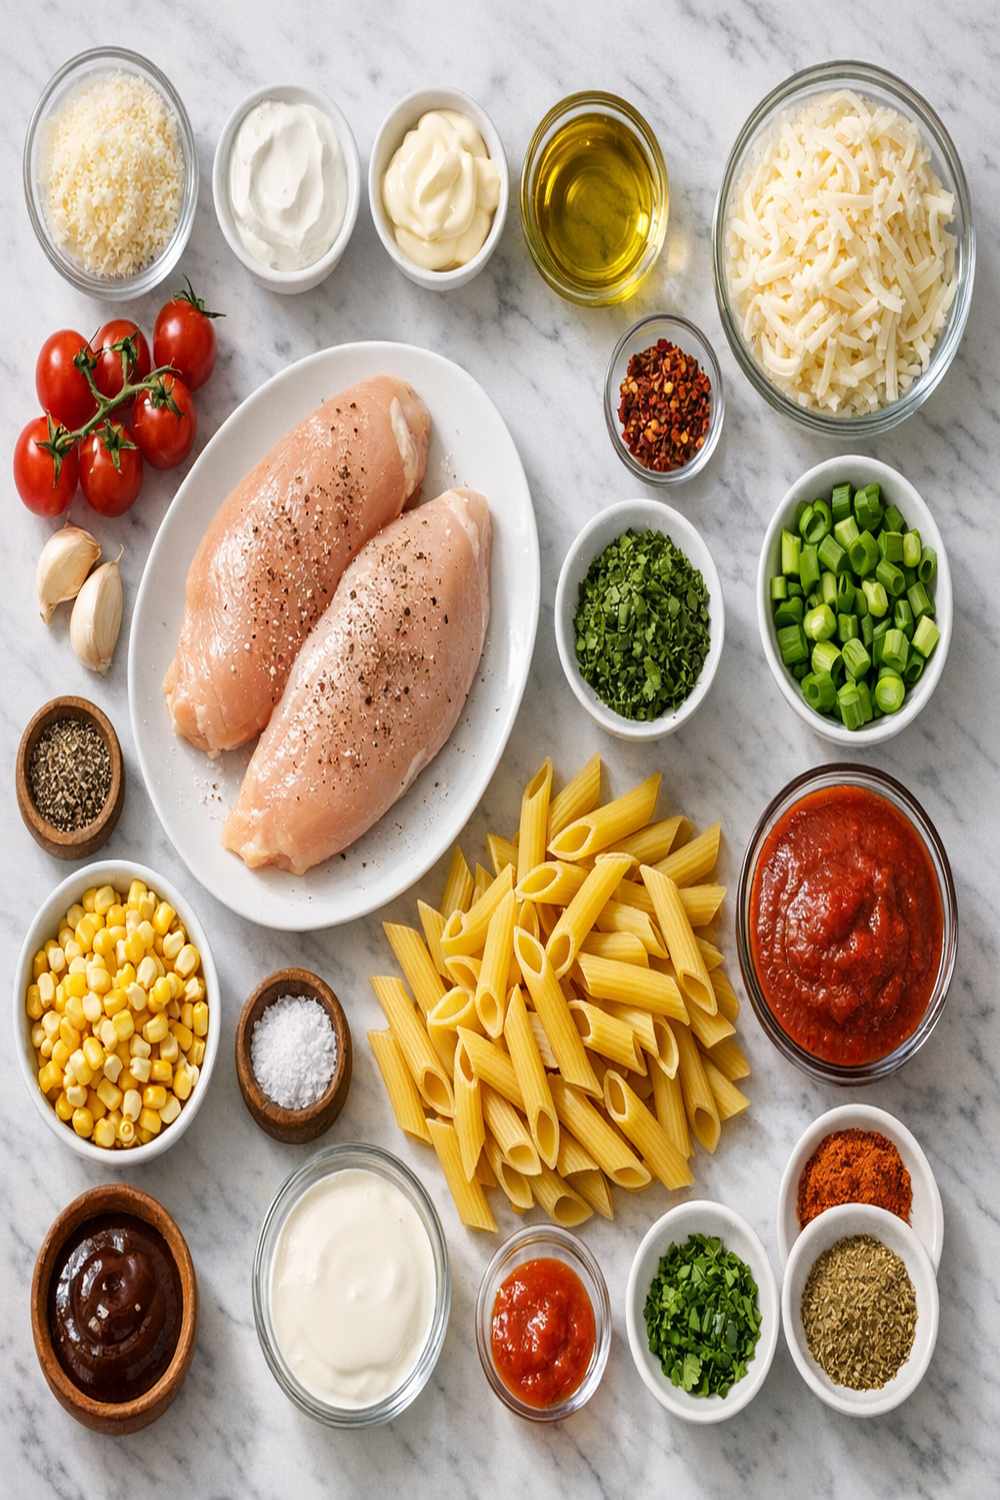
Shopping for this recipe is straightforward. Most ingredients are staples you’ll recognize in any grocery store, and several are items you might already have at home. I’ll walk you through where to find each one and what quality indicators matter for beginners.
- 750 milliliters hot vegetable broth (store-bought or homemade; keep unopened boxes in your pantry, refrigerate after opening for up to five days, or freeze for later)
- 1 large yellow onion (choose ones that feel heavy for their size and have papery, dry skin; store in a cool, dark place, not the refrigerator)
- 600 grams chicken breast meat (ask the butcher to remove the tenders or trim them yourself; freeze in individual portions if buying more than you need, and thaw overnight in the refrigerator)
- 3 garlic cloves (buy a fresh head; store bulbs in a breathable container away from heat and light; they last weeks this way)
- 6 tablespoons barbecue sauce (choose a brand you enjoy; refrigerate after opening and use within three months)
- Salt and freshly ground black pepper (taste as you go; this is your seasoning safety net)
- 100 grams shredded mozzarella cheese (freshly grated melts better than pre-shredded, but pre-shredded works fine; refrigerate in an airtight container for up to two weeks)
- 2 tablespoons fresh lemon juice (optional but recommended; brightens the dish at the end)
- 2 red bell peppers (select peppers with firm, smooth skin and no soft spots; store in your refrigerator’s crisper drawer for up to two weeks)
- 1 teaspoon sweet smoked paprika (buy from the spice aisle; transfer to an airtight glass jar and store away from direct light; keeps for about one year)
- 250 grams dried pasta (any shape works—penne, rigatoni, or farfalle are traditional; store in an airtight container in your pantry for up to one year)
- 200 grams smoky cured pork strips (look for bacon lardons or thick-cut bacon; keep refrigerated in a sealed container for up to two weeks)
- 400 grams canned diced tomatoes (check the label for “no added salt” varieties if watching sodium; unopened cans store indefinitely in your pantry)
Step-by-Step: Your First BBQ Chicken Pasta Recipe
Here we go. You’re about to make something genuinely delicious. I’m going to assume you’ve never made this before, so I’m including details that might seem obvious to experienced cooks—that’s intentional. Every single step matters when you’re learning, and I want you to feel confident the entire way through.
Step 1: Prepare Your Ingredients (Mise en Place)
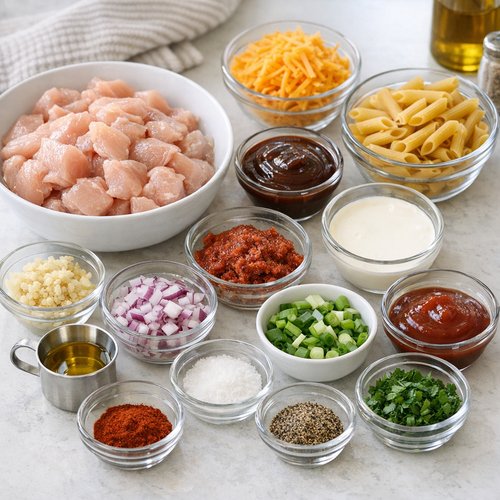
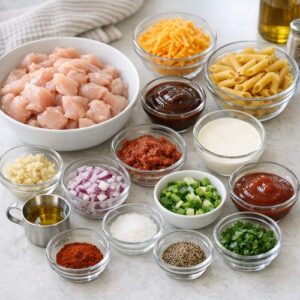
Before any heat touches your pan, prepare everything and arrange it within arm’s reach. This is called mise en place—French for “everything in its place”—and it’s the single most important habit in cooking. When you’re ready to start cooking, you won’t be hunting for ingredients while your pan gets too hot or cools down.
Chop your onion into pieces roughly the size of a dime. Don’t stress about perfect uniformity—even sizes cook at the same rate, which is what matters. Peel your garlic cloves and crush them with the flat side of your knife (smash them gently; you’re not angry at them). Cut your red peppers in half, remove the seeds and white membrane, then cut the flesh into bite-sized pieces. Cut your chicken into chunks approximately the size of walnuts—not tiny, not huge, just bite-sized.
Place your bacon strips on a cutting board and cut them into roughly one-inch pieces. Pour your vegetable broth into a measuring cup and leave it on the counter (it doesn’t need to be hot yet, despite the name; the heat from your pan will warm it). Measure out your paprika, BBQ sauce, and salt and pepper into small bowls. This takes maybe five minutes, and it transforms the cooking process from stressful to smooth.
Step 2: Brown the Bacon (Create Your Fat Base)
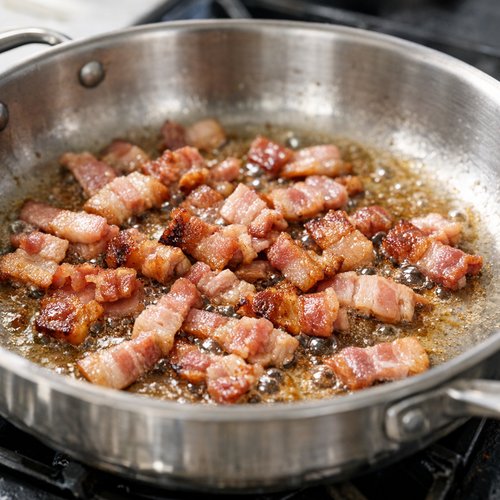
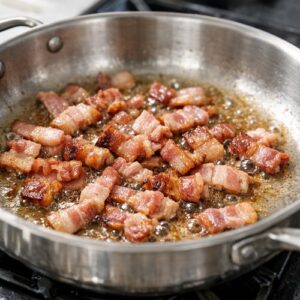
Place your large sauté pan on the stove and turn the heat to medium. This is important: medium heat, not high. High heat will burn your bacon before it renders its fat properly. You want slow, steady browning.
Add your bacon pieces to the cold pan. Yes, cold. This allows the fat to render gradually as the pan heats up, which means crispier bacon and more flavorful rendered fat for cooking everything else. Let it cook undisturbed for about three minutes. Then stir it occasionally for another two to three minutes until the edges are golden brown and the fat is releasing into the bottom of the pan. You should see clear fat pooling—that’s liquid gold for flavor.
Don’t drain this fat. Don’t pour it off. This is the foundation of your entire dish’s flavor. If you rendered a lot of fat and it seems excessive (more than a tablespoon), you can remove about half, but most of it needs to stay.
Step 3: Sear the Chicken (Build Flavor Through Browning)
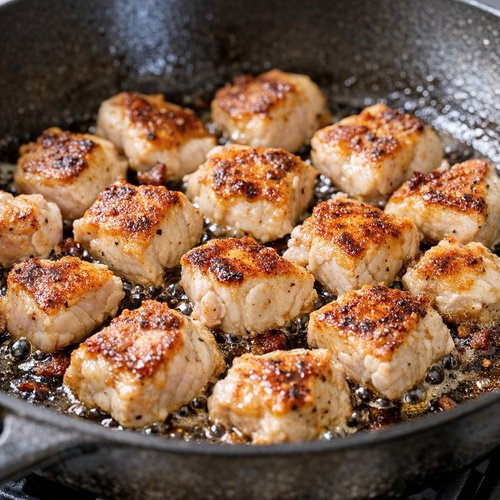
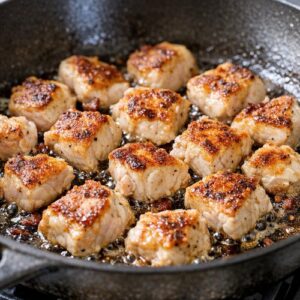
Add your chicken pieces to the pan with the rendered bacon fat. Don’t stir immediately. This is crucial. Let the chicken sit undisturbed for about two minutes so it makes contact with the hot pan and begins to brown. You’re looking for golden-brown edges on the chicken—this is flavor development through the Maillard reaction (a chemical process that creates complex flavors when protein meets heat).
After those two minutes, stir the chicken and bacon together. Continue cooking for another three to four minutes until the chicken is mostly white on the outside with golden-brown edges. The inside doesn’t need to be fully cooked yet; we’re just sealing the exterior and building flavor.
You’ll know this step is done when you can’t see raw pink on the outside of any piece and the pan smells incredible—smoky, savory, absolutely delicious.
Step 4: Add the Vegetables (Soften Without Overcooking)
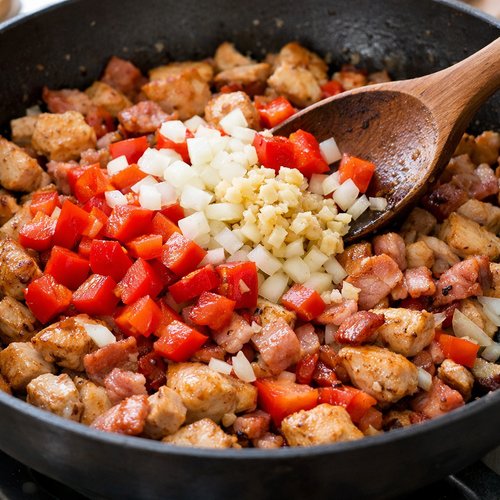
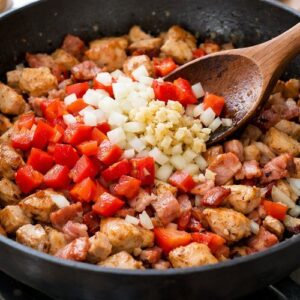
Add your chopped onion, crushed garlic, and red pepper pieces to the pan with the bacon and chicken. Stir everything together thoroughly so the vegetables distribute evenly and make contact with the hot pan. This should take about one minute—you’re not cooking them yet, just incorporating them.
Now let this mixture cook, stirring occasionally, for about five minutes. You’re watching for the onion to become translucent (you can see through it) and the peppers to soften slightly. The kitchen will smell phenomenal—garlicky, sweet from the peppers, smoky from the bacon. This is the smell of flavor building.
When the vegetables look soft and the onion is mostly clear rather than opaque white, you’re ready for the next step.
Step 5: Add Pasta, Sauce, and Broth (Create Your Cooking Liquid)
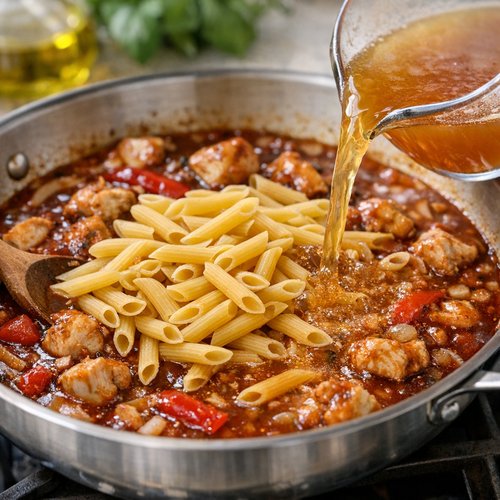
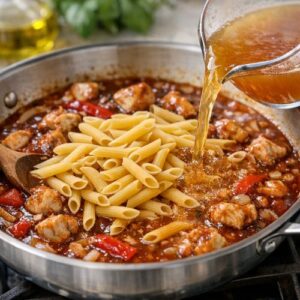
This is where the magic really happens. Add your dried pasta directly to the pan—no pre-cooking, no separate pot. This might feel wrong; I promise it’s not. Add the canned tomatoes (juice and all), the BBQ sauce, the smoked paprika, and 500 milliliters of your vegetable broth. Save the remaining 250 milliliters in case you need extra liquid later.
Stir everything together thoroughly for about one minute. Make sure the pasta is submerged or mostly covered with liquid. Some pieces can be peeking out; they’ll absorb liquid as it cooks. Season with a pinch of salt and a few grinds of black pepper. Taste the broth—does it need more salt? Add a tiny bit now rather than at the end.
The mixture should look wet and saucy, not dry. If it looks dry, add some of that reserved broth.
Step 6: Cover and Simmer (Let the Pan Do the Work)
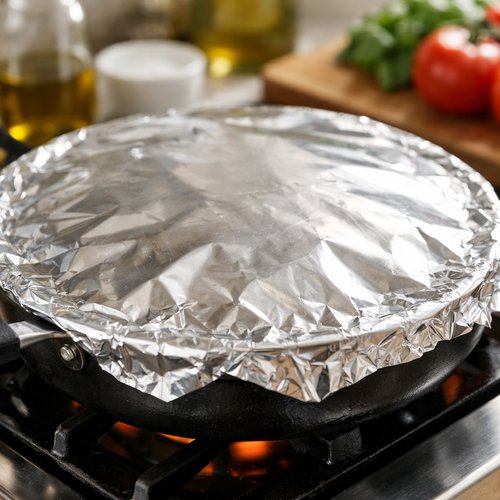
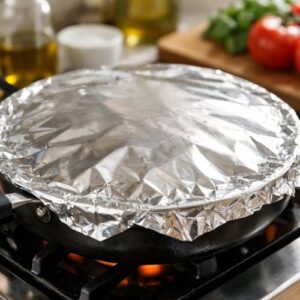
Place a lid on your pan, or if you don’t have one, cover it tightly with aluminum foil. Turn the heat down to medium-low (this is important—you want a gentle simmer, not a rolling boil, or the pasta will break apart and become mushy).
Set a timer for fifteen minutes. During this time, the pasta will absorb the broth and sauce, cooking directly in the flavored liquid. This is passive cooking—you’re not doing anything except occasionally checking that the pan isn’t boiling too vigorously.
At the fifteen-minute mark, carefully remove the lid (steam is hot!), and stir the pasta. Check if the pasta is tender by tasting a piece. Is it soft but still slightly firm to the bite? Perfect. Is it still crunchy? Cook for another two to three minutes and check again. Is it soft and mushy? You’ve cooked it a bit long, but it’s still delicious—this is a learning curve, and timing varies based on pasta brand and your stove.
Most of the liquid should be absorbed, but some sauce should remain coating the pasta. If the pan looks very dry, add a splash of that reserved broth.
Step 7: Preheat Your Broiler (Prepare for the Finale)
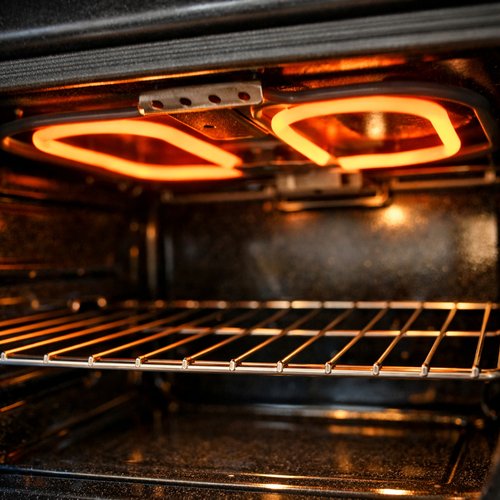
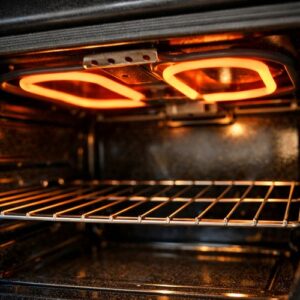
About five minutes before you think the pasta will be done, turn your oven’s broiler on to high. Position the rack about six inches below the heating element. This gives your oven time to heat while the pasta finishes cooking, so everything is ready when you need it.
Step 8: Add Cheese and Broil (Create a Golden Crust)
Once the pasta is cooked to your liking, remove the pan from the stovetop. Taste it again and adjust salt and pepper if needed. If you have fresh lemon juice, squeeze a small amount over everything—it brightens all those smoky, savory flavors beautifully.
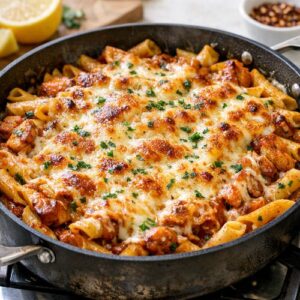
Sprinkle your shredded mozzarella evenly over the top of the pasta. Try to distribute it so there are no bare patches. Carefully place the pan under the broiler (use an oven mitt; the handle will be hot). Set a timer for three to four minutes.
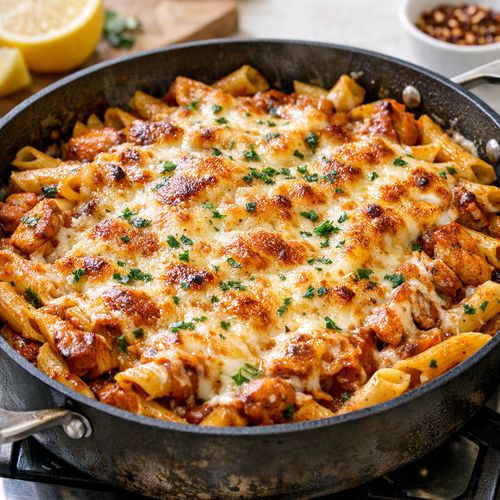
Watch through the oven window. You’re looking for the cheese to melt completely and turn golden-brown in spots. Some brown is good—that’s where caramelization happens. When it looks melted and golden, remove the pan from the oven immediately. The cheese will continue cooking slightly from residual heat.
Let it sit for one minute before serving. This allows the cheese to set slightly so it doesn’t separate when you portion the dish.
How to Tell If You Did It Right
Success in this recipe comes down to a few specific signs. Learn to recognize these, and you’ll know you’ve nailed it every single time you make this.
- The bacon should be crispy and golden, not black — This tells you that you nailed the temperature and timing on step two. If it’s dark brown to black, your heat was too high; next time, use medium heat and be patient.
- The chicken should be opaque white throughout with golden-brown edges — Cut into the largest piece to check. If the inside is still pink, you need a few more minutes of simmering. If it’s cooked through, you’re golden. Chicken breast should never be rubbery; if it is, your heat was too high during the searing step.
- The pasta should be tender but not mushy, with visible sauce clinging to each piece — Grab a single piece of pasta and taste it. It should require minimal chewing but should have some gentle resistance. If it’s crunchy, cook longer. If it’s soft and broken, you’ve gone a bit long, but it’s still delicious.
- The cheese should be melted and golden with some brown spots, not burned — The brown spots are caramelization and flavor. Black spots mean your broiler is too hot or you left it in too long; next time, watch more carefully or move the rack lower.
- The kitchen should smell smoky, savory, and absolutely delicious — If it smells like barbecue, bacon, and slightly charred cheese, you’ve done it right.
What Went Wrong? Beginner Fixes
Even experienced cooks have moments where something doesn’t go exactly as planned. Here are the most common beginner mistakes I see, why they happen, and exactly how to fix them or prevent them next time.
- The pasta is crunchy and won’t soften — This happens when the pan wasn’t hot enough when you added the liquid, or you didn’t simmer long enough. If this is happening, simply add another 250 milliliters of broth, replace the lid, and simmer for another five to ten minutes. The pasta will continue absorbing liquid and softening. There’s no permanent damage here.
- There’s too much liquid and the dish looks soupy — You likely added too much broth at the beginning. If this happens before broiling, simply simmer uncovered for a few minutes while stirring occasionally. The excess liquid will evaporate. If it’s already been broiled, honestly, it’s still delicious—it’s pasta in a flavorful sauce, which is exactly what this should be. Some people prefer it brothier than others.
- The chicken is tough and rubbery — This means your initial heat was too high during searing, or you simmered at too high a temperature. Chicken breast is lean and dries out quickly under intense heat. Next time, be disciplined about medium and medium-low temperatures. The dish will take the same amount of time; the results will be much better.
- The cheese burned under the broiler instead of melting — Your broiler is hotter than most, or your pan was positioned too close to the heating element. Next time, lower the rack slightly and check at the two-minute mark instead of waiting the full three to four minutes. Every oven is different, and learning yours is part of cooking confidently in your own kitchen.
- The bacon tastes overly smoky or bitter — You likely cooked it too long or at too high a temperature, which causes the sugar in the meat to caramelize and turn bitter. Next time, use medium heat and pull it off the heat when it’s golden, not dark brown. Remember, it cooks a bit more after you add other ingredients.
Expert’s Nutritional Tip: The Power of Smoked Paprika
Here’s something I always tell my clients: smoked paprika isn’t just a flavor-builder—it’s also packed with antioxidants, particularly capsaicinoids (compounds that give peppers their health benefits). This recipe uses only one teaspoon, which might seem small, but paprika is concentrated in flavor and nutrition. The smoky quality comes from the slow drying and smoking process, which actually preserves more of the pepper’s beneficial compounds than you’d get from fresh peppers alone.
What makes this relevant to Alaska’s food culture is that we’ve historically used smoking and preservation techniques to make our salmon, halibut, and game meats last through winters. Smoked paprika carries that same philosophy—using heat and smoke to concentrate flavor while actually preserving nutritional integrity. It’s a spice that respects both tradition and science.
Make-Ahead Guide: Meal Prep Like a Professional
One of the reasons I love this recipe is that it adapts beautifully to meal prep and make-ahead cooking. Here’s how I approach it when I’m feeding myself for the week or preparing for company.
The night before: Complete steps one through four (prep and cook the bacon, chicken, and vegetables). Store this mixture in an airtight container in the refrigerator. The next day, you simply add the pasta and broth and continue from step five. This cuts your cooking time to about fifteen minutes when you’re actually ready to eat.
The fully cooked option: Make the entire dish through step six (before broiling). Let it cool to room temperature, then store in an airtight container in the refrigerator for up to three days. When you’re ready to eat, transfer to an oven-safe pan, add the cheese, and broil until golden. This is perfect for busy weeks when you want a hot dinner in five minutes.
The freezer option: Complete through step six, cool completely, then freeze in individual portions for up to three months. Thaw in the refrigerator overnight, transfer to an oven-safe pan, add fresh cheese (old cheese can get grainy after freezing), and broil. You’ve just created homemade frozen meals that taste like you cooked them today.
Seasonal Variations: Adapt This Recipe Year-Round
One thing I love about Alaskan cooking is learning to work with what’s seasonal and fresh. This BBQ chicken pasta adapts beautifully through the year.
Summer: Add fresh corn kernels (about ½ cup) in step four, along with diced zucchini. The sweetness of corn pairs beautifully with BBQ sauce and smoked paprika. If you can get fresh tomatoes at the farmers market, use them instead of canned—dice them and add them in step five.
Fall: Add roasted mushrooms (about 150 grams, diced) in step four. Mushrooms deepen the savory notes and make this feel heartier as temperatures drop. Consider adding a pinch of smoked cayenne pepper if you want more heat.
Winter: Stick with the classic recipe as written, but add a handful of fresh spinach in the last minute of cooking (step six). It wilts beautifully and adds nutrition without changing the core flavors. The pasta will still be delicious even with frozen vegetables if that’s what you have on hand.
Spring: Add fresh asparagus (about 150 grams, cut into one-inch pieces) in step four. Spring vegetables are tender and cook quickly. You might also add a tablespoon of fresh lemon zest for brightness as the season transitions.
Your Next Steps After Mastering This
Congratulations. You’ve made a one-pan pasta dish, which means you’ve learned several foundational cooking skills that unlock dozens of other recipes. You’ve learned how to render fat from bacon, sear protein for browning, soften vegetables, and cook pasta in broth instead of water. These skills are transferable.
Next, try making a similar dish with Carne Asada Recipe in the Crock Pot, which teaches you about marinades and slow cooking. Or explore Cinnamon Maple Whiskey Sour Recipe to learn about flavor balancing with heat, sweetness, and acidity—skills that transfer directly to cooking savory dishes.
If you want to stay in the pasta world, try making a seafood version with salmon or halibut (Alaska’s most famous fish), using the same technique but replacing the chicken and BBQ sauce with fresh fish and a white wine cream sauce. The methodology is identical; only the proteins and sauce change.
Can I Store BBQ Chicken Pasta?
Absolutely. This is one of the reasons I love this recipe—it stores beautifully and often tastes even better the next day as flavors meld.
Refrigerator storage: Let the finished dish cool to room temperature (about fifteen minutes), then transfer to an airtight container. It keeps for up to three days in the refrigerator. Reheat gently in a saucepan over medium-low heat with a splash of broth or water, stirring occasionally, until heated through. The pasta will have absorbed more sauce as it sits, which is delicious.
Freezer storage: Cool completely before transferring to an airtight freezer container or individual portions in freezer bags. It keeps for up to three months. For best results, thaw overnight in the refrigerator before reheating. If you’re in a hurry, you can reheat directly from frozen, but it takes longer—about twenty to thirty minutes in a covered saucepan over medium-low heat.
A note about the cheese: If you freeze this dish with the cheese already melted and broiled, the cheese can become slightly grainy when thawed and reheated. It still tastes great, but the texture changes. For better results, you can skip the broiling step before freezing, then add fresh cheese and broil after reheating (this takes an extra five minutes but yields better texture).
Nutrition Information
Based on USDA nutritional data (per serving, assuming six servings total), this recipe provides approximately:
Calories: 520 per serving | Protein: 38 grams | Carbohydrates: 48 grams | Dietary Fiber: 4 grams | Total Fat: 18 grams (including 6 grams saturated fat) | Sodium: 780 milligrams
This is a balanced, whole-foods-based meal. The protein comes from both the chicken and the bacon, making it satisfying and satiating. The carbohydrates come from the pasta and vegetables, and the fat from the bacon and cheese provides flavor and helps absorb fat-soluble vitamins from the vegetables. The smoked paprika and BBQ sauce add flavor without significantly increasing calories.
For those monitoring sodium, homemade broth will reduce the sodium content to around 600 milligrams per serving, and choosing low-sodium BBQ sauce can bring it even lower. The dish remains delicious with these adjustments.
What Can I Serve With BBQ Chicken Pasta?
This is a fairly complete meal on its own—it has protein, carbohydrates, vegetables, and fat—but there’s always room for simple sides that complement rather than compete.
- A simple green salad with lemon vinaigrette — The acidity and freshness of greens balance the richness of the pasta beautifully. Toss arugula or mixed greens with lemon juice, good olive oil, salt, and pepper. Serve alongside (not on top of) the pasta so people can customize their plate.
- Best Green Beans Recipe — Roasted or sautéed green beans add a fresh vegetable element and beautiful color contrast on the plate.
- Garlic bread or crusty bread — Perfect for soaking up any extra sauce. Slice a baguette in half lengthwise, brush with olive oil and minced garlic, and toast under the broiler for a few minutes until golden.
- Coleslaw with a light dressing — The crunch and slight acidity cut through the richness of the cheese and bacon beautifully. Make it the day before so flavors meld.

BBQ Chicken Pasta Recipe
Ingredients
Method
- Before any heat touches your pan, prepare everything and arrange it within arm's reach. This is called mise en place—French for "everything in its place"—and it's the single most important habit in cooking. When you're ready to start cooking, you won't be hunting for ingredients while your pan gets too hot or cools down. Chop your onion into pieces roughly the size of a dime. Don't stress about perfect uniformity—even sizes cook at the same rate, which is what matters. Peel your garlic cloves and crush them with the flat side of your knife (smash them gently; you're not angry at them). Cut your red peppers in half, remove the seeds and white membrane, then cut the flesh into bite-sized pieces. Cut your chicken into chunks approximately the size of walnuts—not tiny, not huge, just bite-sized. Place your bacon strips on a cutting board and cut them into roughly one-inch pieces. Pour your vegetable broth into a measuring cup and leave it on the counter (it doesn't need to be hot yet, despite the name; the heat from your pan will warm it). Measure out your paprika, BBQ sauce, and salt and pepper into small bowls. This takes maybe five minutes, and it transforms the cooking process from stressful to smooth.
- Place your large sauté pan on the stove and turn the heat to medium. This is important: medium heat, not high. High heat will burn your bacon before it renders its fat properly. You want slow, steady browning. Add your bacon pieces to the cold pan. Yes, cold. This allows the fat to render gradually as the pan heats up, which means crispier bacon and more flavorful rendered fat for cooking everything else. Let it cook undisturbed for about three minutes. Then stir it occasionally for another two to three minutes until the edges are golden brown and the fat is releasing into the bottom of the pan. You should see clear fat pooling—that's liquid gold for flavor. Don't drain this fat. Don't pour it off. This is the foundation of your entire dish's flavor. If you rendered a lot of fat and it seems excessive (more than a tablespoon), you can remove about half, but most of it needs to stay.
- Add your chicken pieces to the pan with the rendered bacon fat. Don't stir immediately. This is crucial. Let the chicken sit undisturbed for about two minutes so it makes contact with the hot pan and begins to brown. You're looking for golden-brown edges on the chicken—this is flavor development through the Maillard reaction (a chemical process that creates complex flavors when protein meets heat). After those two minutes, stir the chicken and bacon together. Continue cooking for another three to four minutes until the chicken is mostly white on the outside with golden-brown edges. The inside doesn't need to be fully cooked yet; we're just sealing the exterior and building flavor. You'll know this step is done when you can't see raw pink on the outside of any piece and the pan smells incredible—smoky, savory, absolutely delicious.
- Add your chopped onion, crushed garlic, and red pepper pieces to the pan with the bacon and chicken. Stir everything together thoroughly so the vegetables distribute evenly and make contact with the hot pan. This should take about one minute—you're not cooking them yet, just incorporating them. Now let this mixture cook, stirring occasionally, for about five minutes. You're watching for the onion to become translucent (you can see through it) and the peppers to soften slightly. The kitchen will smell phenomenal—garlicky, sweet from the peppers, smoky from the bacon. This is the smell of flavor building. When the vegetables look soft and the onion is mostly clear rather than opaque white, you're ready for the next step.
- This is where the magic really happens. Add your dried pasta directly to the pan—no pre-cooking, no separate pot. This might feel wrong; I promise it's not. Add the canned tomatoes (juice and all), the BBQ sauce, the smoked paprika, and 500 milliliters of your vegetable broth. Save the remaining 250 milliliters in case you need extra liquid later. Stir everything together thoroughly for about one minute. Make sure the pasta is submerged or mostly covered with liquid. Some pieces can be peeking out; they'll absorb liquid as it cooks. Season with a pinch of salt and a few grinds of black pepper. Taste the broth—does it need more salt? Add a tiny bit now rather than at the end. The mixture should look wet and saucy, not dry. If it looks dry, add some of that reserved broth.
- Place a lid on your pan, or if you don't have one, cover it tightly with aluminum foil. Turn the heat down to medium-low (this is important—you want a gentle simmer, not a rolling boil, or the pasta will break apart and become mushy). Set a timer for fifteen minutes. During this time, the pasta will absorb the broth and sauce, cooking directly in the flavored liquid. This is passive cooking—you're not doing anything except occasionally checking that the pan isn't boiling too vigorously. At the fifteen-minute mark, carefully remove the lid (steam is hot!), and stir the pasta. Check if the pasta is tender by tasting a piece. Is it soft but still slightly firm to the bite? Perfect. Is it still crunchy? Cook for another two to three minutes and check again. Is it soft and mushy? You've cooked it a bit long, but it's still delicious—this is a learning curve, and timing varies based on pasta brand and your stove. Most of the liquid should be absorbed, but some sauce should remain coating the pasta. If the pan looks very dry, add a splash of that reserved broth.
- About five minutes before you think the pasta will be done, turn your oven's broiler on to high. Position the rack about six inches below the heating element. This gives your oven time to heat while the pasta finishes cooking, so everything is ready when you need it.
- Once the pasta is cooked to your liking, remove the pan from the stovetop. Taste it again and adjust salt and pepper if needed. If you have fresh lemon juice, squeeze a small amount over everything—it brightens all those smoky, savory flavors beautifully. Sprinkle your shredded mozzarella evenly over the top of the pasta. Try to distribute it so there are no bare patches. Carefully place the pan under the broiler (use an oven mitt; the handle will be hot). Set a timer for three to four minutes. Watch through the oven window. You're looking for the cheese to melt completely and turn golden-brown in spots. Some brown is good—that's where caramelization happens. When it looks melted and golden, remove the pan from the oven immediately. The cheese will continue cooking slightly from residual heat. Let it sit for one minute before serving. This allows the cheese to set slightly so it doesn't separate when you portion the dish.
Notes
FAQs
Can I use chicken thighs instead of chicken breast?
Absolutely. Chicken thighs are actually more forgiving because they have more fat and are harder to overcook. They’ll be slightly juicier than breast meat. Cut them into similar bite-sized pieces and follow the recipe exactly as written. You might need an extra minute or two of simmering because thighs are denser, but taste-test the chicken around the twelve-minute mark to check for doneness. Many experienced cooks prefer thighs because they’re less likely to dry out.
What if I don’t have barbecue sauce?
You have options. You can make a quick version by combining two tablespoons ketchup, one tablespoon apple cider vinegar, one tablespoon honey, and ½ teaspoon Worcestershire sauce—this mimics store-bought BBQ sauce reasonably well. Or you can skip the BBQ sauce entirely and increase the smoked paprika to one and a half teaspoons, add a teaspoon of brown sugar, and a splash of apple cider vinegar. You’ll lose some of the sweetness, but the dish will still be delicious and actually lighter in flavor, which some people prefer.
Can I use a different pasta shape?
Yes. This recipe works with any dried pasta shape you enjoy. Penne, rigatoni, and farfalle (bow tie) are traditional choices because they have texture that captures sauce beautifully. Spaghetti or linguine work but are slightly less ideal because long strands can break up during the cooking process. Whatever you choose, stick to about 250 grams total, and the cooking time will remain roughly the same. The thicker the pasta shape, the longer it takes to soften, so if you use very thick pasta like bucatini, check at fifteen minutes and cook longer if needed.
How do I know when the pasta is perfectly cooked?
The best way is to taste it. About three minutes before you think it should be done, grab a single piece of pasta from the pan and taste it carefully. It should be tender enough that it doesn’t crack when you bite down, but it should have slight resistance (this is called “al dente,” which means “to the tooth” in Italian). If it’s crunchy, cook a few more minutes. If it’s mushy, you’ve cooked it longer than ideal, but it’s still fine to eat. Pasta brands vary in cooking time—some cook faster than others—so tasting is always more reliable than a timer. After you make this a few times, you’ll develop an intuition about your particular stove and pasta brand.
What if my broiler burns the cheese before it melts?
This means your broiler is very hot (some are hotter than others, which is completely normal). Move your oven rack lower so the pan is farther from the heating element, and check at the two-minute mark instead of waiting the full three to four minutes. You might also reduce the heat to just below the broiler setting—some ovens have this option, and it allows the cheese to melt more gently. Alternatively, cover the pan loosely with aluminum foil while the cheese is melting to protect it from direct heat, then remove the foil for the last minute to let it brown.
Can I make this without the bacon?
Yes, but you’ll lose the rendered fat that flavors the entire dish. If you’re avoiding pork, you can substitute with olive oil (use about three tablespoons) or another cured meat like turkey bacon or