Burger Pasta Recipe
This post contains affiliate links. As an Amazon Associate I earn from qualifying purchases.
Make this once on Sunday and eat well all week. I’m not exaggerating—this one-skillet burger pasta has saved countless busy families from the takeout trap, and it’s about to save yours too. In just 30 minutes, you’ll have a complete, satisfying meal that reheats beautifully for four to five days of lunches and dinners. If you’re looking to build a sustainable meal prep routine that doesn’t feel like punishment, this recipe is your starting point. Pair it with crispy baked potato wedges or ambrosia salad throughout the week for variety without extra cooking.
One-Skillet Burger Pasta Meal Prep: Cook Once, Eat All Week
I discovered the magic of one-pot meals during my first winter in Alaska, when I was juggling clinical hours at the hospital, weekend farmers market runs, and the simple reality that after a 12-hour shift, I had zero energy to clean three pans. One rainy November evening, I threw ground beef, onions, and pasta into a single deep skillet, added broth, and discovered something revolutionary: I could make a complete, nourishing meal without turning my kitchen into a disaster zone. That discovery changed everything about how I approach meal prep.
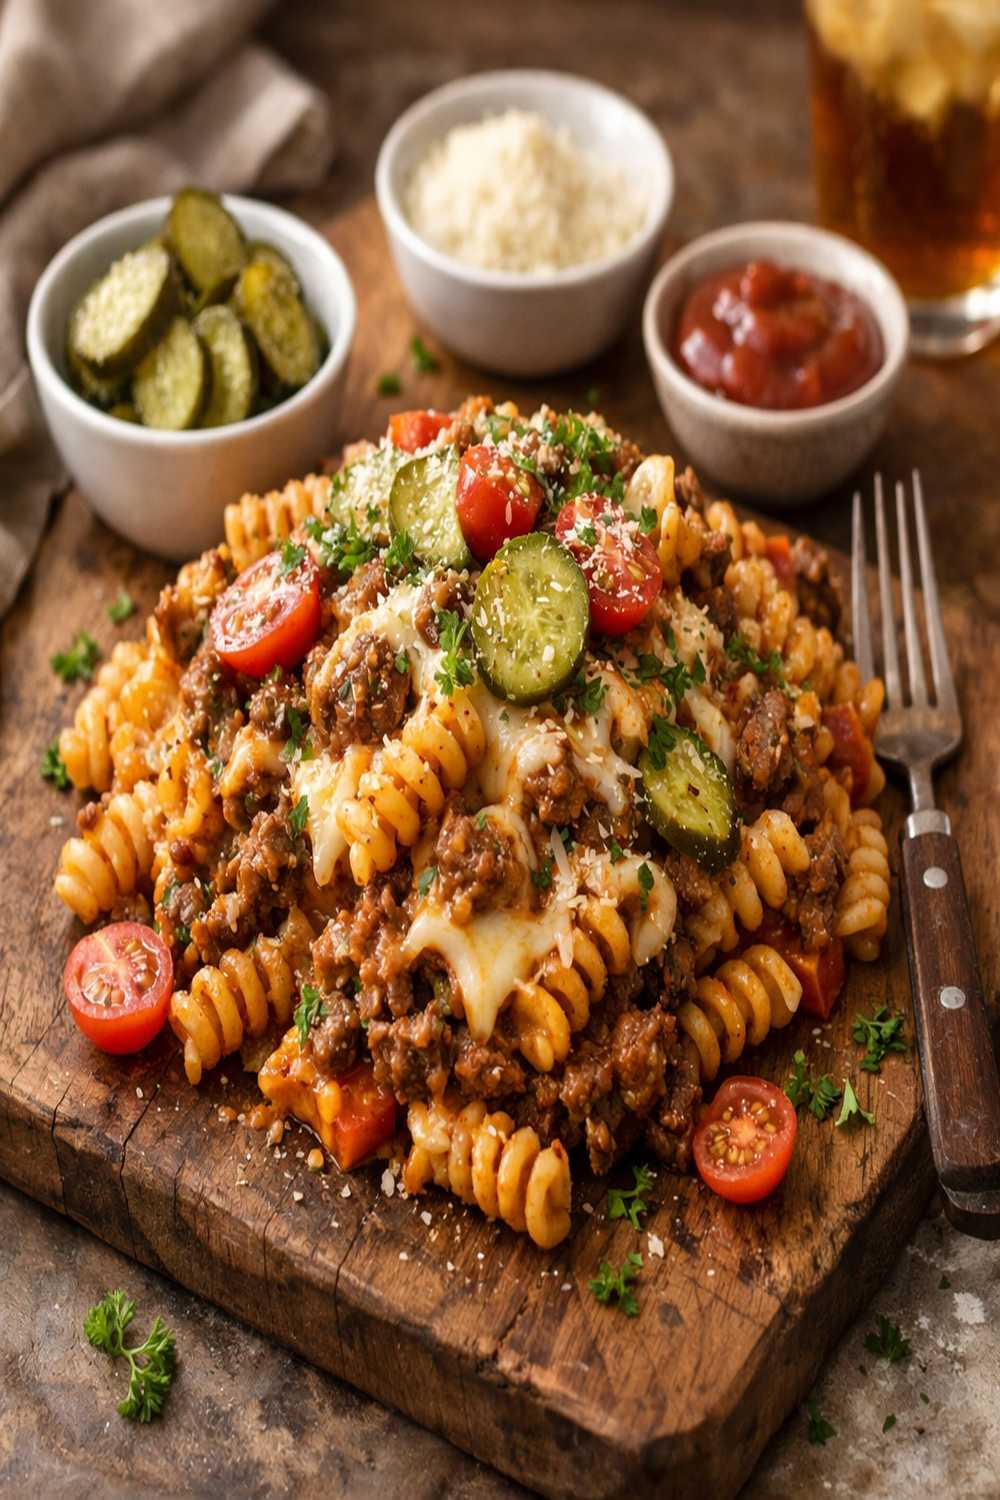
As a registered dietitian, I know that the best meal plan is the one you’ll actually stick to. And the meal plan you’ll stick to is one that doesn’t demand hours of kitchen time or mountains of dishes. This burger pasta checks every box: it’s nutritionally balanced, economical, endlessly adaptable, and—here’s the key—it tastes even better on day three than it does on day one.
Why This Recipe Is Perfect for Meal Prep
- Minimal Active Time – Just 10 minutes of hands-on cooking spread across prep and assembly, leaving you 20 minutes to handle other tasks while it simmers
- Freezer-Friendly Without Texture Loss – Unlike delicate pasta dishes, this one-pot style maintains its silky sauce and tender noodles through freeze-thaw cycles because the pasta absorbs the broth gradually
- Infinite Flavor Variations – The base is so versatile that you can transform the same batch into five completely different meals by changing toppings, sides, and serving methods throughout the week
Your Weekly Meal Plan With This Recipe
Here’s exactly how I transform one batch of burger pasta into five different meals that feel completely distinct. This approach keeps your taste buds engaged and prevents the mental fatigue that comes with eating the exact same thing every day.
- Monday Dinner – Serve it hot from the skillet with fresh-sliced green onions and a side green salad. This is your “fresh from the stovetop” moment—lean into it.
- Tuesday Lunch – Pack a portion cold in a glass container. Top with extra cheese and a drizzle of your favorite hot sauce right before eating. The cold version has a completely different appeal.
- Wednesday Dinner – Reheat gently on the stovetop with a splash of beef broth to loosen it slightly. Serve over toasted bread as an open-faced sandwich situation. Game-changer.
- Thursday Lunch – Mix the pasta with a handful of fresh vegetables (diced bell peppers, shredded carrots) that you prep separately, almost like a deconstructed skillet dinner salad. Eats like something completely new.
- Friday Night – If you’ve frozen a portion, thaw overnight and reheat with a lid on low heat. Serve with extra cheddar melted on top and crusty bread for soaking up every drop of sauce.
The Ingredients – Scaled for a Full Week
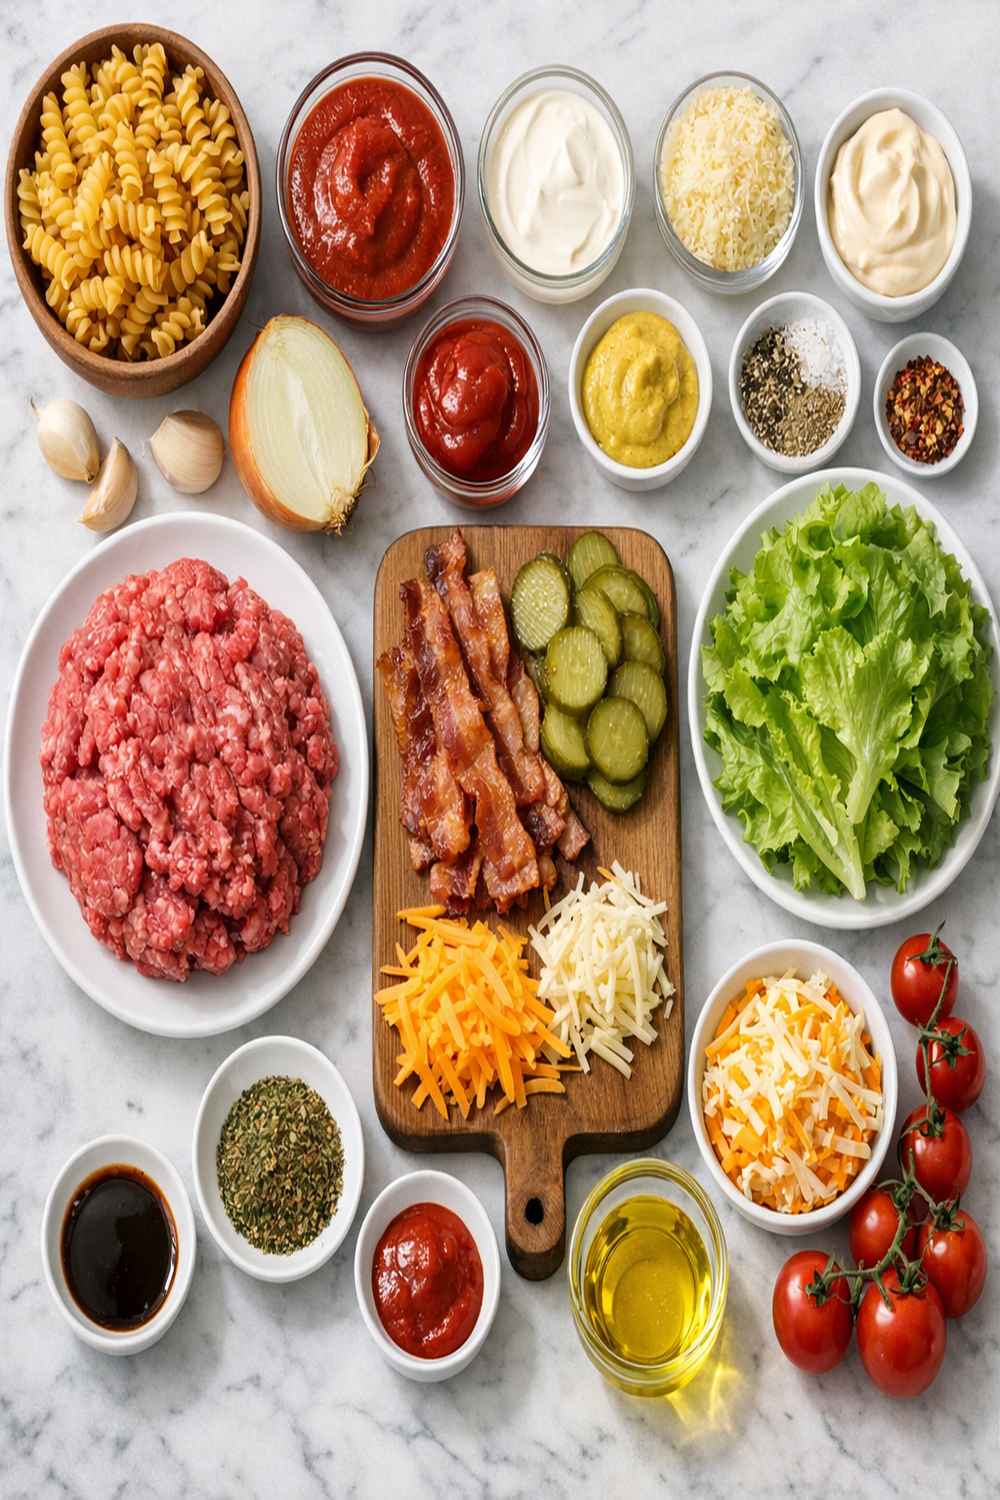
I’ve scaled these ingredients to make six generous servings—perfect for two people eating dinner plus lunch, or four people eating dinner only. Store everything strategically to maintain maximum freshness throughout the week.
- 3 tablespoons all-purpose flour (spooned into measuring cup, never packed; keeps the sauce silky without lumps)
- ¼ cup dill pickle relish (the tangy secret ingredient; keeps indefinitely in the refrigerator and adds brightness the dish needs)
- 1 pound ground beef (80/20 blend holds together better and creates richer sauce; choose grass-fed if your budget allows for superior omega-3 content)
- 1 (15-ounce) can tomato sauce (already opened cans keep five days in the refrigerator in a sealed container, not the original can)
- 4 cups beef broth, preferably low-sodium (homemade is ideal; boxed keeps unopened for two years, opened for five days)
- 1 teaspoon garlic powder (optional but recommended for depth; adds complexity without extra prep work)
- 4 green onions (store upright in a glass of water in the refrigerator; they’ll stay crisp for one week)
- 2 medium yellow onions (store in a cool, dark place away from potatoes; they’ll last two weeks and won’t sprout if separated)
- 2 tablespoons extra virgin olive oil (open only when needed; store away from heat and light to prevent rancidity)
- Salt and black pepper to taste (freshly cracked pepper makes a real difference in one-pot dishes)
- 1 pound pasta shells, uncooked (store in an airtight container to prevent moisture absorption and keep fresh indefinitely)
- 8 ounces sharp cheddar cheese, block form (pre-shredded contains anti-caking agents; buy a block and shred it yourself for better melting)
The Meal Prep Process: How to Make One-Skillet Burger Pasta in Bulk
I’m going to walk you through this as a system, not just a recipe. The goal is efficiency without cutting corners on flavor or nutrition. Set up your workspace before you start—mise en place, as we say in the kitchen—and watch how quickly this comes together.
Step 1: Prep Your Aromatics While the Skillet Heats
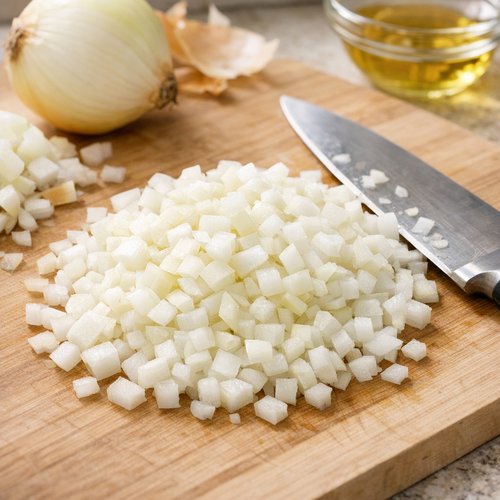
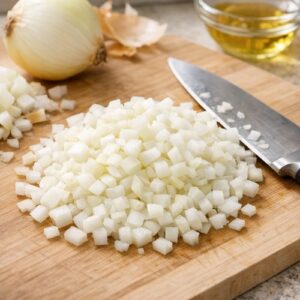
Dice both yellow onions into small, even pieces—about ¼-inch cubes. This takes maybe three minutes with a sharp knife, and uniform pieces cook evenly. Pro move: chill your knife under cold water for 30 seconds first; it makes cutting through onions cleaner and reduces the tear-inducing compounds released into the air. Place the diced onions in a small bowl and set aside. While you’re doing this, place your large deep skillet over medium heat with the olive oil. The oil should shimmer gently—not smoke—when you’re ready to add the beef.
Step 2: Brown the Ground Beef and Soften the Onions Together
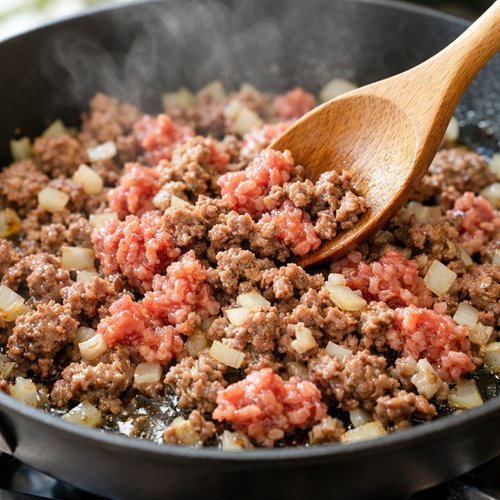
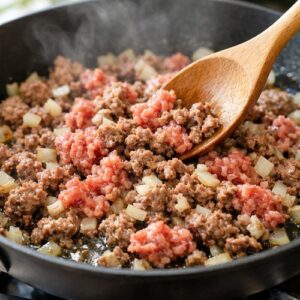
Once the oil is ready, add the ground beef directly to the skillet, breaking it into small pieces as it hits the hot surface. Use a wooden spoon or spatula to continuously break it apart—don’t let it sit and form large clumps. After two minutes, add the diced onions to the same skillet. This is the efficiency move: everything cooks together, and the onions release their moisture to help further brown the beef. Stir regularly for five to six minutes until the beef is completely browned (no pink remaining) and the onions are soft and translucent. If significant grease has accumulated, carefully drain it into a small container (save it for cooking vegetables later in the week).
Step 3: Create Your Thickening Base With Flour
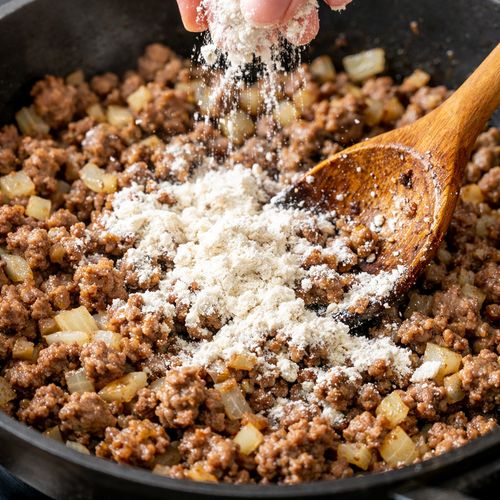
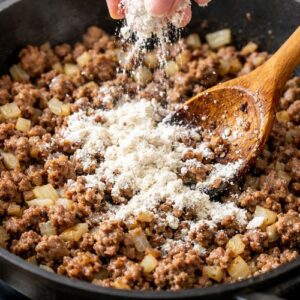
Sprinkle the flour over the cooked beef and onions, stirring constantly for exactly one minute. You’re creating a roux—a flour and fat combination that will thicken your sauce. Watch carefully; you want the flour to toast slightly and smell nutty, but not brown or burn. This step prevents lumps later and builds deeper flavor. The flour will coat the bottom of the skillet and start to stick slightly, which is exactly right.
Step 4: Deglaze and Build Your Sauce
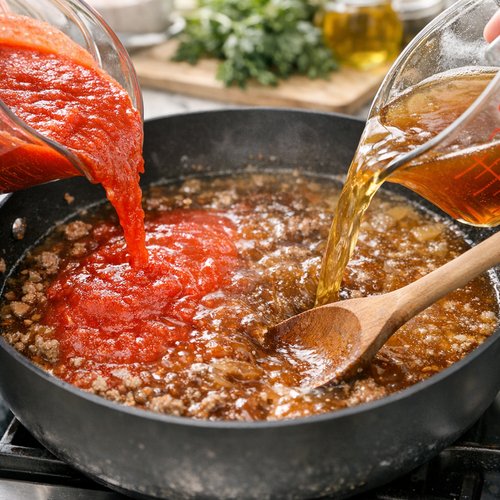
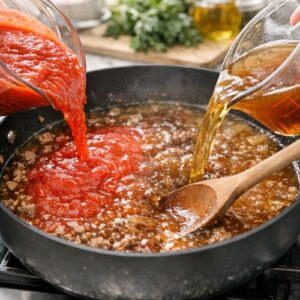
Pour in the tomato sauce and all four cups of beef broth simultaneously. Stir vigorously for 30 seconds—you’re dissolving the flour off the bottom of the skillet and creating a smooth, unified sauce. Some of the brown bits (called fond) stuck to the bottom are pure flavor; they’ll incorporate into your sauce as you stir. If you see any lumps of flour, keep stirring until they disappear. The sauce should be smooth and slightly loose at this point.
Step 5: Add the Uncooked Pasta and Combine
Add the entire pound of uncooked pasta directly to the skillet. Stir well—the liquid won’t cover all the pasta, and that’s completely normal. Uncooked pasta will settle and absorb the broth as it cooks, and you’ll stir it halfway through to ensure even cooking. The mixture should look slightly soupy and crowded. If it looks too dry, add ½ cup more broth.
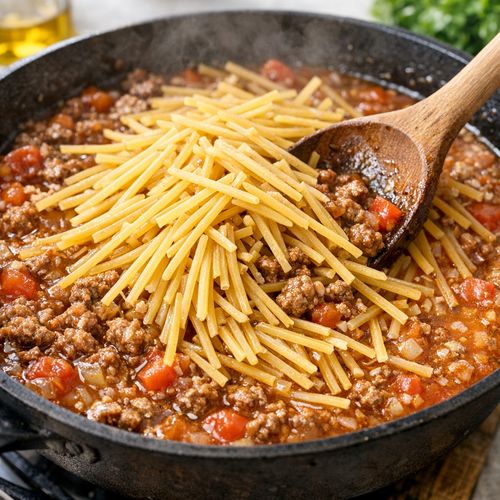
Step 6: Bring to a Boil, Then Reduce Heat and Simmer
Increase the heat to medium-high and watch the skillet carefully. You’re looking for the liquid to come to a full rolling boil—this takes about three to four minutes. Once it reaches a boil, give everything a quick stir to loosen any pasta stuck to the bottom of the skillet, then place a lid on top (use a baking sheet if you don’t have a skillet lid) and reduce the heat to low. This traps steam and helps the pasta cook evenly. Set a timer for 10 minutes.
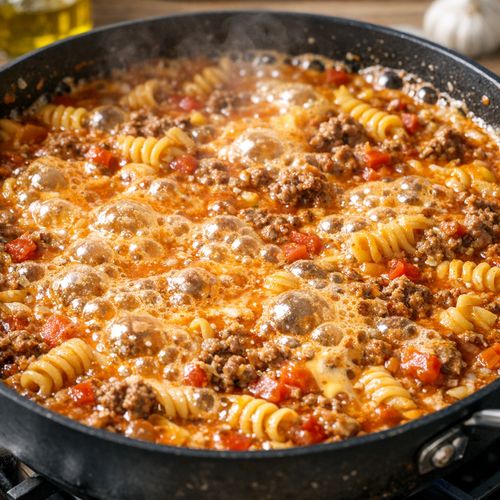
Step 7: Stir and Monitor Pasta Doneness
At the seven-minute mark, lift the lid and stir gently. The pasta should be starting to soften, and the sauce should be thickening noticeably. If the pasta seems to be drying out more than you’d like, add another ¼ cup broth. Replace the lid and continue simmering. At the 10-minute mark, check the pasta for tenderness. It should be cooked through but not mushy. If it still needs time, cook for another minute or two, but check frequently. The sauce should be thick and creamy, coating the pasta rather than swimming in liquid.
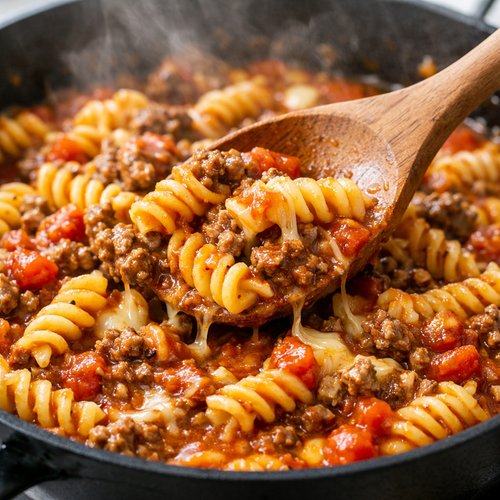
Step 8: Melt Cheese and Add Final Flavors
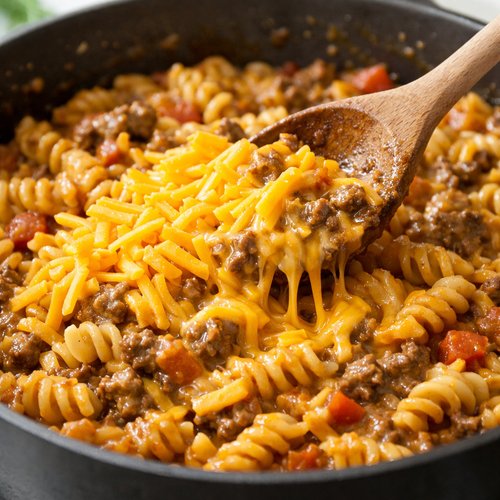
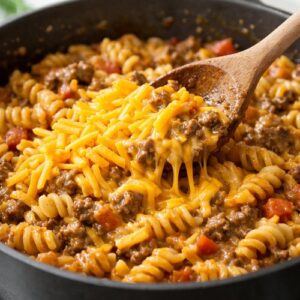
Once the pasta is tender and the sauce has thickened to your liking, turn off the heat. Add the shredded cheddar cheese, stirring constantly until it’s completely melted and incorporated. This should take 60 seconds. The residual heat will melt the cheese smoothly. Stir in the dill pickle relish—this adds tang and brightness that balances the richness of the beef and cheese. Taste and adjust seasoning with salt, pepper, and that optional garlic powder. Top with fresh-sliced green onions right before serving.
Storage and Organization System
- High-Quality Glass Containers With Lids – Glass maintains the integrity of your meal better than plastic; it won’t absorb odors, doesn’t leach chemicals when heated, and shows you exactly what you have left. Buy a set with matching lids—they’re game-changers for meal prep sanity.
- Divide Into Four Portions Immediately After Cooking – Don’t store the entire batch together. Divide into four containers while the pasta is still warm but has cooled enough to handle safely. This portion strategy means you’re not opening and closing one large container all week, introducing bacteria with each opening.
- Label Everything With Date and Contents – Use painter’s tape and a permanent marker on the lid, not the container itself. Write the date you made it and “Burger Pasta – Eat By [five days from today].” This takes 20 seconds and prevents the “Is this still good?” refrigerator roulette.
How to Reheat Without Losing Quality
Stovetop Method (Best for Days 1-3): Place your portion in a skillet over medium-low heat with a lid. Add one tablespoon of beef broth or water to loosen the sauce slightly. Heat for four to five minutes, stirring occasionally, until warmed through. This method prevents the pasta from drying out and allows the sauce to re-emulsify beautifully. The pasta absorbs more flavor on day two and three, so expect the dish to actually improve.
Microwave Method (Best for Office Lunches): Transfer your portion to a microwave-safe container with a lid (leave the lid slightly ajar to allow steam to escape). Microwave on 50% power for two to three minutes, stirring halfway through. Lower power prevents the edges from overheating while the center stays cold. This takes a bit longer but yields better results than high power.
Oven Method (Best for Feeding Multiple People): Preheat your oven to 325°F. Transfer your portions to an oven-safe dish, cover with foil, and bake for 12 to 15 minutes until heated through. This gentle method prevents any evaporation and works beautifully if you’re reheating multiple portions at once. I use this method on Friday nights when I’m serving my family.
Can I Freeze Burger Pasta Recipe?
Absolutely, and I do this regularly. Here’s my exact system: Allow the pasta to cool completely to room temperature (about 30 minutes) before freezing. Hot food creates steam in the container and promotes ice crystal formation. Place your portions in freezer-safe containers, leaving ½-inch headspace at the top (pasta expands slightly as it freezes). Label with the date and “Use Within 3 Months” in permanent marker. Frozen burger pasta will maintain quality for up to three months, though I typically use it within six to eight weeks for best flavor.
To thaw: Transfer your container to the refrigerator the night before you want to eat it. Thawing overnight allows the pasta to rehydrate slowly without texture loss. Never thaw at room temperature—this allows bacteria to multiply. Once thawed, reheat using the stovetop method above, adding a splash of extra broth to refresh the sauce. Thawed and reheated burger pasta tastes remarkably similar to freshly made, which is why I freeze portions proactively even if I don’t need them immediately.
Nutrition Information
Each serving (approximately one-quarter of the recipe, or 1.5 cups) contains roughly 520 calories, 28 grams of protein, 48 grams of carbohydrates, and 18 grams of fat. The protein comes primarily from the ground beef and cheddar cheese, making this a satisfying meal that keeps you full for hours. One serving provides about 25% of your daily iron needs (USDA reference), which is significant—especially important for anyone eating a plant-forward diet during other meals of the week.
The beauty of this meal prep approach is consistency: you know exactly what you’re eating all week. No mysterious takeout ingredients, no hidden sugars, no excessive sodium beyond what you control. When you cook at home, you control the quality of every component. I recommend eating this alongside a vegetable—something raw like a salad or something cooked like baked corn with cream-style corn—to round out your nutritional profile with additional fiber and micronutrients.
Expert’s Nutritional Tip: Why Dill Pickle Relish Matters More Than You Think
That dill pickle relish isn’t just a fun flavor addition—it’s serving a genuine nutritional purpose. Fermented and pickled foods contain beneficial bacteria and compounds that support digestive health. The vinegar in relish also slows gastric emptying, meaning this meal will keep you satisfied longer and your blood sugar will rise more gradually than if you ate plain burger pasta. Additionally, the tangy flavor tricks your brain into perceiving more richness and satisfaction from less cheese, which is a subtle way of controlling calories without feeling deprived. This is the kind of small-decision nutrition that works long-term because you’re not fighting against flavor.
What to Pair With Burger Pasta Recipe Throughout the Week
Serving the same pasta five times in a row will feel boring, but serving five different meals that happen to feature that same pasta is strategic and exciting. Here’s how I rotate sides to keep things fresh without additional cooking burden:
- Monday: Simple Green Salad – Mix fresh greens with a lemon vinaigrette. The acidity brightens the rich pasta, and raw vegetables provide textural contrast. Takes five minutes.
- Tuesday: Steamed Broccoli or Green Beans – Steam from frozen while reheating the pasta. This costs almost nothing and adds crucial vegetables to an otherwise meat-heavy meal.
- Wednesday: Crusty Bread and Butter – Toast thick slices and use them to soak up every drop of sauce. This transforms the meal into something almost Italian and deeply satisfying.
- Thursday: Raw Vegetable Crudités – Carrots, celery, cherry tomatoes, and bell peppers served cold alongside warm pasta. The temperature contrast makes this feel like a different meal entirely.
- Friday: Roasted Root Vegetables – If you have time, toss cubed sweet potato or regular potato with oil and roast at 425°F for 20 minutes while you reheat the pasta. Adds earthiness and substance.
Make-Ahead Guide: The Advanced Meal Prep Strategy
Once you’ve made this burger pasta once, you’ll discover opportunities to make it even more efficient. Sunday Prep Day Strategy: Dice your onions on Sunday morning while you’re making coffee, store them in an airtight container, and you can brown the beef-onion mixture anytime between Sunday afternoon and Monday morning—this extends your cooking window. The diced onions stay fresh for two days when stored properly.
Build a Pasta Rotation: Make one batch of burger pasta, then make a completely different pasta meal the following week (maybe bravo sauce or Asian noodle soup). Your palate stays engaged, and you build repetitive systems without repetitive eating.
Freeze Individual Portions Now, Thaw Later: I often make a double batch of burger pasta (doubling all ingredients) and freeze half immediately in individual portions. Two weeks later, when I don’t have time to cook, I have a homemade, nutritious meal ready to thaw and reheat. This approach is simultaneously meal-prepping and building a freezer pantry.
Common Mistakes to Avoid
Mistake 1: Not Draining Excess Beef Fat – Too much fat in the skillet makes the final dish greasy rather than sauce-coated. After browning the beef, tilt the skillet and use a spoon to remove any pooled fat into a small container. You want the dish to be rich from cheese and beef flavor, not from excess oil.
Mistake 2: Cooking the Pasta Too Long – Pasta continues to soften as it sits and cools, and it softens further when you reheat it. Cook it until just tender on day one, knowing it will be slightly softer by day three. If you cook it fully tender on day one, it’ll be mushy by mid-week.
Mistake 3: Forgetting to Leave Headspace When Freezing – Pasta and sauce expand as they freeze. If your container is completely full, the lid won’t seal properly and freezer burn will develop. Leave exactly ½-inch of space at the top.
Mistake 4: Not Labeling Your Containers – I know this seems obvious, but I’ve watched people throw away good food because they genuinely forgot when they made it. Twenty seconds of labeling prevents waste and stress. Use painter’s tape so you can remove the label easily when washing containers.
Seasonal Variations: How to Adapt This Recipe Year-Round
Spring Version: Replace ¼ cup of the beef broth with fresh lemon juice. Add fresh peas (frozen is fine) in the last two minutes of cooking. Top with fresh dill instead of green onions. This lighter variation suits spring appetites beautifully.
Summer Version: Make it as written, but serve cold with fresh tomatoes, arugula, and a drizzle of balsamic vinegar. Yes, cold pasta salad—completely different experience, same base recipe.
Fall Version: Brown the beef with the onions plus one diced carrot and one diced celery stalk. Replace the dill pickle relish with whole grain mustard. Add one teaspoon of dried sage. This becomes an almost Thanksgiving-adjacent flavor profile.
Winter Version: Increase the beef broth by one cup, creating a brothier, more stew-like consistency. Add diced mushrooms to the beef and onions. Serve over egg noodles instead of shells for extra coziness. This becomes almost a stroganoff situation and feels perfect on cold Alaska evenings.

Burger Pasta Recipe
Ingredients
Method
- Dice both yellow onions into small, even pieces—about ¼-inch cubes. This takes maybe three minutes with a sharp knife, and uniform pieces cook evenly. Pro move: chill your knife under cold water for 30 seconds first; it makes cutting through onions cleaner and reduces the tear-inducing compounds released into the air. Place the diced onions in a small bowl and set aside. While you're doing this, place your large deep skillet over medium heat with the olive oil. The oil should shimmer gently—not smoke—when you're ready to add the beef.
- Once the oil is ready, add the ground beef directly to the skillet, breaking it into small pieces as it hits the hot surface. Use a wooden spoon or spatula to continuously break it apart—don't let it sit and form large clumps. After two minutes, add the diced onions to the same skillet. This is the efficiency move: everything cooks together, and the onions release their moisture to help further brown the beef. Stir regularly for five to six minutes until the beef is completely browned (no pink remaining) and the onions are soft and translucent. If significant grease has accumulated, carefully drain it into a small container (save it for cooking vegetables later in the week).
- Sprinkle the flour over the cooked beef and onions, stirring constantly for exactly one minute. You're creating a roux—a flour and fat combination that will thicken your sauce. Watch carefully; you want the flour to toast slightly and smell nutty, but not brown or burn. This step prevents lumps later and builds deeper flavor. The flour will coat the bottom of the skillet and start to stick slightly, which is exactly right.
- Pour in the tomato sauce and all four cups of beef broth simultaneously. Stir vigorously for 30 seconds—you're dissolving the flour off the bottom of the skillet and creating a smooth, unified sauce. Some of the brown bits (called fond) stuck to the bottom are pure flavor; they'll incorporate into your sauce as you stir. If you see any lumps of flour, keep stirring until they disappear. The sauce should be smooth and slightly loose at this point.
- Add the entire pound of uncooked pasta directly to the skillet. Stir well—the liquid won't cover all the pasta, and that's completely normal. Uncooked pasta will settle and absorb the broth as it cooks, and you'll stir it halfway through to ensure even cooking. The mixture should look slightly soupy and crowded. If it looks too dry, add ½ cup more broth.
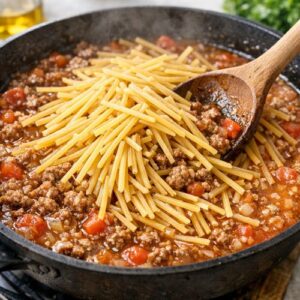
- Increase the heat to medium-high and watch the skillet carefully. You're looking for the liquid to come to a full rolling boil—this takes about three to four minutes. Once it reaches a boil, give everything a quick stir to loosen any pasta stuck to the bottom of the skillet, then place a lid on top (use a baking sheet if you don't have a skillet lid) and reduce the heat to low. This traps steam and helps the pasta cook evenly. Set a timer for 10 minutes.
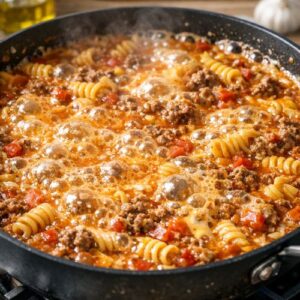
- At the seven-minute mark, lift the lid and stir gently. The pasta should be starting to soften, and the sauce should be thickening noticeably. If the pasta seems to be drying out more than you'd like, add another ¼ cup broth. Replace the lid and continue simmering. At the 10-minute mark, check the pasta for tenderness. It should be cooked through but not mushy. If it still needs time, cook for another minute or two, but check frequently. The sauce should be thick and creamy, coating the pasta rather than swimming in liquid.
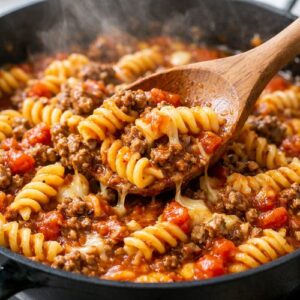
- Once the pasta is tender and the sauce has thickened to your liking, turn off the heat. Add the shredded cheddar cheese, stirring constantly until it's completely melted and incorporated. This should take 60 seconds. The residual heat will melt the cheese smoothly. Stir in the dill pickle relish—this adds tang and brightness that balances the richness of the beef and cheese. Taste and adjust seasoning with salt, pepper, and that optional garlic powder. Top with fresh-sliced green onions right before serving.
FAQs
Can I make this recipe with ground turkey or ground chicken instead of beef?
Absolutely. Ground turkey will work perfectly and reduces the fat content slightly. Ground chicken is lighter but slightly less flavorful—I recommend using ground chicken thighs rather than breast for better taste and texture. Brown it the same way, but note that poultry cooks slightly faster than beef, so check for doneness at the four-minute mark instead of six.
What if I don’t have dill pickle relish?
This ingredient is crucial for balance, so substitute thoughtfully. Two tablespoons of whole grain mustard works beautifully. Or use two tablespoons of diced dill pickles plus one tablespoon of pickle juice stirred in at the end. You could even use a tablespoon of apple cider vinegar plus a teaspoon of dried dill. The goal is tang and brightness—don’t skip this component.
How long does this actually keep in the refrigerator?
Safely? Five days maximum. Realistically, I eat the first portion immediately and consume the remaining portions over the next four days. The pasta begins to dry out slightly on day four, though it’s still perfectly safe to eat. By day five, the texture changes noticeably. If you know you won’t eat it by day three, freeze portions on day two.
Can I double this recipe, and should I adjust cooking time?
Double it absolutely—I do this constantly. You may need a larger skillet or to use a 5-quart pot instead. The cooking times remain mostly the same because you’re adding proportional amounts of liquid. However, monitor the pasta more carefully; with double the volume, it might take an extra minute or two to cook through. Stir more frequently to ensure even cooking throughout the larger batch.
What if my pasta seems too dry after cooking?
Add broth one tablespoon at a time while the skillet is still on low heat, stirring gently. The pasta will continue to absorb liquid, so the consistency will tighten as it sits. If it seems too loose, increase the heat slightly to allow some evaporation, stirring occasionally. The sauce should coat the pasta but not swim in liquid. You want creamy, not soupy.
More Meal Prep Recipes
- Crispy Smashed Potatoes – A versatile side dish that pairs beautifully with burger pasta and stores excellently for five days
- Bravo Sauce Recipe – Another sauce-based meal that freezes and reheats with the same reliability as burger pasta
- Asian Noodle Soup Recipe – A completely different noodle-based meal prep option for rotating through your weekly rotation
Here’s what I want you to understand: meal prepping isn’t about restriction or punishment. It’s about taking back control of your week. It’s about not standing in front of your refrigerator at 6 PM wondering what on earth to make, and instead opening a container of something delicious that you made with intention. This one-skillet burger pasta is your gateway to that freedom. Make it once, taste how good it is, and watch how quickly Sunday cooking becomes something you actually look forward to. You’ve got this. Happy Cooking!