Cauliflower Taco Recipe
This post contains affiliate links. As an Amazon Associate I earn from qualifying purchases.
Learning to make cauliflower tacos isn’t just about this single dish—it’s about mastering a two-part technique that transforms ordinary vegetables into restaurant-quality meals. I discovered this approach years ago while experimenting with wild Alaskan harvests and pantry staples during long winters. Once you understand how to roast vegetables until they develop deep, caramelized edges and how to build a silky sauce from roasted ingredients, you’ll unlock dozens of weeknight dinners. This technique has saved me countless times when I needed something wholesome, filling, and ready in under thirty minutes. Whether you’re cooking for your family or meal prepping for the week, these tacos teach you the foundation that makes everyday cooking feel less like a chore and more like kitchen magic.
Master the Technique Behind Cauliflower Tacos (And Never Struggle With Vegetable Dinners Again)
I’ll never forget the moment this clicked for me. I was standing in my kitchen on a gray Alaska spring afternoon, staring at a head of cauliflower and wondering why my attempts at vegetarian dinners always felt flat and uninspired. I’d tried steaming, sautéing, and blanching—all technically correct methods that left me disappointed. Then I remembered watching my grandmother roast root vegetables until their edges turned golden and nutty, concentrating their natural sweetness. That night, I roasted cauliflower alongside garlic and almonds, then blended them into something creamy and complex. My family came back for seconds. That’s when I understood: the magic isn’t in fancy ingredients or complicated techniques—it’s in understanding how heat transforms simple whole foods.
The Core Technique Explained
What you’re learning here is the roast-and-blend method—two complementary techniques that work together to create depth and texture. The first part, high-heat roasting, applies dry heat to vegetables and nuts, causing their natural sugars to caramelize through the Maillard reaction. This creates umami, browning, and concentrated flavor. The second part, smooth blending with roasted ingredients, creates an emulsified sauce where roasted garlic and almonds provide body and richness without cream or butter.
Here’s the science: when you roast cauliflower at 400°F, the moisture evaporates and the cell walls break down slightly, allowing sugars to concentrate. The outer florets develop crispy, caramelized edges while the interior stays tender. Meanwhile, garlic transforms from sharp and pungent to sweet and mellow—the sulfur compounds break down into milder, sweeter molecules. Almonds release their oils and develop a toasted flavor. When you blend these roasted ingredients with tomatoes, lime juice, and spices, you create an emulsion: the almond oils disperse throughout the sauce, creating creaminess and coating your palate with flavor.
What This Technique Unlocks
Once you master roasting and blending, you’ll be able to make dozens of recipes that seem intimidating at first glance. Here are five dishes that use this exact same two-part approach:
- Roasted Red Pepper Soup – roast peppers until charred, then blend with roasted garlic and broth for silky texture
- Charred Broccoli with Tahini Drizzle – high-heat roasting creates crispy florets, then blend tahini with roasted lemon and garlic
- Roasted Beet Hummus – roasting beets concentrates their earthiness, then blend with roasted garlic, chickpeas, and tahini
- Crispy Cauliflower Curry – same roasting method, different spice blend and sauce finish
- Roasted Carrot and Walnut Pesto – roast carrots until caramelized, blend with roasted walnuts, garlic, and herbs
The Ingredients – Chosen to Teach the Technique
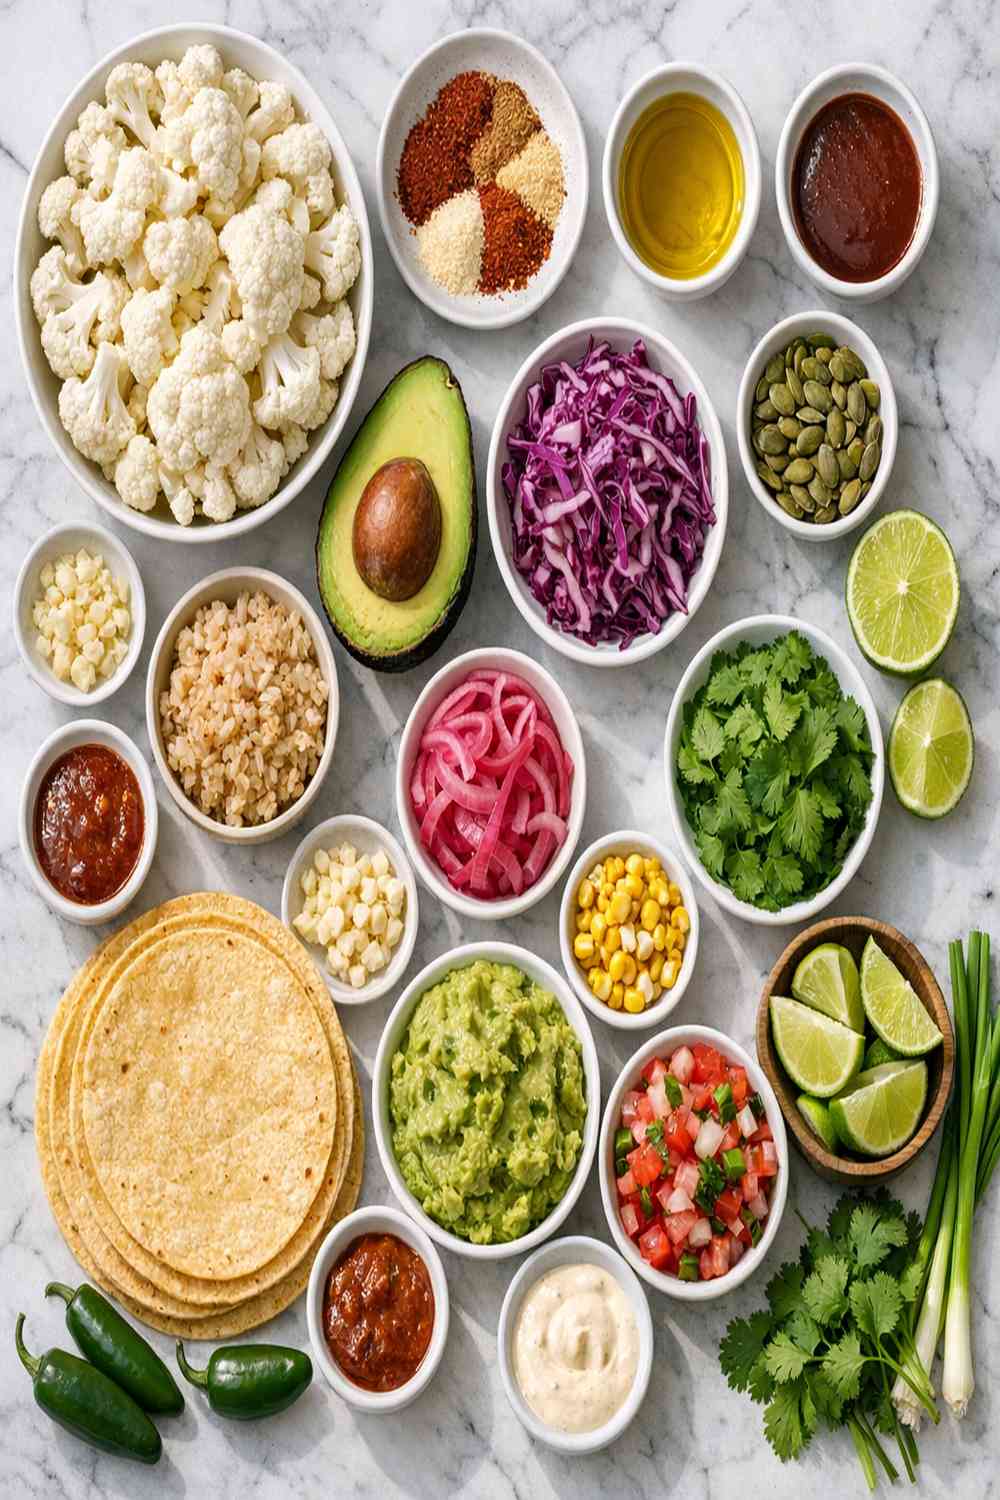
I’ve selected these ingredients specifically because each one teaches you something about how heat transforms food and how flavors build in a sauce. Nothing here is fancy—just whole ingredients that work together to demonstrate the roast-and-blend method. You’ll notice I’m using both roasted and raw garlic. This is intentional. Raw garlic in the sauce brings a sharp, bright quality that balances the deep, mellow sweetness of roasted garlic. That contrast is where professional-tasting food comes from.
For the Roasted Cauliflower
- 2 small heads cauliflower (chopped into bite-sized florets, about the size of large walnuts—smaller pieces roast more quickly and develop more caramelized surface area)
- 4 unpeeled garlic cloves (skin protects garlic and makes it easier to peel after roasting)
- 1 teaspoon sea salt (draws out moisture and seasons throughout)
- 2 teaspoons chili powder (adds depth without overwhelming heat)
- 3 teaspoons ground cumin (warm spice that complements roasted vegetables)
- 3 tablespoons avocado oil or melted coconut oil (high smoke point prevents burning at 400°F; if avoiding oil, substitute with 3 tablespoons vegetable broth instead)
- 2 teaspoons smoked paprika (reinforces the roasted, caramelized flavor)
For the Romesco Sauce
- 1 tablespoon pure maple syrup (balances heat and adds subtle sweetness)
- 2 medium garlic cloves (peeled and raw, for sharp brightness)
- ¼ cup raw almonds (provide fat and body without cream)
- ¼ teaspoon smoked paprika (ties flavors together)
- 2 tablespoons extra virgin olive oil (adds richness to the emulsion)
- ½ teaspoon ground cumin (echoes the cauliflower seasoning)
- 1 (15-ounce) can fire-roasted tomatoes (drained well to prevent watery sauce)
- 1 medium lime (juiced, about 3 tablespoons fresh juice for acidity)
- ¼ teaspoon sea salt (tastes before blending, adjust after)
- 1 to 2 whole chipotle peppers in adobo sauce (bring smoky heat and complexity)
For Assembly and Serving
- ¼ small head red cabbage (sliced thin for crisp texture and visual contrast)
- 12 to 15 small corn tortillas (warmed just before serving)
- 1 lime (cut into wedges for squeezing)
- 2 avocados (sliced just before serving to prevent browning)
- ¼ cup raw pepitas (add crunch and complete protein)
- Fresh cilantro leaves (optional, but traditional in Mexican cuisine)
The Masterclass: How to Make Cauliflower Tacos
This isn’t just a recipe—it’s a step-by-step lesson in how heat transforms whole ingredients into something greater than their parts. Pay close attention to the visual cues, sounds, and aromas at each stage. Your senses are your most reliable cooking tools.
Step 1: Prep Your Vegetables and Arrange Your Workspace
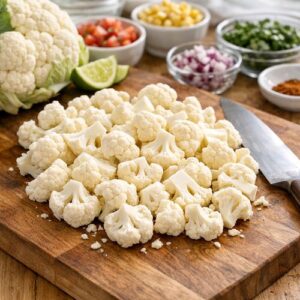
Start by chopping your cauliflower into uniform bite-sized florets—each piece should be about the size of a large walnut or marble. Uniformity matters more than size perfection because it ensures even roasting. Smaller pieces cook faster and develop more caramelized surface area, which is exactly what we want. Place these florets into a large bowl and set aside. Peel your garlic cloves—four of them will be roasted with their skin on, and two will be peeled for raw blending later. Measure out all your spices and place them near your cauliflower. This is called mise en place, and it makes the next step seamless.
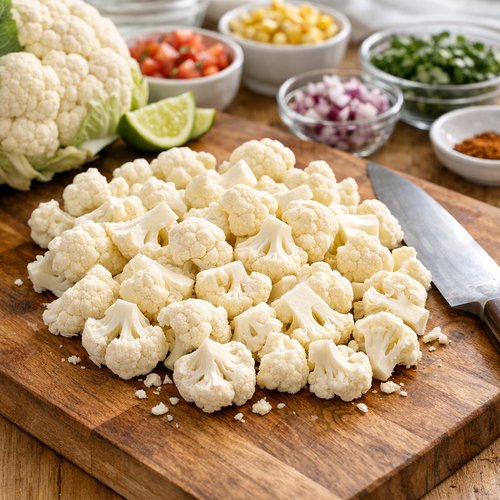
Why this matters: Prep work isn’t busywork—it’s insurance against mistakes. When everything is measured and ready, you won’t accidentally forget cumin or accidentally add too much salt because you were rushing.
Step 2: Season and Roast the Cauliflower
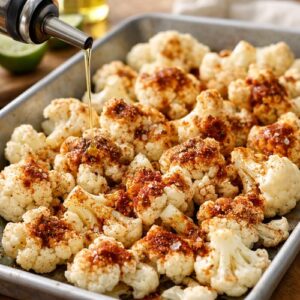
Preheat your oven to 400°F. While it heats, drizzle your cauliflower with oil, then sprinkle cumin, chili powder, smoked paprika, and salt over the top. Toss everything together with your hands or a large spoon until every floret is coated. The oil helps the spices stick and allows them to bloom during roasting. Spread the seasoned cauliflower across two large baking sheets in a single layer. This spacing is crucial—don’t crowd the pan. If pieces touch, they steam instead of roast. The hot air needs to circulate on all sides.
Place these sheets on your oven’s bottom rack and roast for 20 to 25 minutes. At the 12-minute mark, open the oven and give everything a gentle stir, rotating the pans if needed. You’re looking for edges that turn deep golden brown—almost caramelized. The color tells you caramelization is happening. If your cauliflower is pale after 20 minutes, it needs more time. The interior should be tender enough to pierce easily with a fork, but the edges should look like they’ve been kissed by fire.
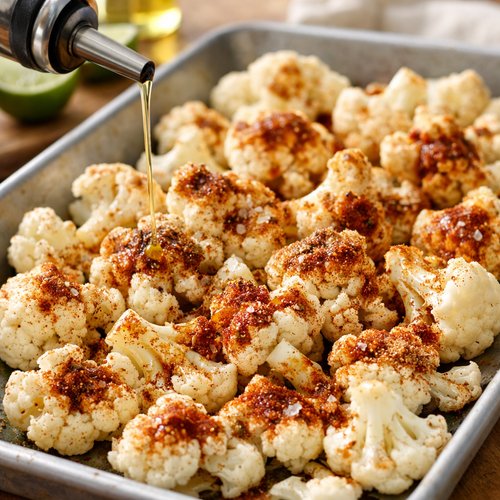
Expert’s Nutritional Tip: That caramelization isn’t just delicious—it’s nutritionally significant. When vegetables brown, their cell walls break down slightly, making their nutrients more bioavailable. Your body absorbs more vitamins and minerals from roasted cauliflower than from raw or boiled. This is why I always prioritize roasting in my practice as a dietitian.
Step 3: Roast Garlic and Almonds Simultaneously
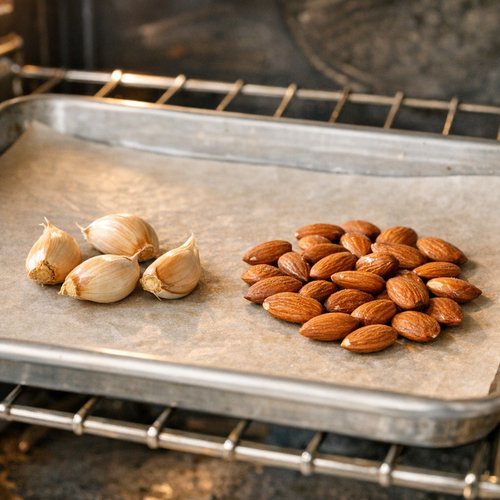
While your cauliflower roasts, place four unpeeled garlic cloves and ¼ cup raw almonds on a separate baking sheet. Put this sheet on your oven’s center rack and roast for 10 to 12 minutes. At the 8-minute mark, check your almonds—they can go from golden to burnt in seconds. If they’re already dark brown and cracking, remove them immediately. The garlic will finish cooking while you’re blending the sauce. The almonds’ oil content makes them cook faster than garlic, so this timing separation is important.
You’ll know the almonds are ready when they smell nutty and toasted, and when you cut one open, the interior is light golden. The garlic is done when the skin blackens slightly and the cloves yield to gentle pressure. Let everything cool for 2 minutes, then slip the garlic cloves out of their skin—they’ll practically fall out.
Step 4: Build Your Sauce Through Blending
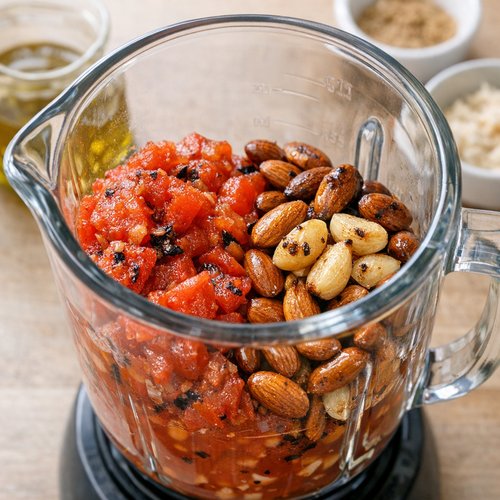
While your vegetables finish roasting, gather your blender and all sauce ingredients. Add drained fire-roasted tomatoes, roasted almonds, roasted garlic cloves (peeled), raw garlic cloves (peeled), olive oil, lime juice, cumin, smoked paprika, salt, maple syrup, and one to two whole chipotle peppers in adobo sauce to your blender in that order. The order matters slightly—heavier ingredients first, wet ingredients last—so your blender works efficiently.
Blend on high speed for 45 to 60 seconds until completely smooth and creamy. Stop and scrape down the sides with a spatula, then blend for another 20 to 30 seconds. The sauce should look like creamy tomato soup—no grainy texture, no visible almond pieces. If it seems too thick, add 2 tablespoons of water and blend again. If it’s too thin, add a few more roasted almonds.
Now comes the crucial step: taste your sauce and adjust the flavor profile intentionally. Dip a small spoon into the sauce and taste. Too acidic? Add ½ teaspoon more maple syrup. Not garlicky enough? Add a few more raw garlic slivers and blend again. Not smoky? Increase paprika or add another chipotle pepper. Not salty? Add a pinch of sea salt. Make these adjustments one at a time and retaste—it’s easier to add than to remove.
Step 5: Warm Your Tortillas
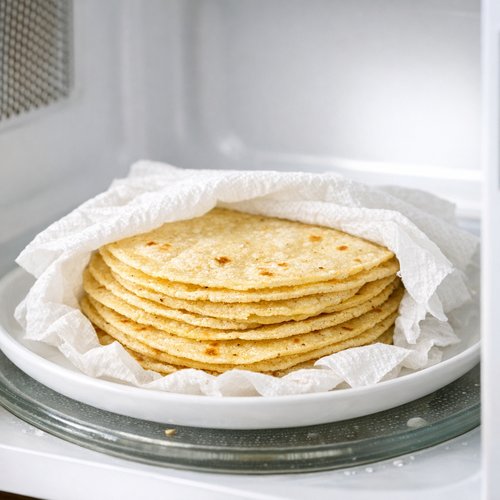
When you’re almost ready to serve, warm your corn tortillas using one of two methods: the microwave method or the oven method. For the microwave, stack your tortillas, wrap them in a damp kitchen towel, and microwave for 45 to 60 seconds until they’re warm and pliable. For the oven method (my preferred approach), place tortillas directly on your oven racks—they’re still warm at this point—for 2 to 3 minutes until they’re heated through. This second method gives tortillas a slightly charred edge that adds flavor. Tortillas that are warm are pliable and won’t tear; cold tortillas crack when you fill them.
Step 6: Assemble and Serve
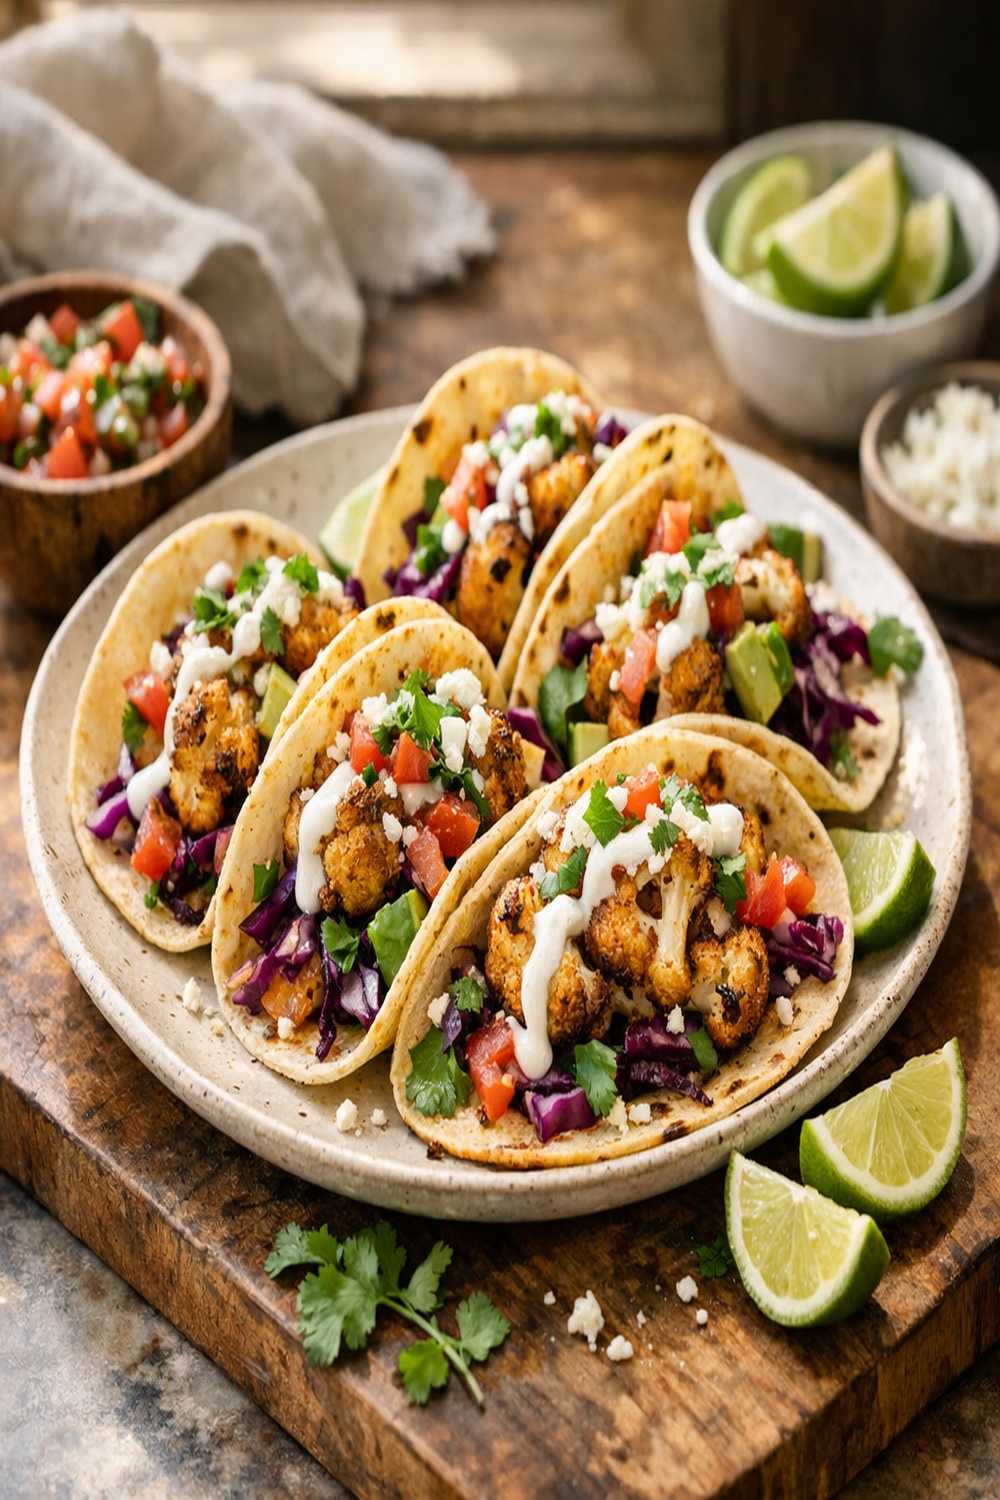
Build each taco by spreading 1 to 2 tablespoons of romesco sauce on a warm tortilla, then adding a generous handful of roasted cauliflower. This ratio—more sauce than you think you need, then plenty of cauliflower—is the balance that makes these tacos sing. Top with thin slices of red cabbage for crunch, a sprinkle of pepitas for protein and nutrition, fresh avocado slices, and cilantro if you’re using it. Finish with a squeeze of lime juice just before eating. The acid brightens everything and brings the flavors into focus.
How to Know You’ve Mastered the Technique
True mastery isn’t about following instructions perfectly—it’s about recognizing the visual, aromatic, and tactile cues that tell you everything is working. Here’s what success looks and feels like:
- Cauliflower edges turn deep golden brown with slight charring – this is caramelization happening in real time. If your cauliflower stays pale yellow after 25 minutes, the oven temperature might be off, or you’re crowding the pan. Next time, increase temperature to 425°F or space pieces further apart.
- Romesco sauce coats the back of a spoon with a smooth, creamy layer – when you dip a spoon in and run your finger across the back, the sauce should cling without dripping. This means the almonds have emulsified properly.
- Aroma: the kitchen smells simultaneously nutty, smoky, and tangy – if you smell only tomato or only cumin, your sauce needs more balance. Trust your nose.
- Taste: each bite has heat, then sweetness, then acid, then smoke in sequence – flavors shouldn’t all hit at once. They should unfold as you chew and swallow.
Common Technique Mistakes and How to Fix Them
- Crowding the baking sheet causes steaming instead of roasting – if your cauliflower comes out pale and mushy instead of golden and crispy, you packed too many pieces on one pan. The steam from adjacent pieces prevents browning. Solution: use three baking sheets instead of two, or roast in batches.
- Over-roasting almonds creates bitter sauce – almonds toast quickly and turn bitter easily. If your sauce tastes acrid or burnt, you left the almonds in too long. Solution: roast for exactly 10 minutes, check at 8, and remove immediately when golden. Once you’ve made this mistake once, your timing instincts will adjust permanently.
- Not enough seasoning in the cauliflower means bland tacos – I see this often with people who reduce salt thinking it’s healthier. The truth is, salt makes vegetables taste like the best version of themselves. If your cauliflower tastes flat, increase salt by ¼ teaspoon and try again. The difference will shock you.
- Raw garlic sauce tastes too sharp and pungent – if your romesco sauce makes you pucker or tastes overwhelmingly garlicky, you used too much raw garlic. Remember: you’re using both raw and roasted garlic. The roasted garlic is already sweet and mellow, so the raw garlic’s job is just to add brightness. Stick to two medium cloves max.
Practice Variations to Build Your Skill
Beginner Variation: Simple Roasted Cauliflower Tacos with Store-Bought Sauce – Master the roasting technique first by making just the cauliflower. Season with cumin, chili powder, paprika, and salt, then roast until golden. Serve on warm tortillas with store-bought salsa and avocado. This removes the blending component and lets you focus entirely on roasting temperature, timing, and pan arrangement. Once you can consistently produce golden, caramelized cauliflower, you’re ready for the full recipe.
Intermediate Variation: Cauliflower Tacos with Simplified Almond Sauce – Make the full romesco sauce but reduce the components. Use only roasted garlic (no raw garlic), reduce chipotle peppers to just one, and simplify the spice list to cumin and salt only. This teaches you blending and emulsification without the flavor complexity. You’ll understand the technique while building confidence.
Advanced Variation: Cauliflower Tacos with Charred Lime Romesco and Pickled Red Onions – Char your lime directly over a gas flame before juicing to add caramelized depth to the sauce. Make quick-pickled red onions by heating lime juice with sugar and salt, then pour over thinly sliced onions. Roast your cauliflower at 425°F for a more aggressive char. This version demands precision timing and flavor-pairing intuition, but it’s the version I serve when I want to impress.
Make-Ahead Guide: Meal Prep Like a Registered Dietitian
This recipe is exceptionally well-suited to meal prep because both components—roasted cauliflower and romesco sauce—store beautifully. Here’s my professional approach:
The Sunday Prep Method (feeds four for lunch through Wednesday): Make a double batch of both cauliflower and sauce on Sunday. Roast two extra heads of cauliflower using the same method, and double the sauce ingredients. Cool the cauliflower completely, then divide between four glass containers, storing without sauce. Keep the romesco sauce in a separate airtight container. Store cauliflower for up to three days in the refrigerator. Pair with fresh tortillas, avocado, and cabbage at lunchtime. The sauce keeps refrigerated for seven days, so you actually have a full week of taco-building potential.
Storage Temperature Hack from My Alaska Kitchen: In winter, I often store prepared cauliflower in an unheated corner of my pantry if the temperature drops below 50°F. This preserves it longer than refrigeration and saves precious fridge space. In summer, refrigerate immediately.
Freezing Strategy for Later Months: You can freeze romesco sauce in an ice-cube tray, then transfer frozen cubes to a freezer bag. Each cube thaws in minutes and seasons 2 to 3 bowls of grain or roasted vegetables. Freeze roasted cauliflower in a single layer on a baking sheet, then transfer to a freezer bag. Reheat at 350°F for 8 to 10 minutes. It won’t have the crispy edges of freshly roasted cauliflower, but it’s perfect for grain bowls or soups.
Can I Store Cauliflower Taco Components?
Yes, and both components store well when handled correctly. Roasted cauliflower keeps refrigerated for up to 3 days in an airtight container. Reheat at 350°F for 8 to 10 minutes until warm. Don’t microwave—the texture suffers. Romesco sauce keeps refrigerated for up to 1 week in a sealed glass container, and freezes for up to 1 month. To freeze, divide into ice-cube trays, freeze solid overnight, then transfer cubes to a labeled freezer bag. Each cube is about 2 tablespoons. Thaw in the refrigerator overnight or gently warm in a small saucepan.
Pro tip: Don’t store cauliflower and sauce together. The moisture from the sauce will soften the cauliflower’s crispy edges. Assemble just before eating for maximum texture contrast.
Assembled taco storage: These are best eaten fresh. If you’ve assembled extras, wrap them in foil and refrigerate for up to 2 hours. They won’t hold their texture beyond that point because the warm cauliflower will soften the tortillas.
Nutrition Information
Based on one serving (2 tacos with sauce, cauliflower, and basic toppings), using USDA FoodData Central nutritional standards:
Calories: 185 | Protein: 6g | Carbohydrates: 24g | Fiber: 6g | Fat: 8g | Saturated Fat: 1g | Sodium: 380mg | Iron: 2.1mg (12% DV)
These tacos are intentionally high in fiber and low in calories, making them an excellent choice for anyone prioritizing plant-based protein and satiety. The fiber content—nearly 6 grams per serving—supports digestive health and stable blood sugar, which was my primary focus when developing this recipe. The roasting method concentrates micronutrients like vitamin C and vitamin K, which are heat-stable in cauliflower.
The almonds provide heart-healthy monounsaturated fats and vitamin E, an antioxidant that Alaskans especially benefit from during low-light winter months. The lime juice provides additional vitamin C for immune support and iron absorption from the plant-based ingredients.
What to Serve With Cauliflower Tacos?
These tacos stand wonderfully on their own, but they become part of a complete meal when paired thoughtfully. I think of cauliflower tacos as the protein-and-vegetable component of a meal, so I typically serve them alongside something starchy and something with healthy fat.
- Cilantro Lime Cauliflower Rice – serves as a lighter grain base that echoes the taco flavors. The cauliflower rice allows you to eat more volume while staying lighter, perfect for people watching portions.
- Black Beans or Pinto Beans – adds complementary plant-based protein and fiber. Season simply with cumin and garlic to match the taco seasoning.
- Charred Street Corn Salad – the sweetness of corn contrasts beautifully with the smoky, savory tacos. A simple easy tomato salad works similarly well and celebrates seasonal produce.
- Roasted Sweet Potatoes with Chili-Lime Seasoning – the natural sweetness balances the heat and smoke. Sweet potatoes also provide beta-carotene for immune support.
- Quick Quesadillas – for heartier appetites, these quick quesadillas made with beans and cheese create a complete Tex-Mex spread when served alongside tacos.
- Lime-Marinated Cucumber and Jicama Slaw – a cooling, crunchy vegetable slaw cuts through the richness and rests the palate between bites.
Seasonal Variations: How to Adapt This Recipe Year-Round
Spring Variation: Replace cauliflower with young broccoli florets, which are more tender and cook slightly faster. Substitute fresh spring garlic (still soft in May and June) for dried garlic. Add fresh herbs like chives or tarragon to the romesco sauce for a brighter taste.
Summer Variation: Use charred zucchini and patty pan squash instead of cauliflower—their higher water content requires slightly shorter roasting (15 to 18 minutes). Make the romesco sauce with fresh tomatoes instead of canned. Increase the lime juice slightly since fresh tomatoes are less acidic than fire-roasted canned tomatoes.
Fall Variation: Root vegetables shine here. Replace cauliflower with cubed carrots, parsnips, or beets (beets add shocking color and earthiness). Extend roasting time to 28 to 30 minutes since these vegetables are denser. Add ½ teaspoon cinnamon to the romesco sauce to echo fall spices.
Winter Variation: In Alaska, winter is prime storage vegetable season. Use crispy roasted Brussels sprouts halves instead of cauliflower. Brush halves with oil, season with the same spices, and roast cut-side-down for caramelization. The romesco sauce recipe stays identical, which is why mastering it is so valuable.

Cauliflower Taco Recipe
Ingredients
Method
- Start by chopping your cauliflower into uniform bite-sized florets—each piece should be about the size of a large walnut or marble. Uniformity matters more than size perfection because it ensures even roasting. Smaller pieces cook faster and develop more caramelized surface area, which is exactly what we want. Place these florets into a large bowl and set aside. Peel your garlic cloves—four of them will be roasted with their skin on, and two will be peeled for raw blending later. Measure out all your spices and place them near your cauliflower. This is called mise en place, and it makes the next step seamless. Why this matters: Prep work isn't busywork—it's insurance against mistakes. When everything is measured and ready, you won't accidentally forget cumin or accidentally add too much salt because you were rushing.
- Preheat your oven to 400°F. While it heats, drizzle your cauliflower with oil, then sprinkle cumin, chili powder, smoked paprika, and salt over the top. Toss everything together with your hands or a large spoon until every floret is coated. The oil helps the spices stick and allows them to bloom during roasting. Spread the seasoned cauliflower across two large baking sheets in a single layer. This spacing is crucial—don't crowd the pan. If pieces touch, they steam instead of roast. The hot air needs to circulate on all sides. Place these sheets on your oven's bottom rack and roast for 20 to 25 minutes. At the 12-minute mark, open the oven and give everything a gentle stir, rotating the pans if needed. You're looking for edges that turn deep golden brown—almost caramelized. The color tells you caramelization is happening. If your cauliflower is pale after 20 minutes, it needs more time. The interior should be tender enough to pierce easily with a fork, but the edges should look like they've been kissed by fire. Expert's Nutritional Tip: That caramelization isn't just delicious—it's nutritionally significant. When vegetables brown, their cell walls break down slightly, making their nutrients more bioavailable. Your body absorbs more vitamins and minerals from roasted cauliflower than from raw or boiled. This is why I always prioritize roasting in my practice as a dietitian.
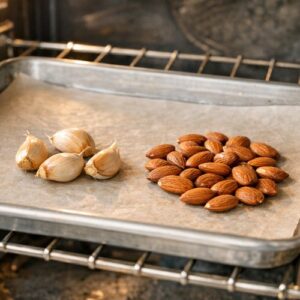
- While your cauliflower roasts, place four unpeeled garlic cloves and ¼ cup raw almonds on a separate baking sheet. Put this sheet on your oven's center rack and roast for 10 to 12 minutes. At the 8-minute mark, check your almonds—they can go from golden to burnt in seconds. If they're already dark brown and cracking, remove them immediately. The garlic will finish cooking while you're blending the sauce. The almonds' oil content makes them cook faster than garlic, so this timing separation is important. You'll know the almonds are ready when they smell nutty and toasted, and when you cut one open, the interior is light golden. The garlic is done when the skin blackens slightly and the cloves yield to gentle pressure. Let everything cool for 2 minutes, then slip the garlic cloves out of their skin—they'll practically fall out.
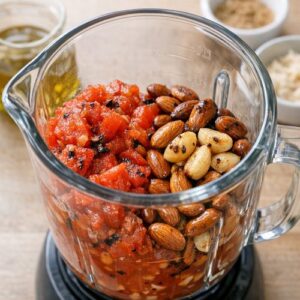
- While your vegetables finish roasting, gather your blender and all sauce ingredients. Add drained fire-roasted tomatoes, roasted almonds, roasted garlic cloves (peeled), raw garlic cloves (peeled), olive oil, lime juice, cumin, smoked paprika, salt, maple syrup, and one to two whole chipotle peppers in adobo sauce to your blender in that order. The order matters slightly—heavier ingredients first, wet ingredients last—so your blender works efficiently. Blend on high speed for 45 to 60 seconds until completely smooth and creamy. Stop and scrape down the sides with a spatula, then blend for another 20 to 30 seconds. The sauce should look like creamy tomato soup—no grainy texture, no visible almond pieces. If it seems too thick, add 2 tablespoons of water and blend again. If it's too thin, add a few more roasted almonds. Now comes the crucial step: taste your sauce and adjust the flavor profile intentionally. Dip a small spoon into the sauce and taste. Too acidic? Add ½ teaspoon more maple syrup. Not garlicky enough? Add a few more raw garlic slivers and blend again. Not smoky? Increase paprika or add another chipotle pepper. Not salty? Add a pinch of sea salt. Make these adjustments one at a time and retaste—it's easier to add than to remove.
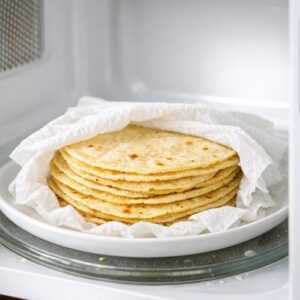
- When you're almost ready to serve, warm your corn tortillas using one of two methods: the microwave method or the oven method. For the microwave, stack your tortillas, wrap them in a damp kitchen towel, and microwave for 45 to 60 seconds until they're warm and pliable. For the oven method (my preferred approach), place tortillas directly on your oven racks—they're still warm at this point—for 2 to 3 minutes until they're heated through. This second method gives tortillas a slightly charred edge that adds flavor. Tortillas that are warm are pliable and won't tear; cold tortillas crack when you fill them.
- Build each taco by spreading 1 to 2 tablespoons of romesco sauce on a warm tortilla, then adding a generous handful of roasted cauliflower. This ratio—more sauce than you think you need, then plenty of cauliflower—is the balance that makes these tacos sing. Top with thin slices of red cabbage for crunch, a sprinkle of pepitas for protein and nutrition, fresh avocado slices, and cilantro if you're using it. Finish with a squeeze of lime juice just before eating. The acid brightens everything and brings the flavors into focus.
Notes
FAQs
Can I Make These Tacos Without Oil?
Yes, though the texture will be different. Substitute oil with vegetable broth or water for roasting the cauliflower—use about 2 tablespoons and brush it on rather than drizzle it. The cauliflower will roast more slowly and won’t develop as crispy edges because water doesn’t transfer heat as effectively as oil. For the romesco sauce, omit oil and add 2 to 3 tablespoons more broth instead. The sauce will be less creamy but still delicious. I often make this version for clients avoiding added fats for health reasons.
What if My Oven Runs Hot or Cold?
Oven temperature variance is incredibly common. If your oven runs hot (food browns too quickly), reduce temperature to 375°F and add 5 minutes to cooking time. If your oven runs cool (food takes longer to brown), increase temperature to 425°F and check at 18 minutes instead of 20. The visual cue—golden brown, caramelized edges—matters more than the timer. If your cauliflower looks pale at 25 minutes, give it another 5 minutes regardless of the recipe.
Can I Use Frozen Cauliflower?
I don’t recommend it for this recipe. Frozen cauliflower releases significant water during roasting, which prevents proper caramelization and produces watery, steamed results instead of crispy, golden florets. The technique requires the dry-heat environment that fresh cauliflower provides. That said, if frozen is your only option, thaw it completely, pat it dry very thoroughly with a kitchen towel, and use it immediately. You may need to reduce roasting time by 5 minutes.
Can I Make This Recipe Without a High-Speed Blender?
A high-speed blender is ideal, but not essential. If you have a regular blender, blend the sauce ingredients in batches—tomatoes and spices first, then transfer to a bowl and blend almonds and garlic separately until they’re finely minced, then combine everything and mix thoroughly by hand. It’s more work and the texture won’t be quite as creamy, but it’s absolutely doable. A food processor works too; pulse until everything is combined, then process for 60 seconds.
What’s the Difference Between Smoked Paprika and Regular Paprika?
Smoked paprika is dried peppers that have been smoked before grinding, adding a campfire-like, complex flavor. Regular paprika is simply dried and ground peppers with no smoke. In this recipe, smoked paprika echoes the caramelization happening in the oven and reinforces the roasted flavor profile. If you only have regular paprika, use it, but add ¼ teaspoon of liquid smoke to compensate. The smoke component matters here because it’s part of the flavor story you’re building.
How Do I Know if My Cauliflower Is Properly Caramelized?
Look for edges that are a deep golden brown—almost tan, with slight charring on the very tips. This is caramelization. If your cauliflower is pale yellow or light golden, it needs more time. If it’s dark brown or black, it’s past the point. The interior should yield to a fork without resistance, indicating tenderness. The best test: taste a single floret. It should taste sweet and nutty, with no bitter or burnt notes. Once you’ve made this one successfully, your eyes will calibrate for the right color permanently.
More Recipes Using This Technique
- Kale Chips – uses high-heat roasting to create crispy, caramelized leaves from delicate greens
- Carne Asada – demonstrates how deep caramelization builds complex, layered flavors in proteins
- Mujaddara – combines roasted vegetables with blended sauce in a similar format
Expert’s Nutritional Tip: Why Roasting Matters for Absorption
I want to circle back to something I mentioned earlier because it’s clinically significant. When you roast vegetables instead of eating them raw, you’re not just changing flavor—you’re changing nutrition. Heat breaks down cell walls, making vitamins and minerals more bioavailable. This is especially true for carotenoids (orange, red, and yellow pigments) and fat-soluble vitamins like vitamin K in cauliflower.
Additionally, roasting creates compounds called Maillard reaction products, which have antioxidant and anti-inflammatory properties. This is why roasted vegetables are anti-inflammatory while boiled vegetables—especially over-boiled—can actually leach nutrients into cooking water that you throw away. As a dietitian, I always choose roasting methods when possible because they preserve